

Display Tables for Greenhouse
I am a plant hoarder and have more seeds than I know what to do with. I have already outgrown my 6 x 8 greenhouse. So I wanted to have some tables outside the greenhouse to move plants and seedlings to as the weather continues to get warmer. I also would love to start selling plants and seeds, so that means more space will be needed. I debated for a while on what style of tables to do. I wanted something attractive since we’d see them from the house. I thought about just buying greenhouse display tables online, but they are so expensive! I finally decided to build them out of 2×4’s and 1×6’s with the help of my dad.
I will share with you the plans I used to make one of the tables. Overall measurements are 4′ 3″ x 8′ x 24.75″ tall. One table costs me $69.25 before tax, including purchasing a 1 lb box of the deck screws and 1 box of nails. The lumber alone was just $56.10. That’s a lot better than paying $120 for something a little smaller than this. I didn’t have to buy screws or nails, so I only had to pay $107 for the lumber for two tables. More than double the space for cheaper than all the tables I found online! And they’re easy to build! The hardest part is purchasing & loading the lumber and leveling the dang thing. I hate leveling stuff…
Here is what you’ll need for one table:
- 1 lb box of deck screws, 2½” long $8.68
- 6 @ 2 x 4 x 8 treated boards $32.22
- 6 @ 1 x 6 x 8 treated boards $23.88
- 1 lb box of hot-dipped galvanized nails, 2″ long $4.47
The cut list is super easy too. I made them the dimensions they are so I would have no scrap wood left over, if building 2 of them.
- 2 of the 2x4x8 boards do not need to be cut; they will be the long sides of the frame (diagram below).
- 2 of the 2x4x8 boards need to be cut in half to give you the shorter sides and middle support pieces (around 48″).
- With the remaining 2 boards that are 2x4x8, cut out 6 pieces that are 24″ long for the legs.
If you are cutting 4 legs out of one board, the last leg will be about 1/4″ – 3/8″ shorter because of the space you lose when you cut with the saw (diagram below). This was not an issue for me and can easily be compensated for. Alternatively, if you are just building one table, you can cut 3 pieces that are 24″ long out of each board, and they will all be the same length. I opted to do it the way I did so I wouldn’t have to buy more 2×4’s for the legs because 2 of these 2×4 boards yielded me 12 legs, which is exactly how many I needed for 2 tables.
- You do not need to cut the 1x6x8 boards.
That’s it! Below is the diagram for making the table frame.
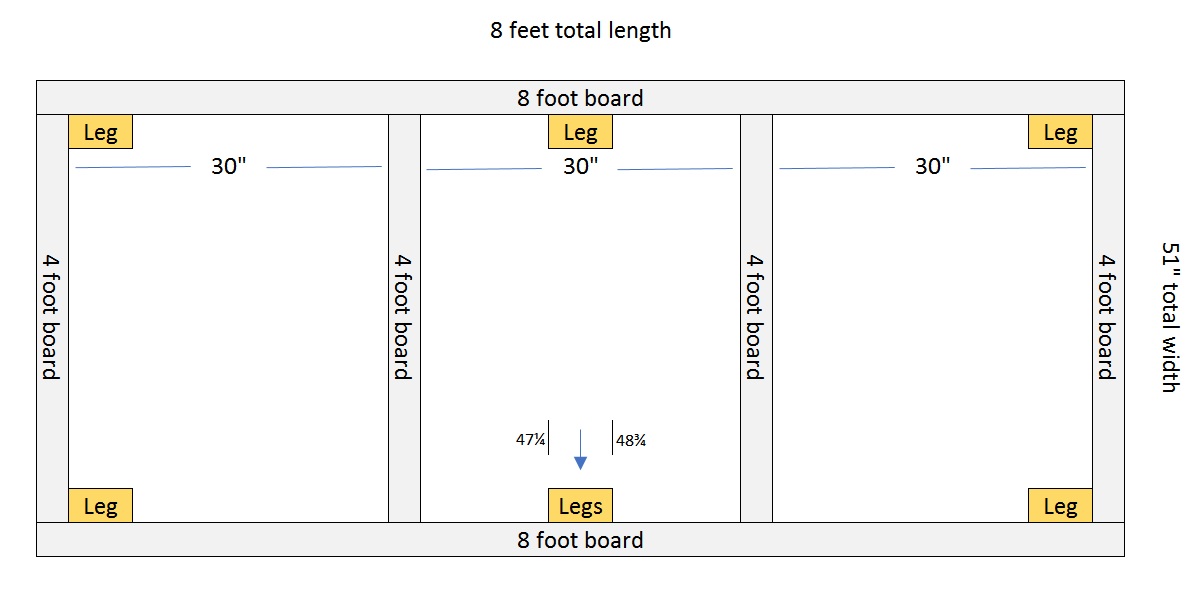
Here is the cut diagram for the 2×4 for the legs I mentioned above. I used one 8-foot board to get 4 legs. My “leftover” leg piece at the end was about 1/8 to 1/4″ short rather than 3/8″ short.
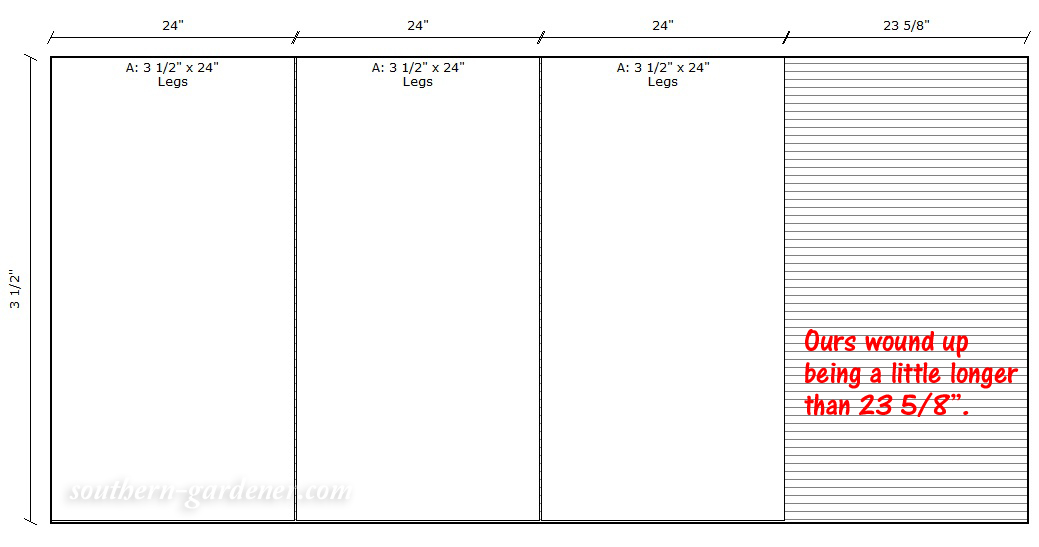
If you wanted the legs perfectly even, you could cut each leg at 23 7/8″, assuming your saw blade is 1/8″ thick. Or, you can cut them like above, and when you go to attach the slightly shorter leg to the frame, adjust it 3/8″ down (or whatever the difference is to the 2-foot mark) so all the legs sit evenly. I didn’t worry about doing this since I was leveling them in dirt and knew one side of that area was sitting higher than the other side anyway. I just made sure the shorter pieces were on the side that was sitting the highest.
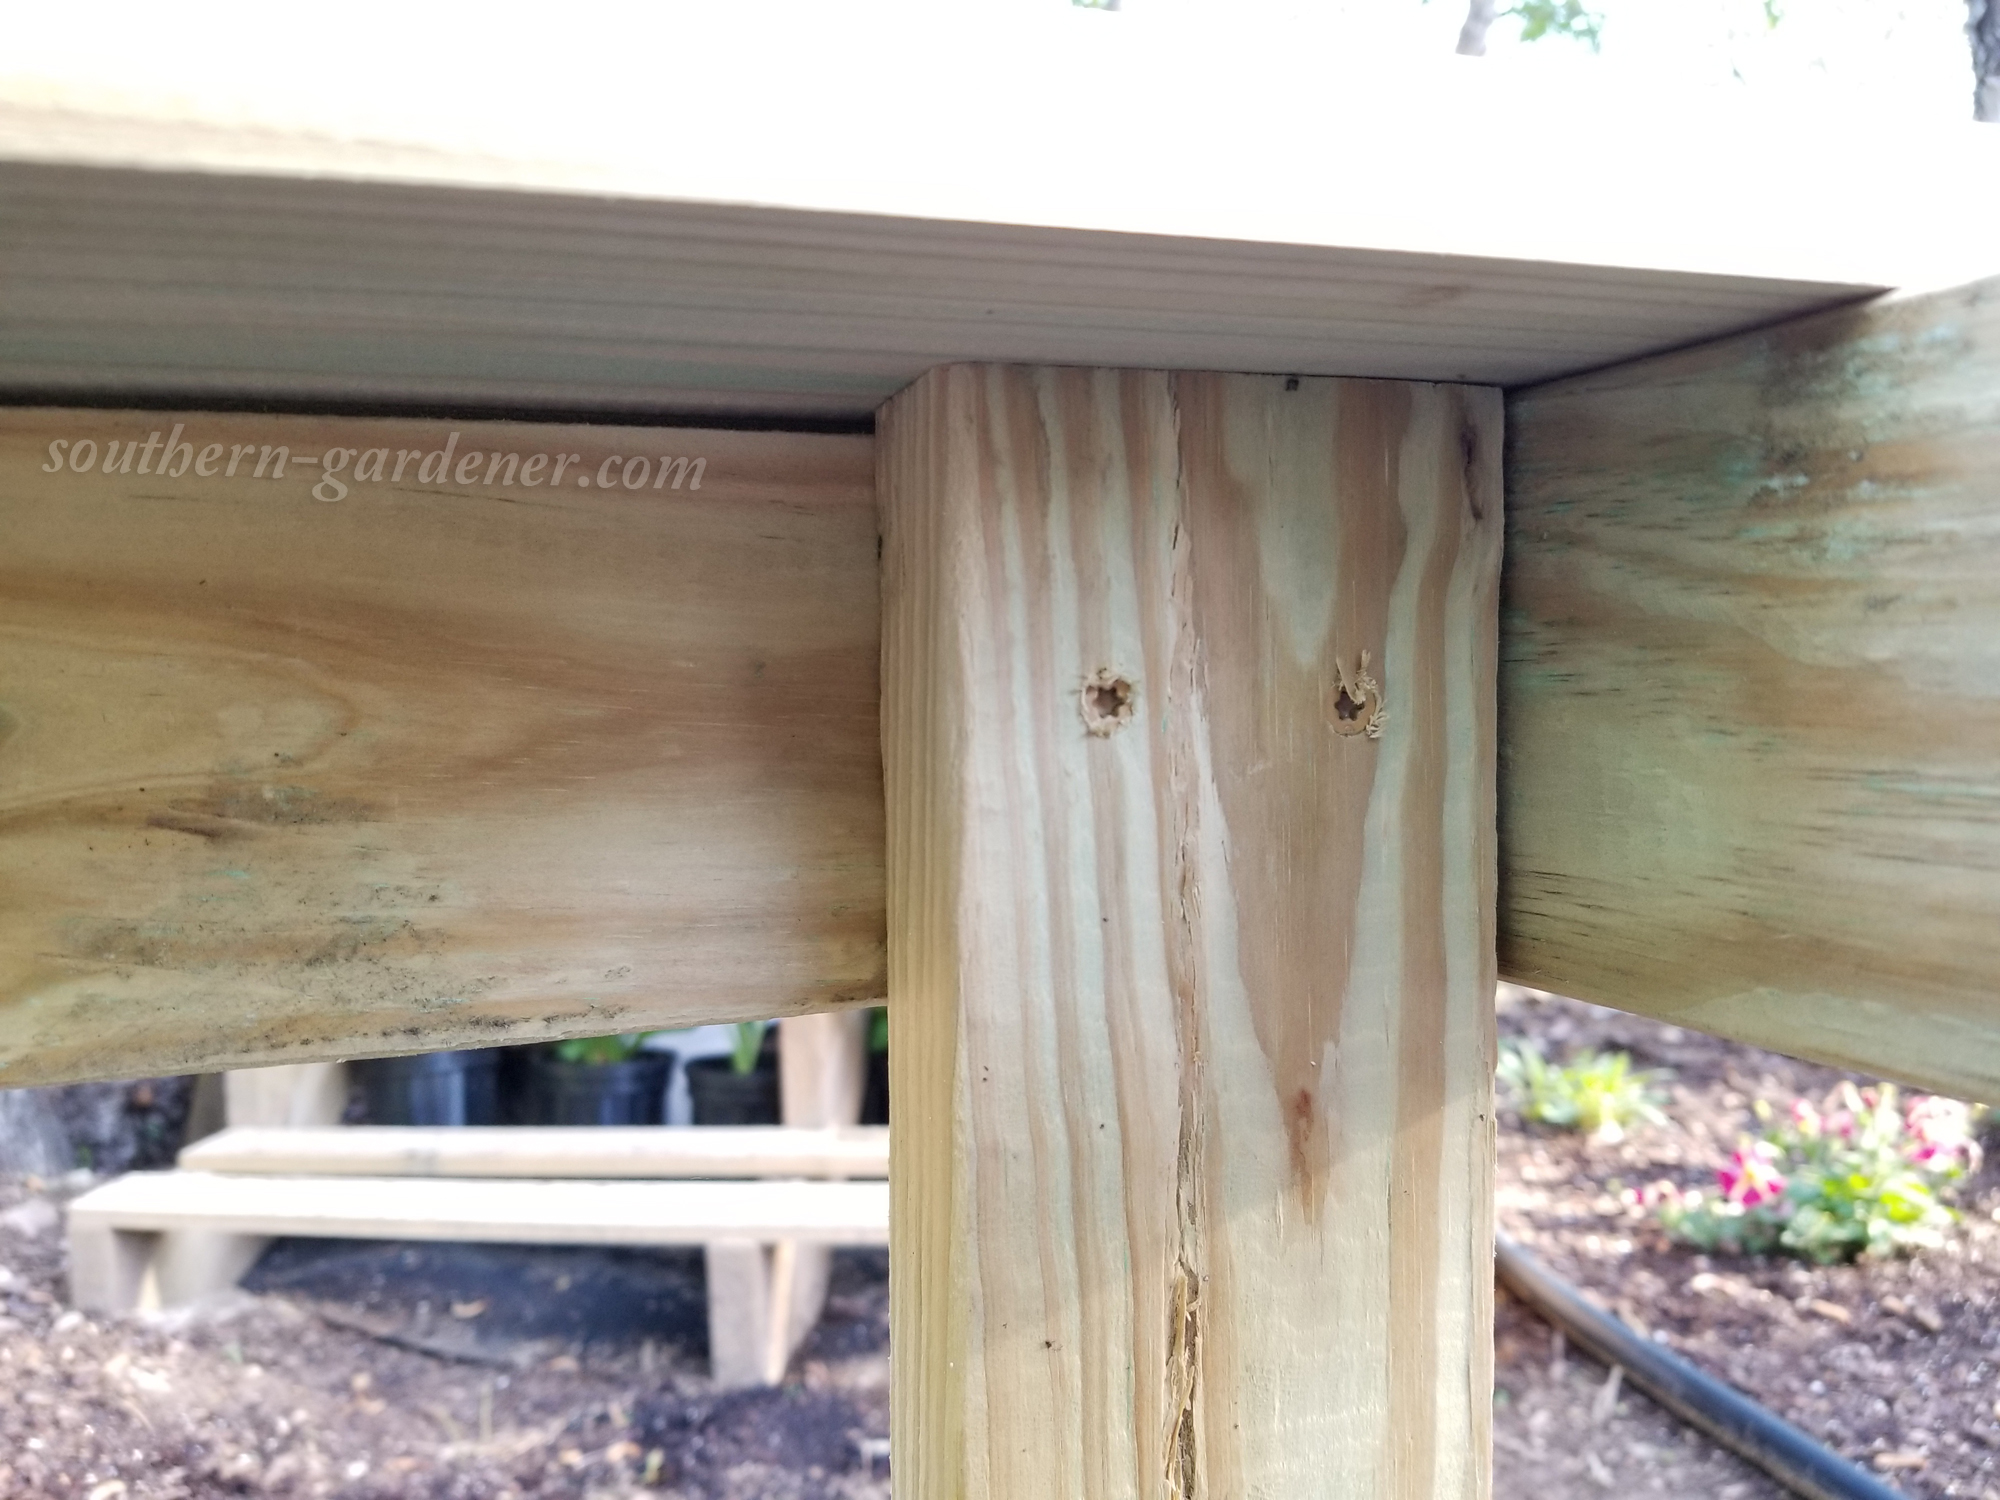
We used 3″ screws (it’s what I had on-hand) to attach the main frame together, using 2 at each connection point. The 2 1/2″ screws will do just fine for this part as well.
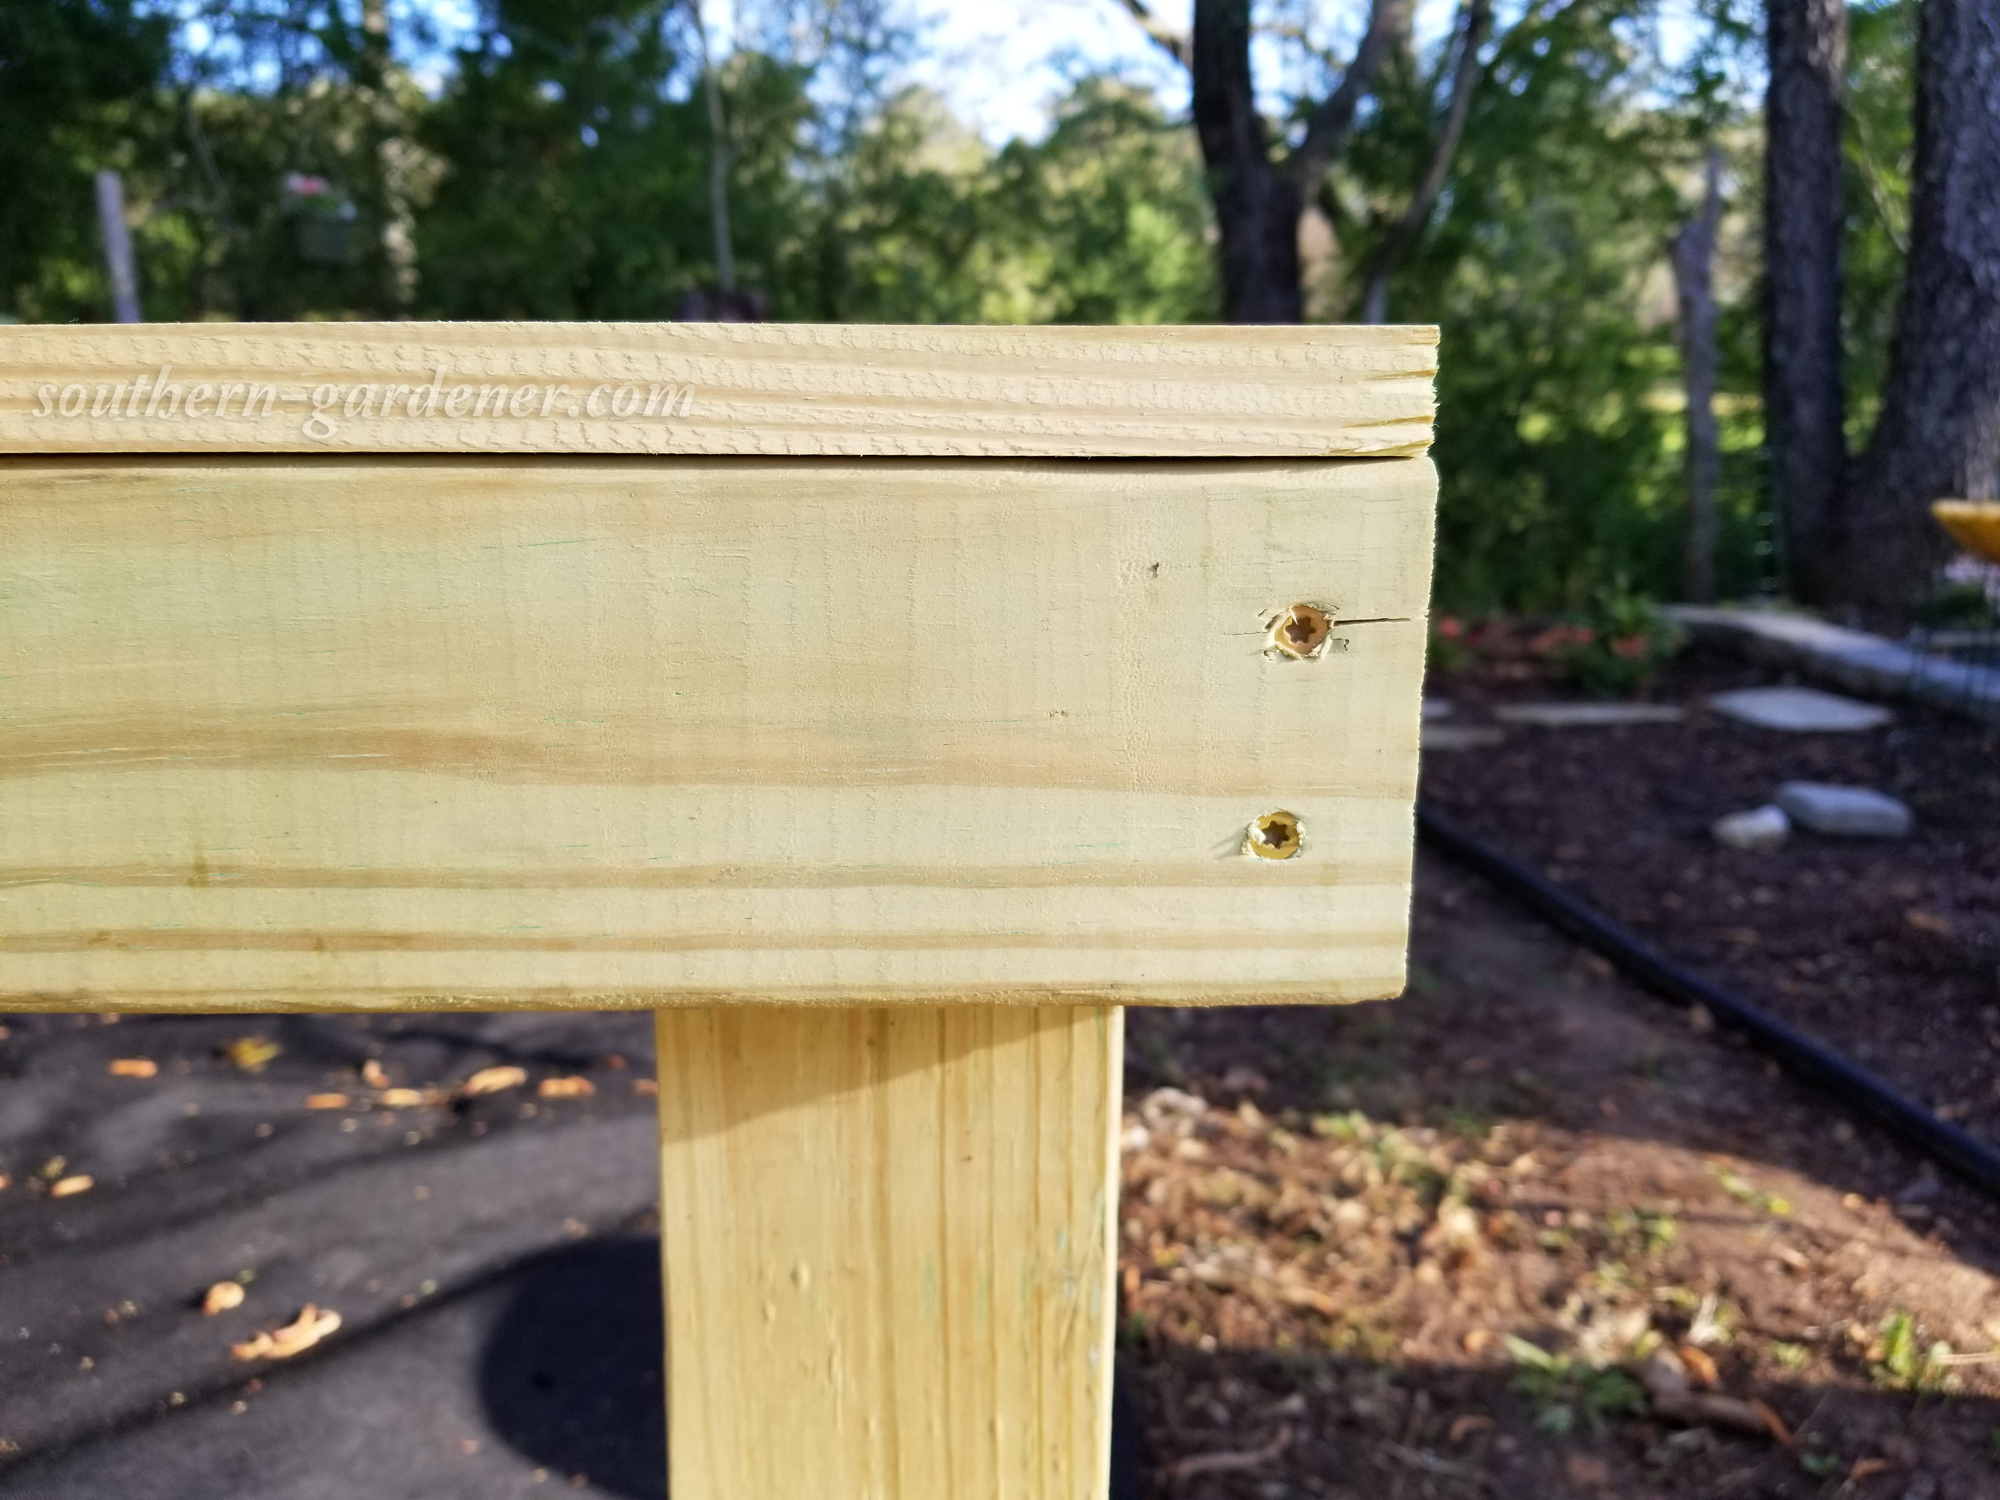
Then we used 2½” screws to attach the legs, screwing them in from the backside so those wouldn’t show. Don’t use 3″ screws for this part because they might go through the leg and frame piece just a little.
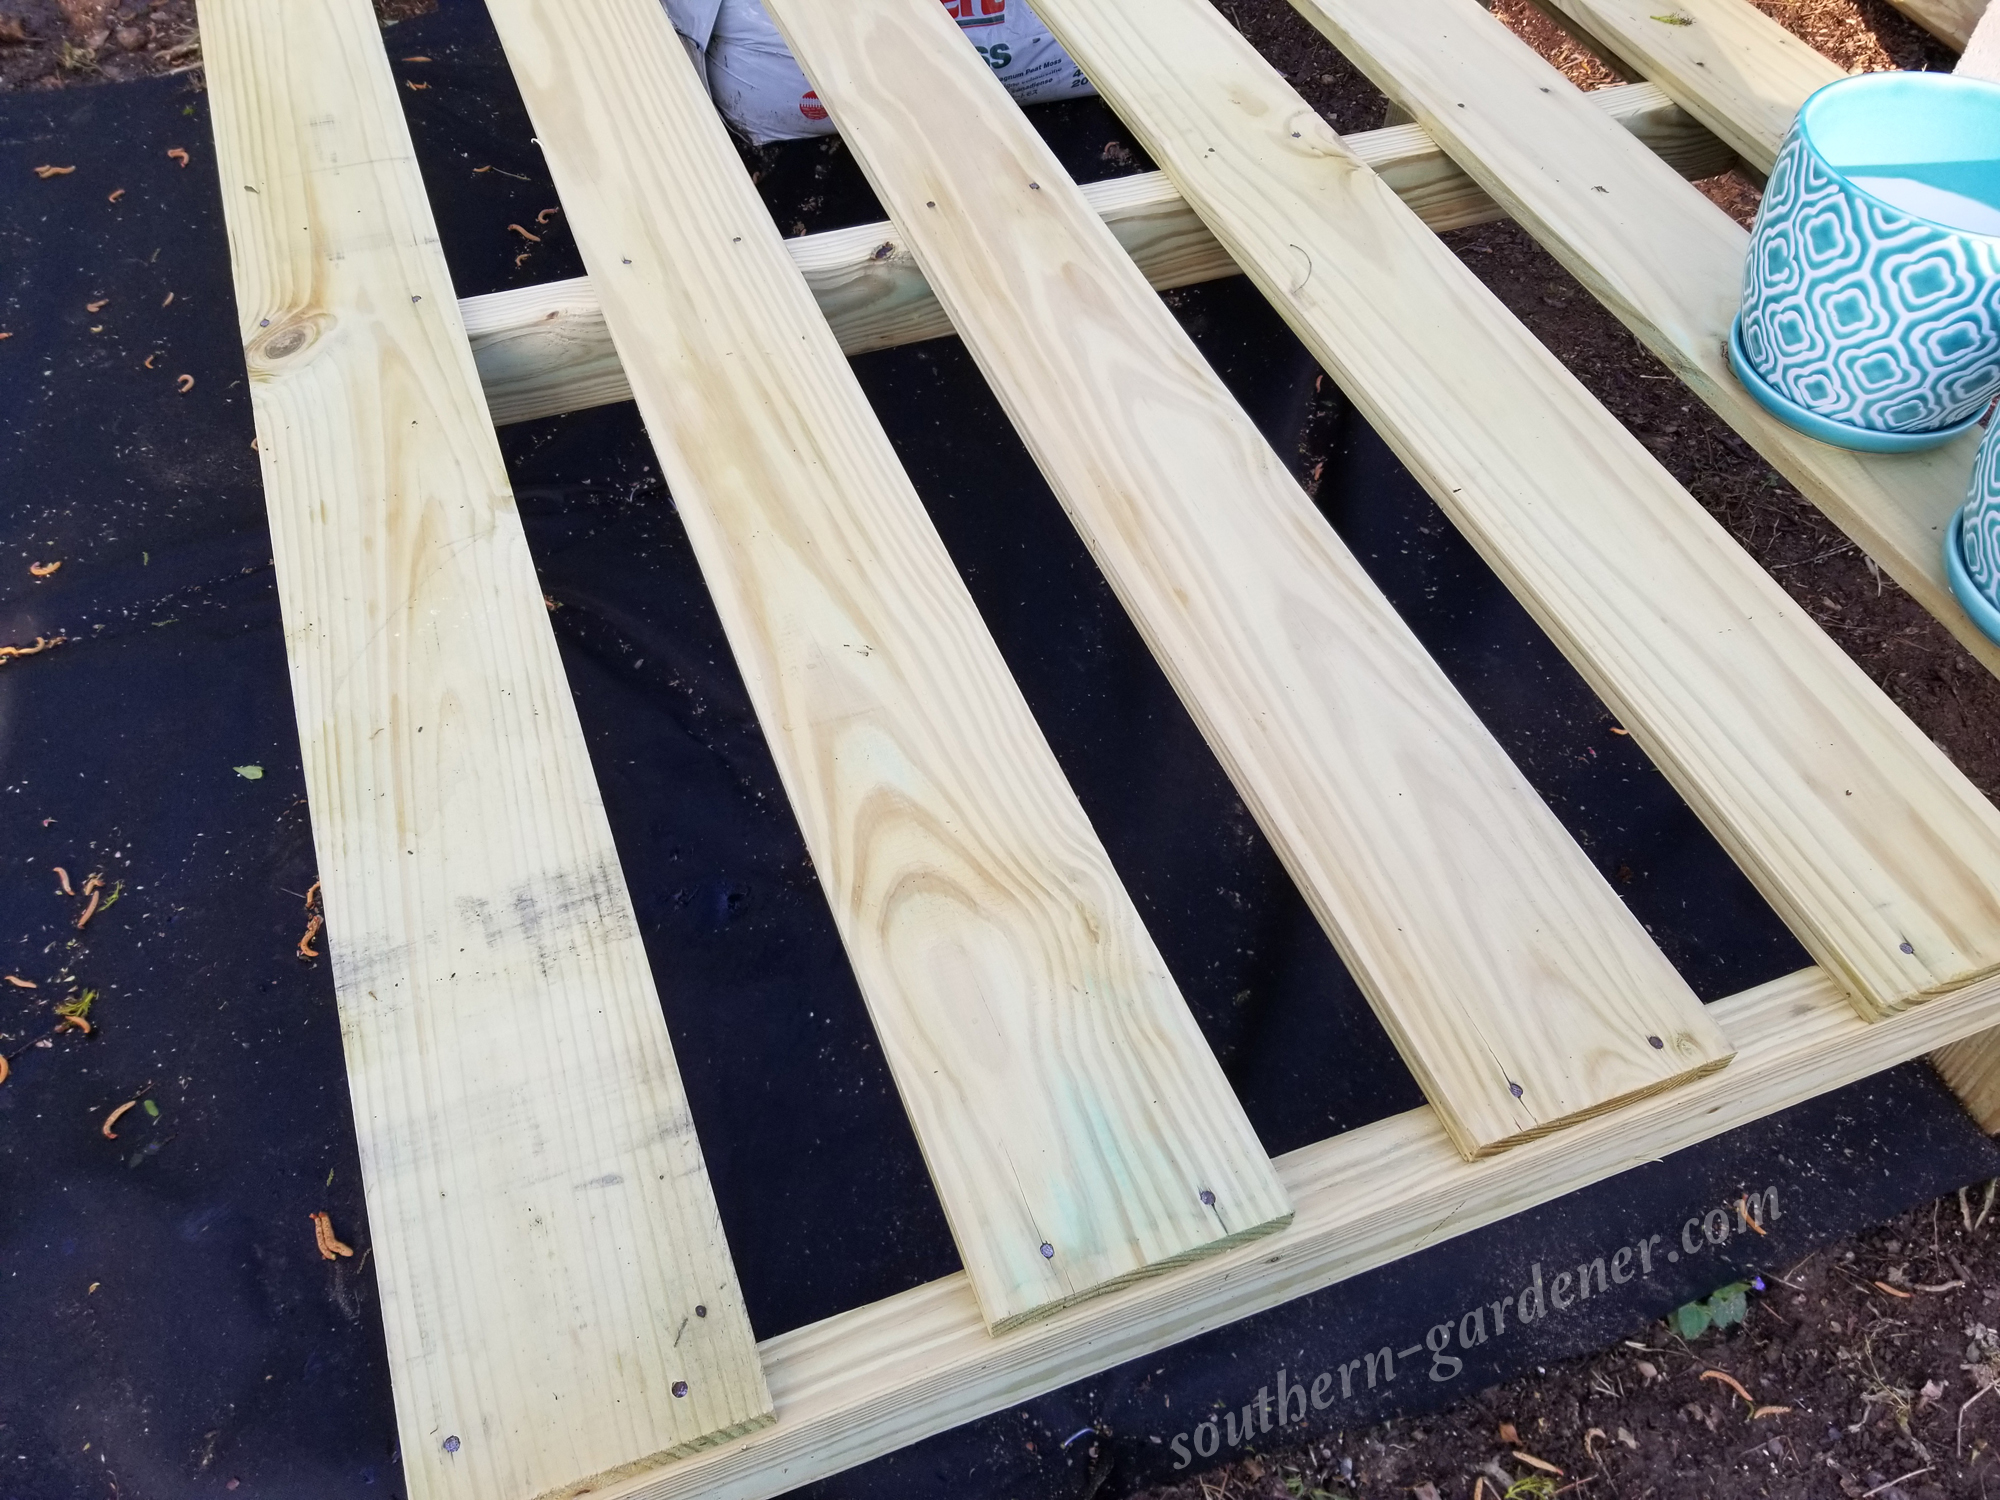
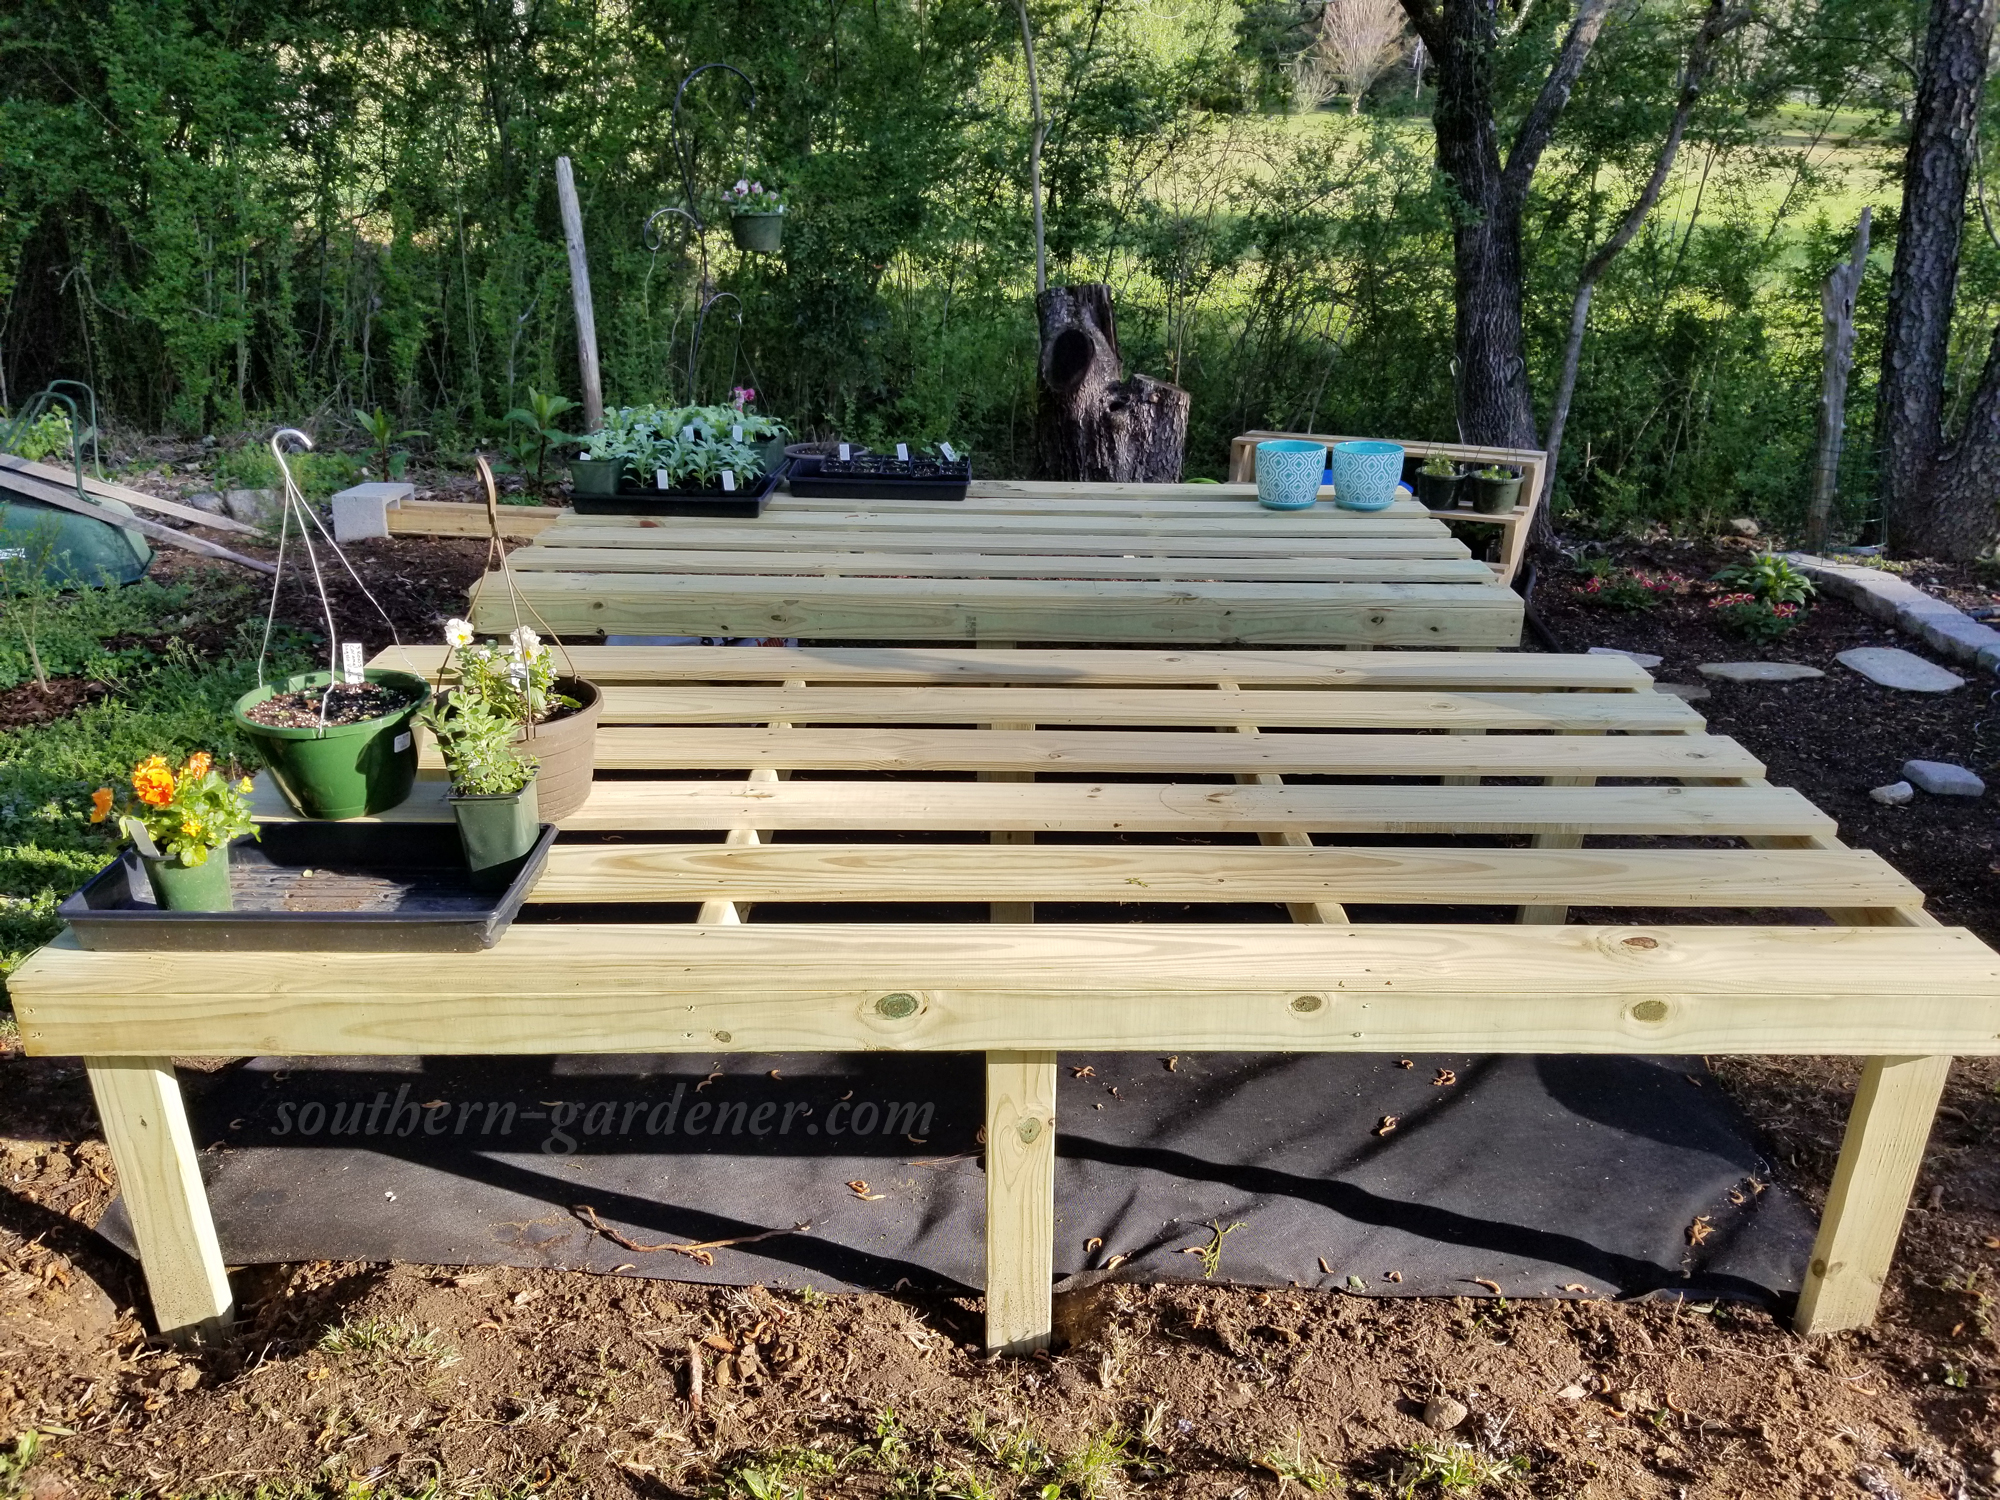
To finish the table assembly, we used the galvanized nails to nail the tops down. Each board is spaced out 3 5/8″ to make them even across the top. The outside boards are flush with the frame.
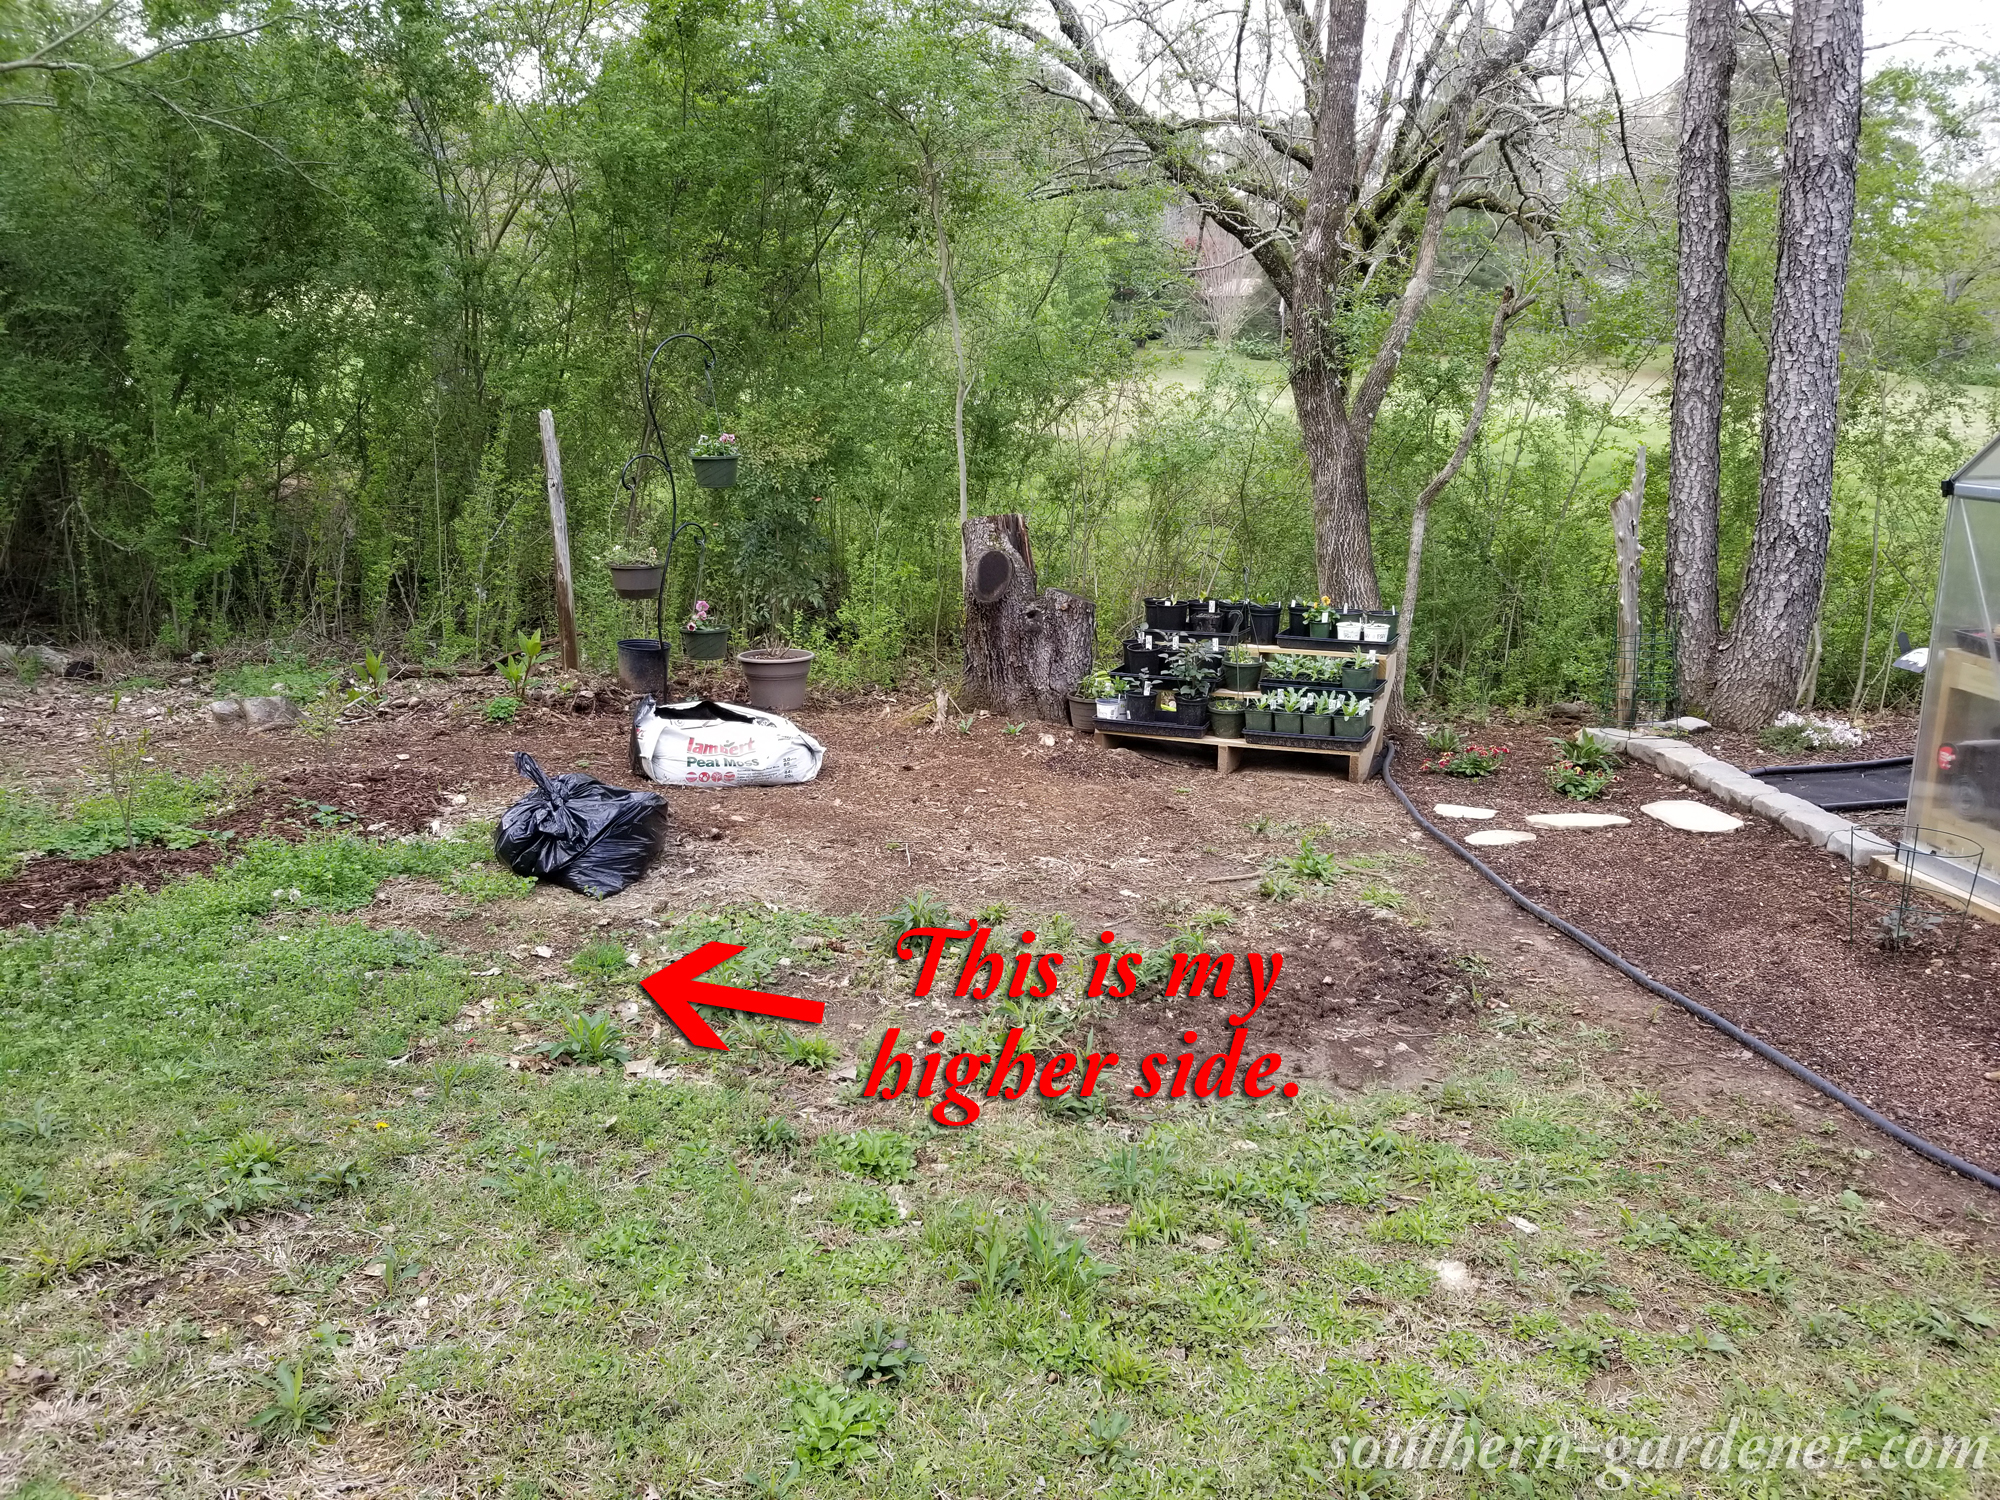
Once we had them assembled, all we had to do was level them in the their sitting positions, which was a pain in the butt! I used my electric tiller to break up most of the dirt, but we ran into one big issue with one of the legs. The front table, the front left leg, was sitting directly on some old tree roots, so we had to dig and ax at them until we could get the table about 95% leveled. I didn’t want the legs to sit so deep in the ground, but this one corner area was not cooperating with the tiller because of so many roots, big and small.
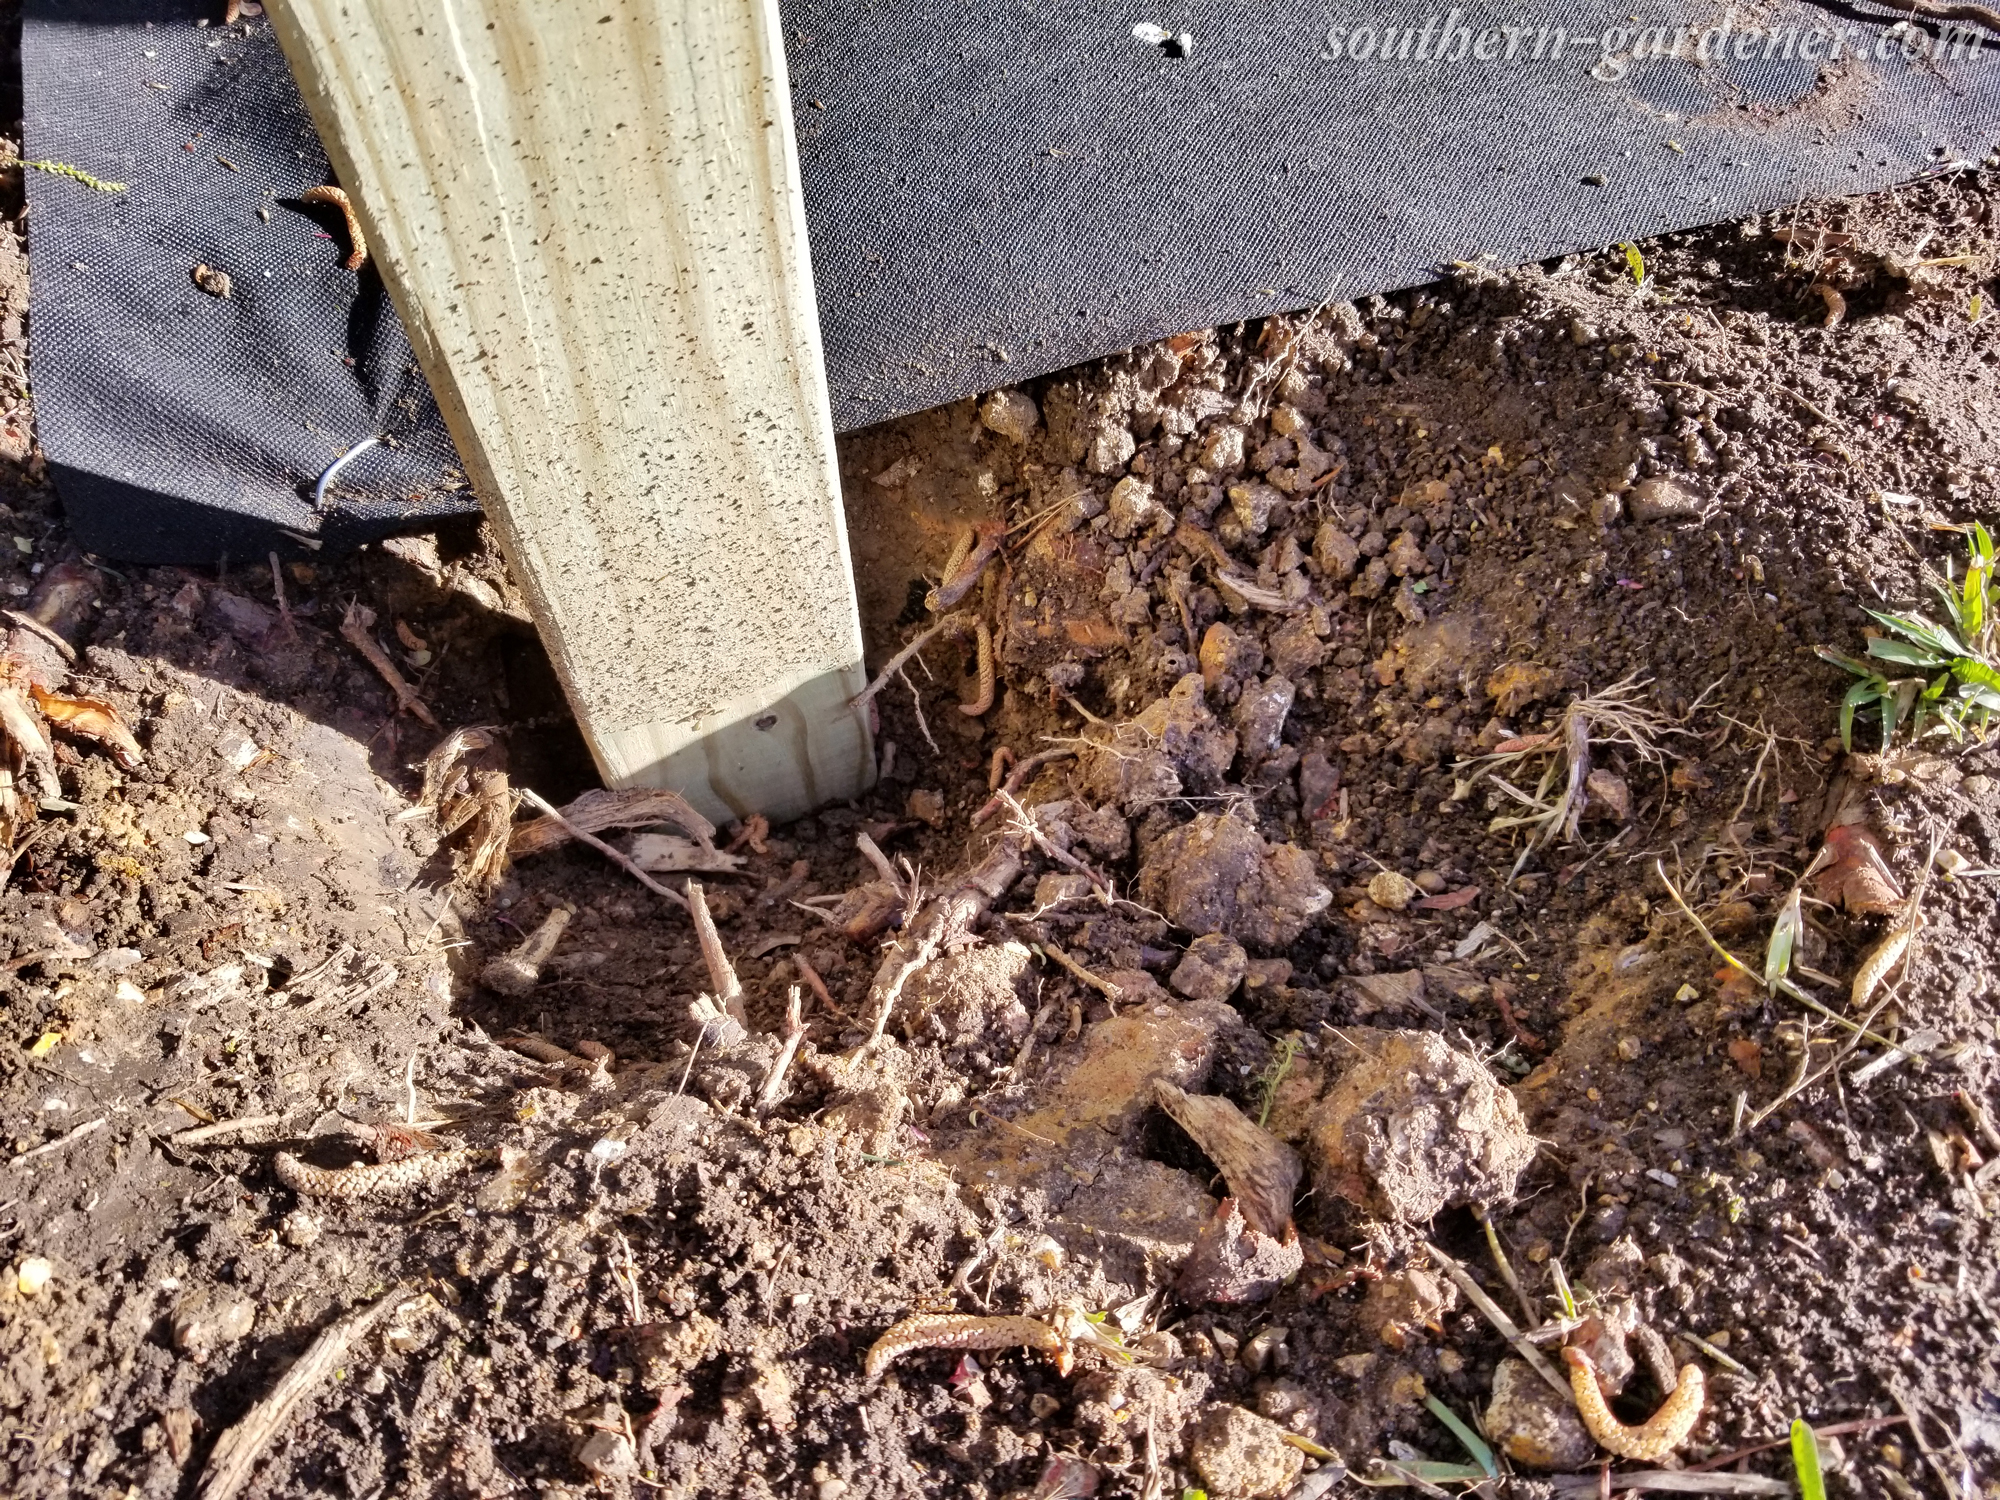
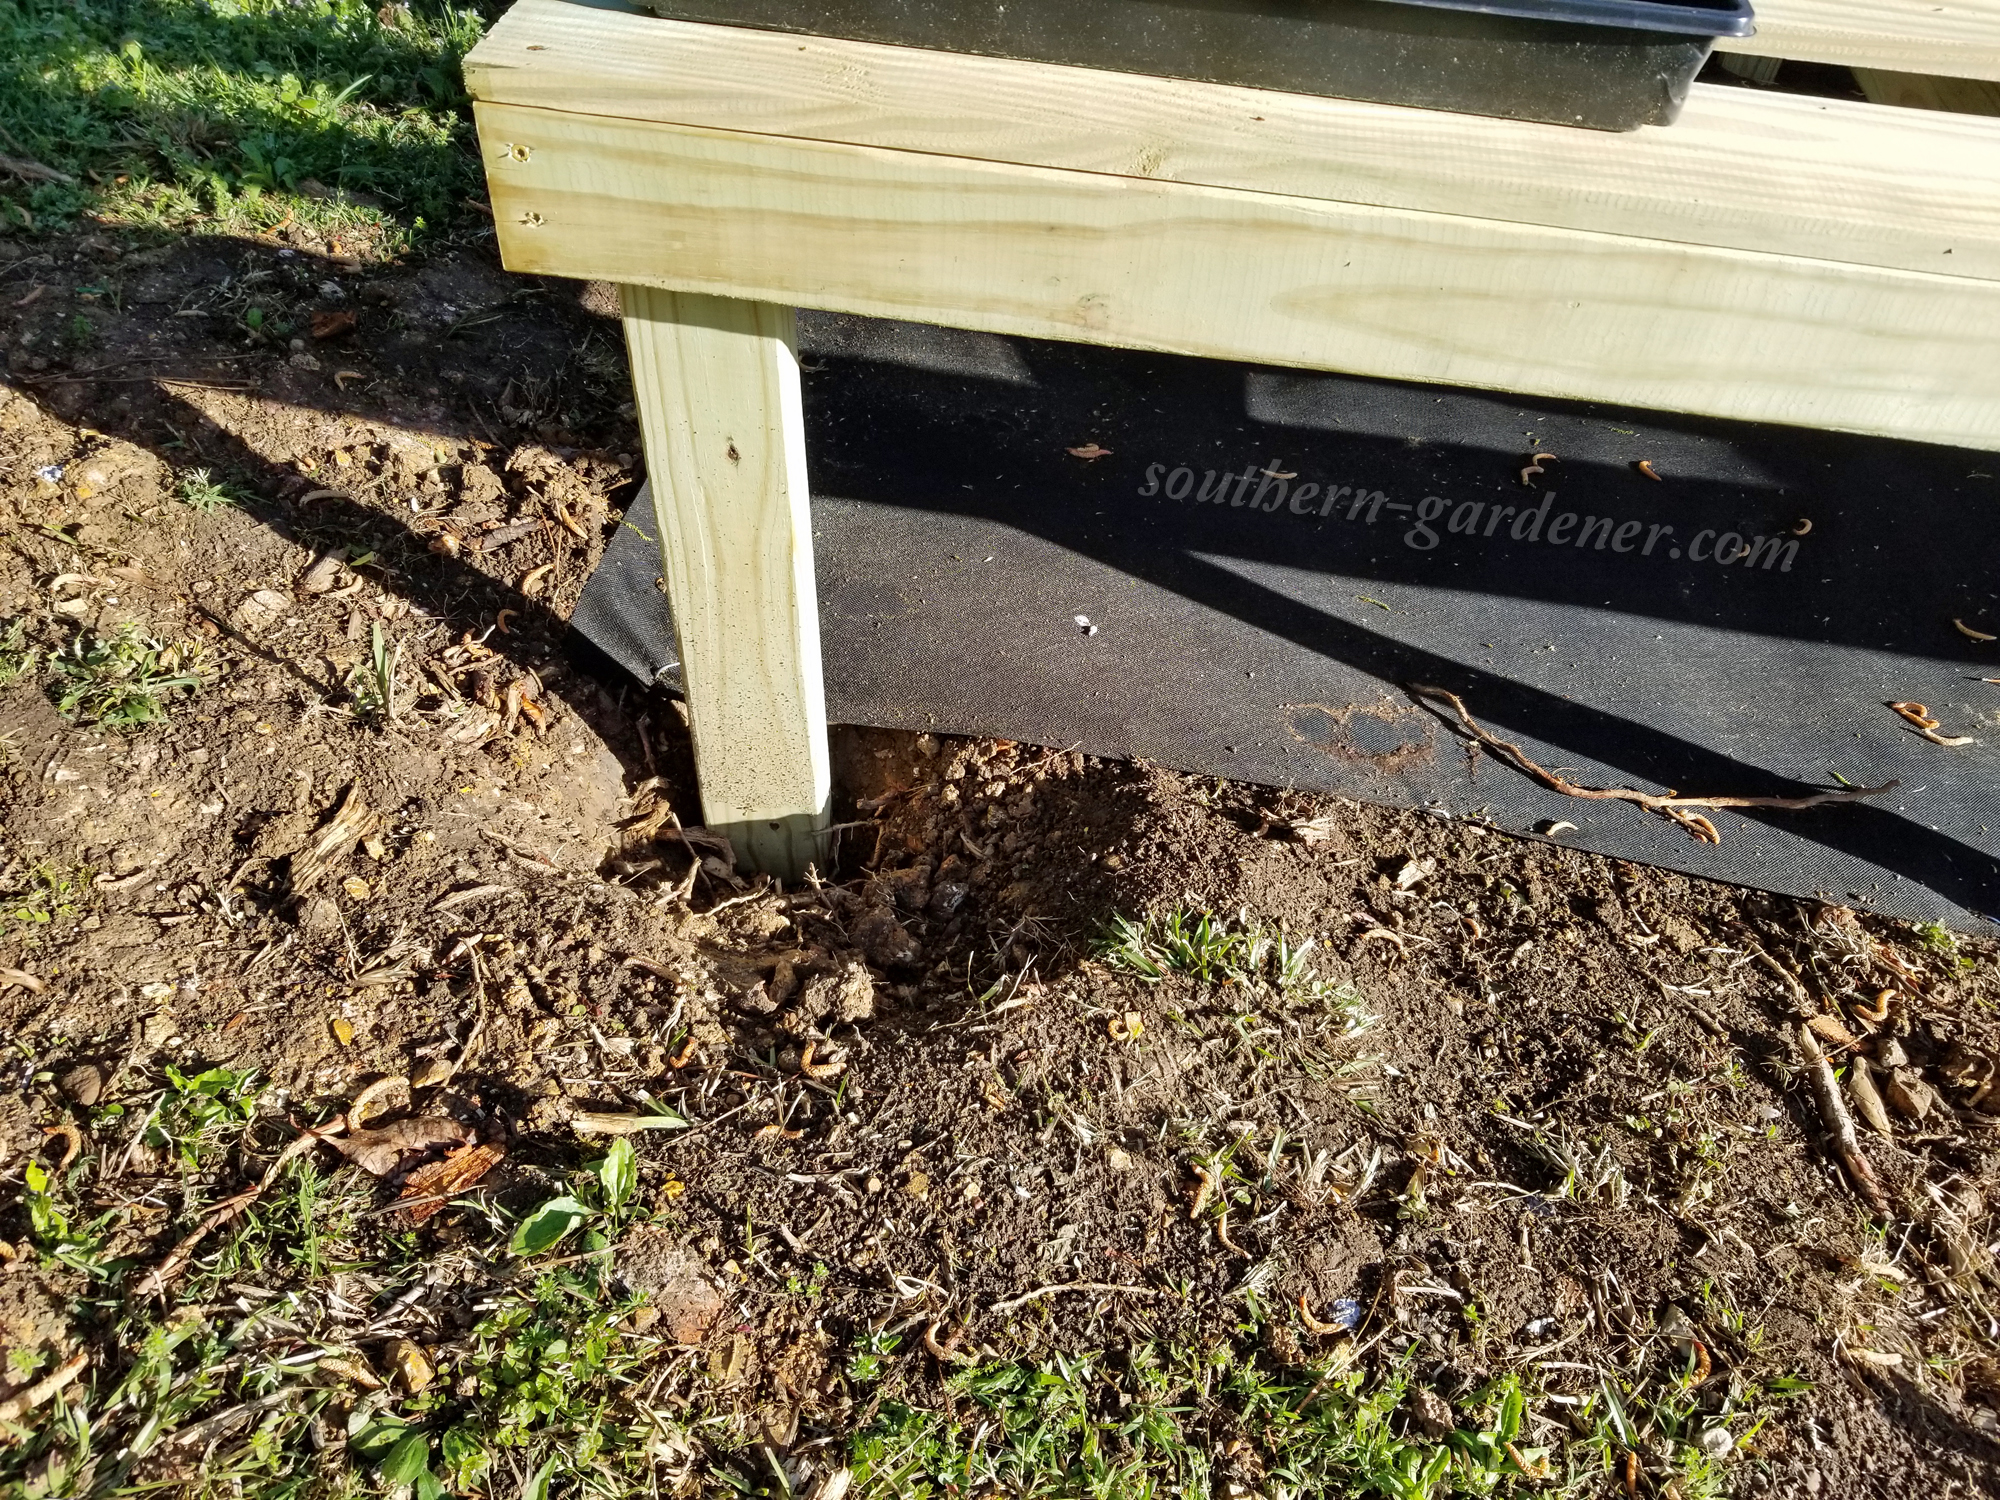
It’s really close to being level, so it works for me! I really hate leveling things… 😕 How do major construction companies do such a large area so fast?!
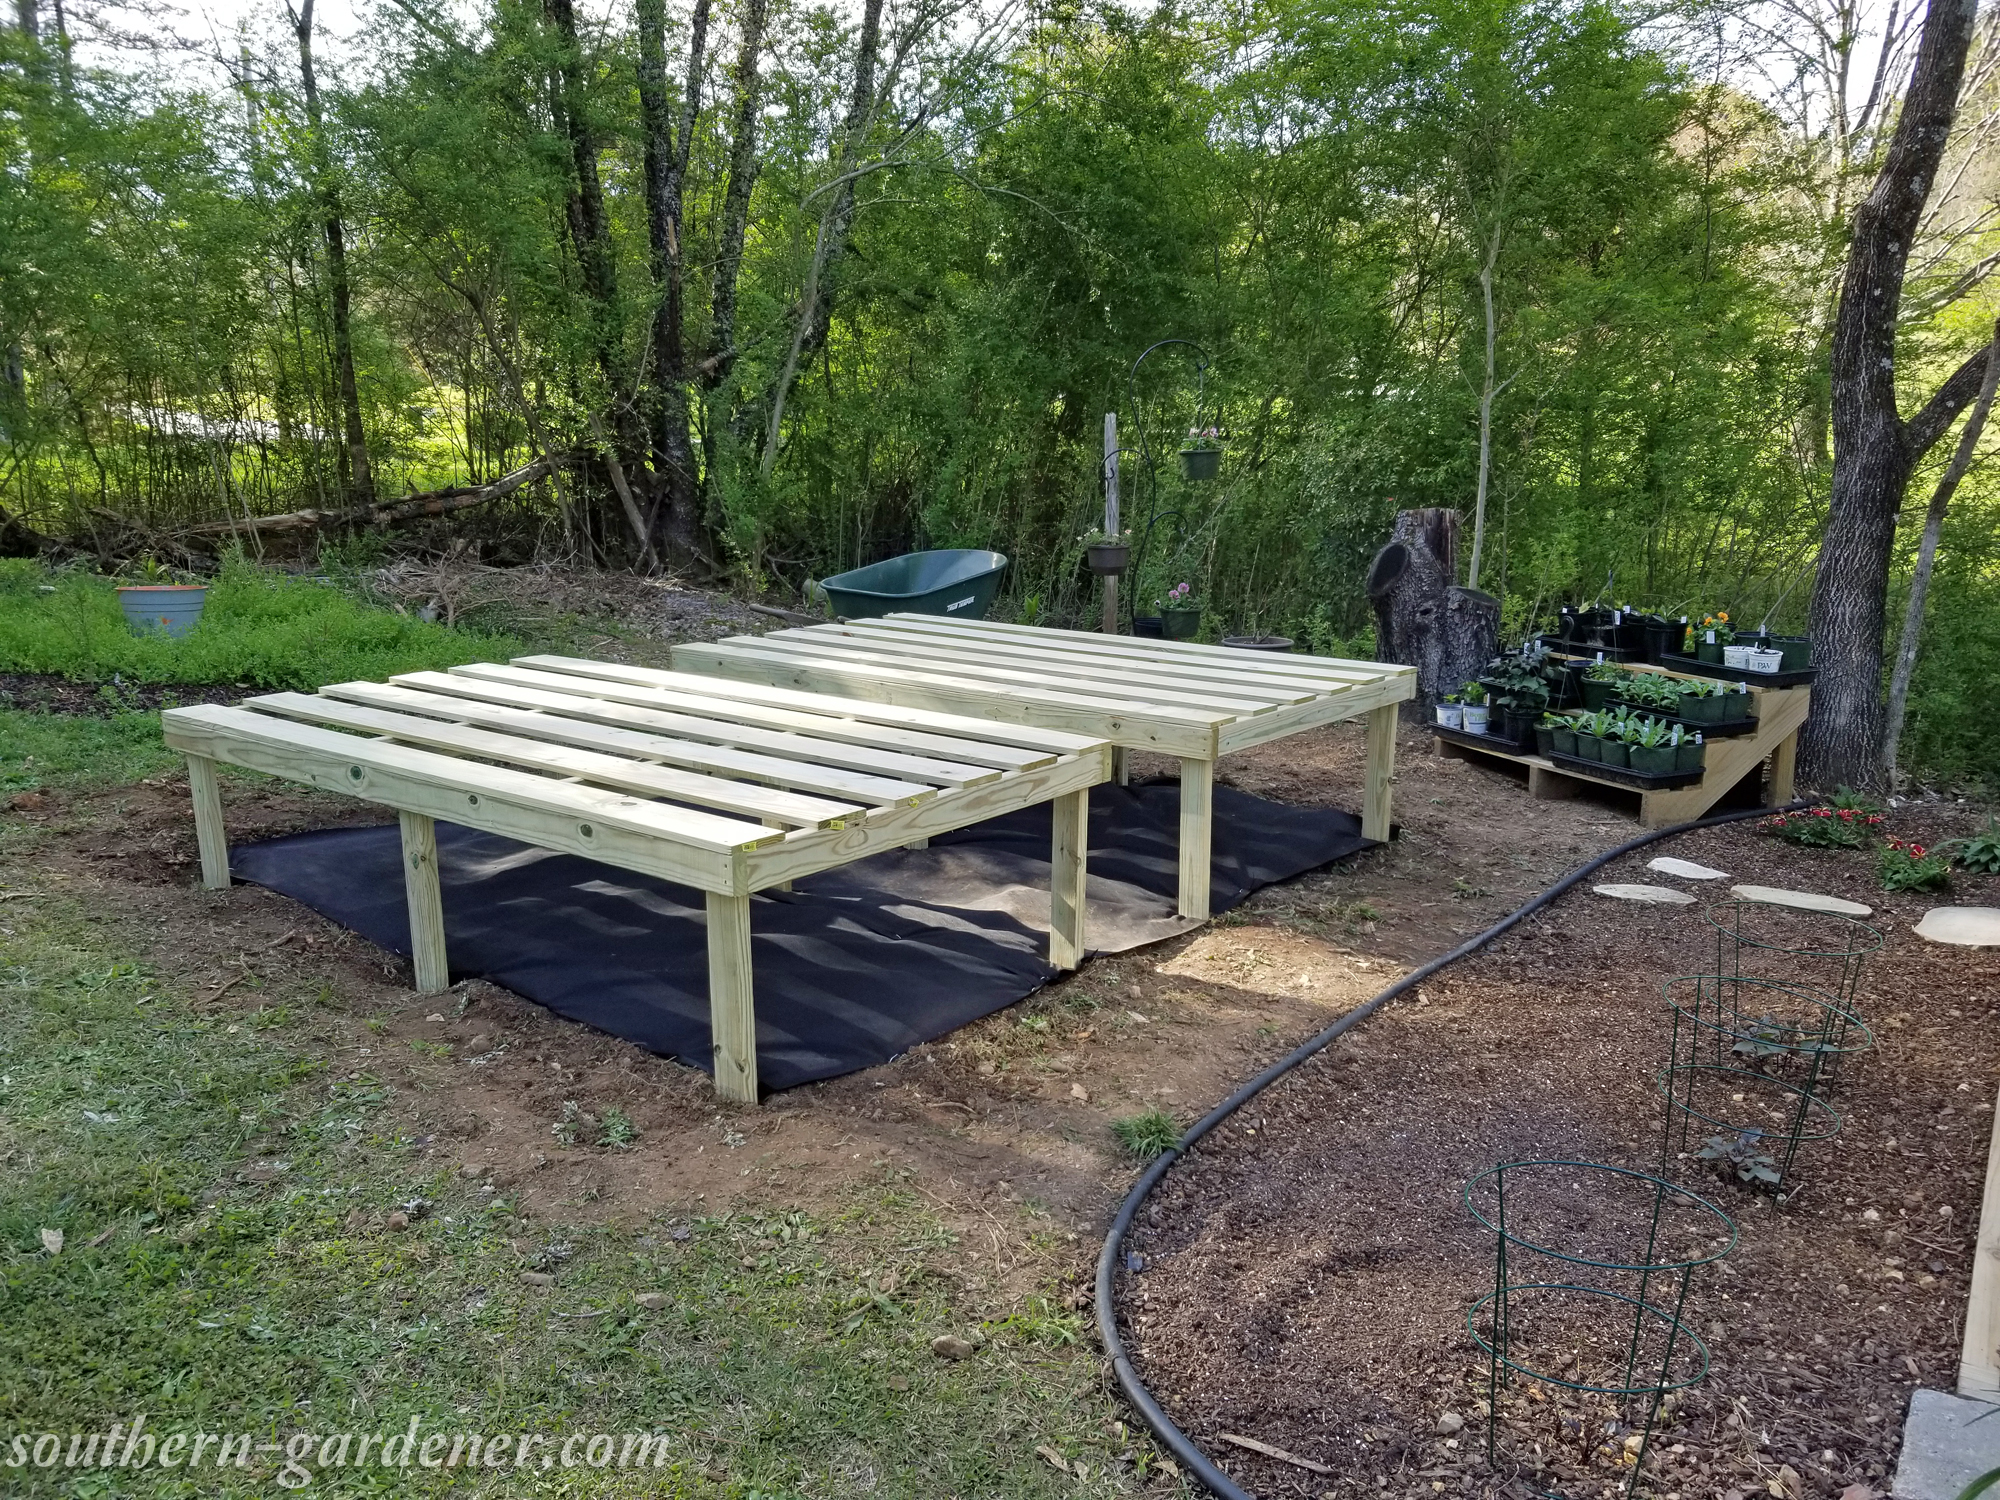
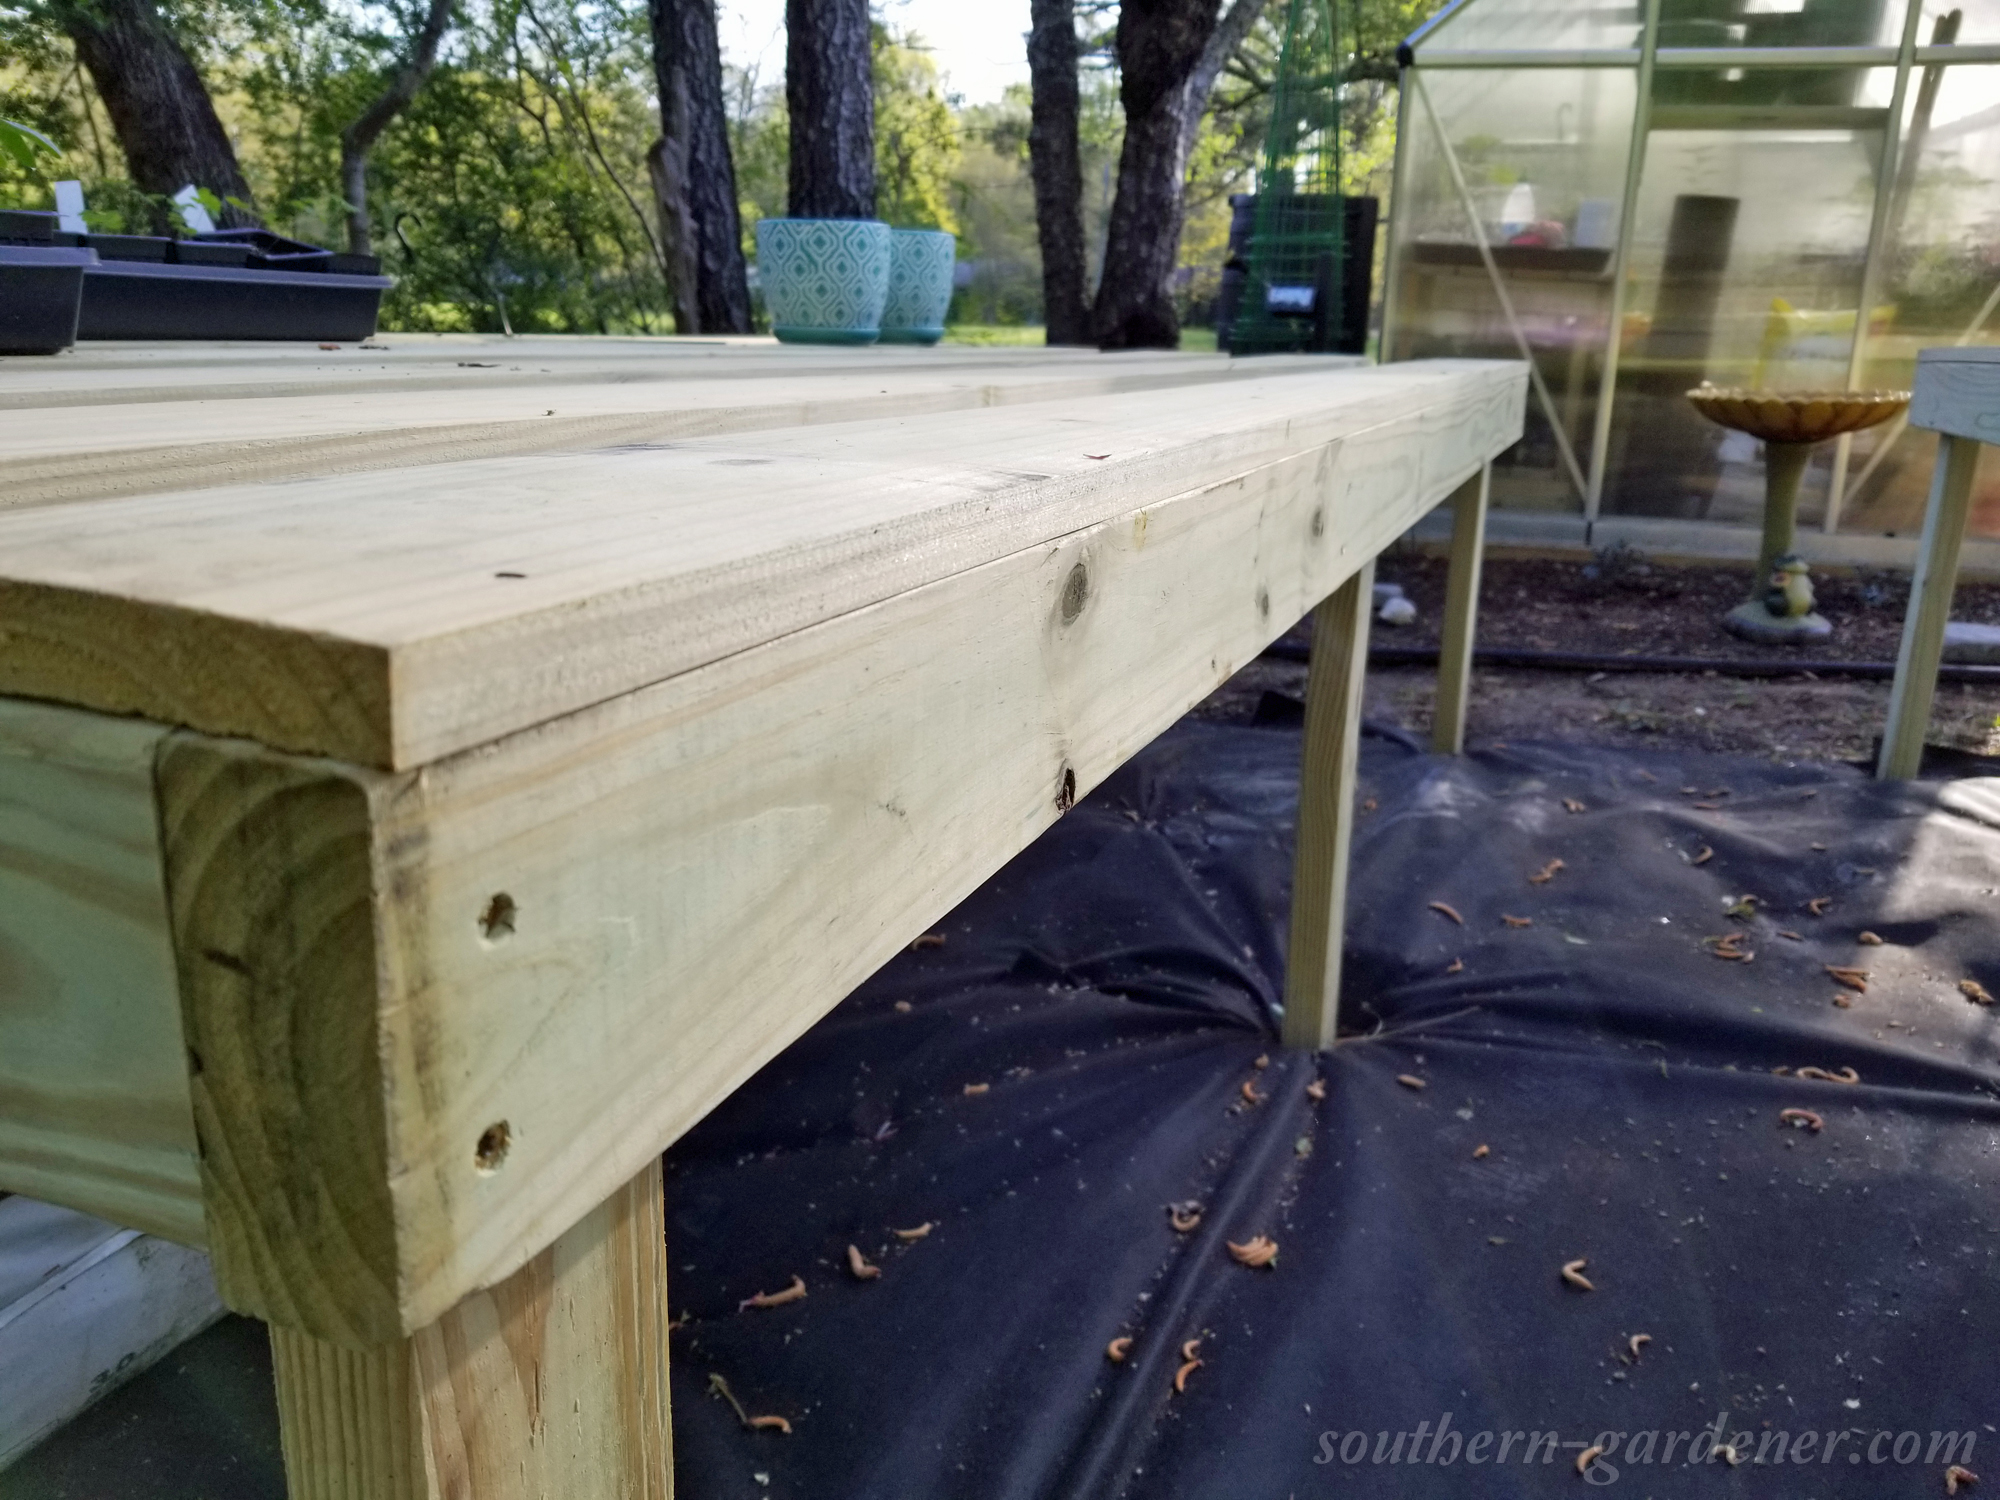
As you can see, I used some really good weed fabric underneath the tables because I just don’t want to deal with it. I also intend to use the area under the tables for shade plants.
And there you have it! Now I have 68 square feet to put plants (on the table), plus the square footage under the tables! All for $107, without tax included!
Ryan Rubel
Thanks for this – I’m making benches for inside my greenhouse and will use your design for them. I know this post is old but it’s appreciated!
April
I’m so glad you found it useful! Thank you, and good luck with the benches in your greenhouse!