

Day 5 continued from here.
It was after lunchtime when we headed to Home Depot to get the wood we would need for the tables, along with deck screws. Before the end of the day, we managed to get all of the framing pieces cut for both tables and most of the frame pieces together for the shorter side. I am going to plant a lemon tree at the end of one side, so that bench will be shorter. After 8 long hours on this day, we called it a day. We were also losing daylight.
The bottom frame of this table is not attached yet. We were both exhausted and almost out of daylight by the time we got to this point.

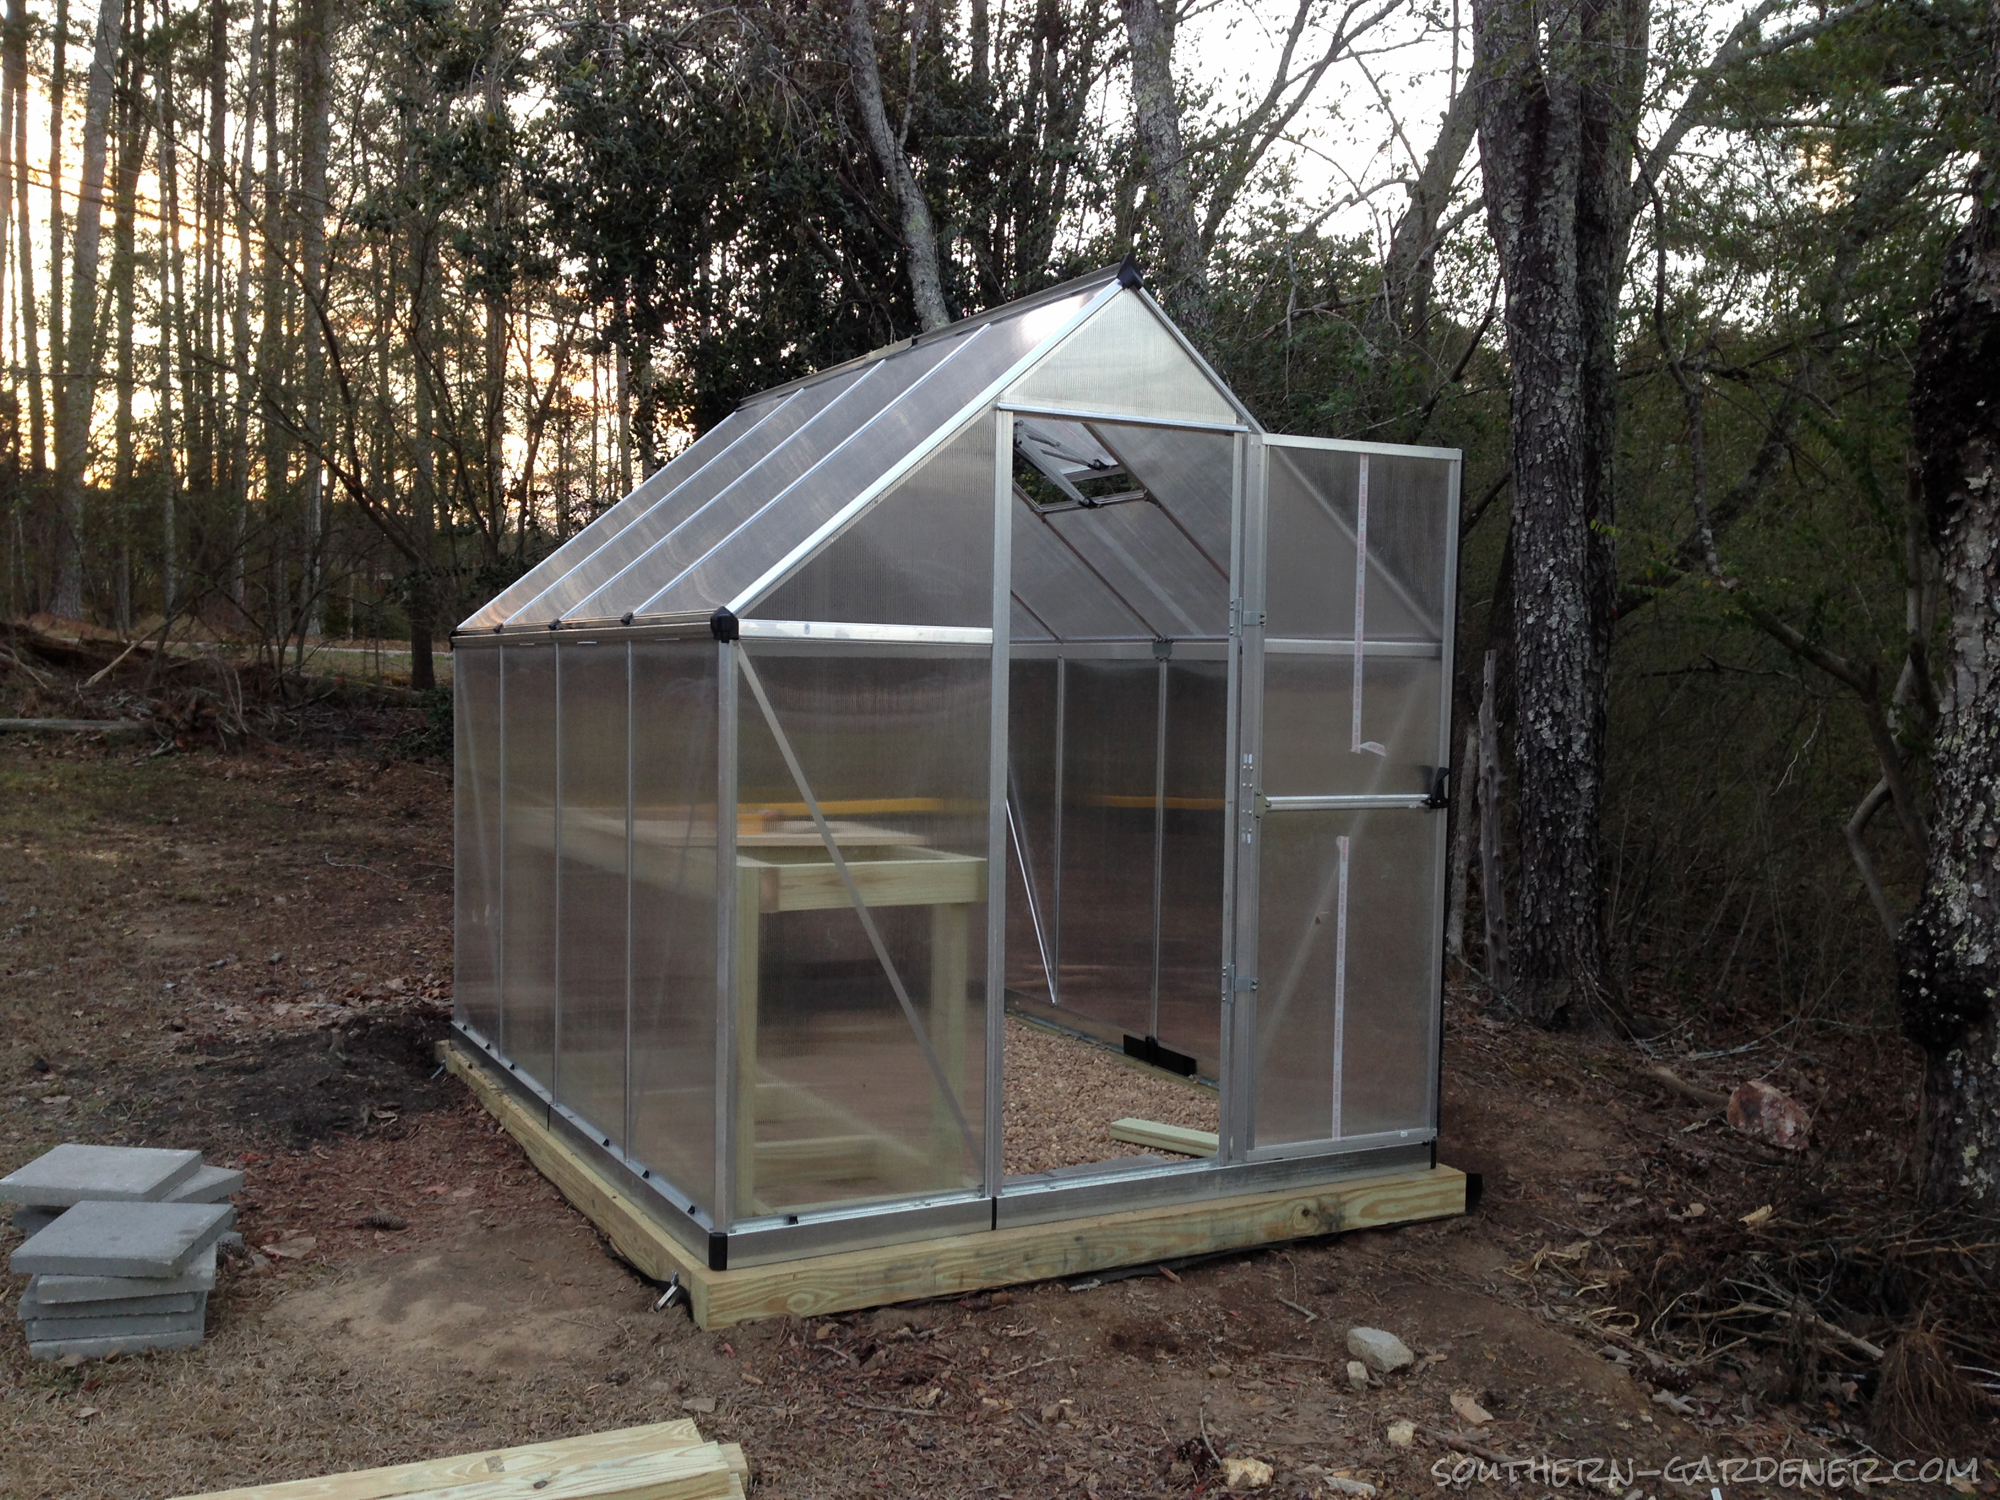
The greenhouse is level; I just can’t snap a picture correctly!

We had to skip doing anything the next day because of light rain throughout the day. This is probably good because my body was starting to protest! Even with doing Zumba twice a week, my legs were feeling a little sore, and I was dragging all day in general. I’m not sure how productive I would have been had we been able to work this day.
Day 6: 6 hours
To me, day 6 was by far the worst when it came to weather. It was COLD, and the wind was brutal. Thank goodness we did a lot of the work inside the greenhouse. It definitely felt like winter on this day!
Even though we didn’t have the bottom shelf framing attached to the shorter table, I knew we were going to have to shorten the width of the longer table or there would be a chance my pavers would not fit in the middle pathway. So I cut the shorter frame pieces (the ends and middle pieces) down from 17.5″ to 16 5/8″ while my dad was on his way.
Once he arrived, we finished assembling the frame for the shorter table. We positioned the frame for the bottom shelf so there would be 7″ from the bottom of the leg up to the bottom of the frame. Also, we put the back legs on the outside of the frames and the front legs on the inside of the frames, mainly for spacing reasons against the wall on the backside of the table. Then we dug out the pea gravel where the legs would sit, leveled it, and used 3″ deck screws to screw the back legs into the 4×4 frame the greenhouse is sitting on for extra support.


Then it was time to assemble the 2 frame pieces for the larger table.

The length of this longer table was 93″. I should have made the total length about 92.5″ because of the space the corner brackets and screw heads took up where the 4×4 framing was connected. We didn’t have this issue with the other table because it did not run the entire length of the greenhouse. As a simple fix, we removed the back right leg and moved it in half an inch, and the table fit.

Putting the legs on this table was fun (sarcasm noted) because we had to do it in the greenhouse with limited space. The tables would be too wide to fit through the door.
And then it was time to do the pieces for the shelving. We thought this would be quick and easy, but we were wrong – again. 😆 We started with the bottom shelf on the longest table. First of all, I did my original calculations based off of a treated 1×6, which is 5.5″ wide. We decided to go with deck boards that are supposed to be 5.5″ wide but were more like 5.75″. I couldn’t put 4 of them side-by side on the lower shelf or there would be overhang since the shelf would only be 21.25″ wide (4 boards = 23″). I did not want overhang on the bottom shelf. So we notched out where the 2×4’s were and went with 3 boards with gaps in between them as seen below.

Another problem presented itself: you cannot fit a 93″ board on the bottom shelf in the greenhouse. It’s just not possible, no matter which way you try turning the board. Trust me, we tried. So we had to cut each bottom piece into 2 pieces so they would fit.

With the top, we did a 1/2″ overhang past the table legs in the back and butted 3 more boards up against it, so there would be a 3/4″ overhang in front. I’m really digging the look of the overhang for the top. We went ahead and attached the top pieces the same way for the shorter table, but there was no overhang in front since this table is 1″ wider than the longer table. At this point, we called it a day. We were both tired, and we were losing daylight again. Which meant is was starting to feel even colder.
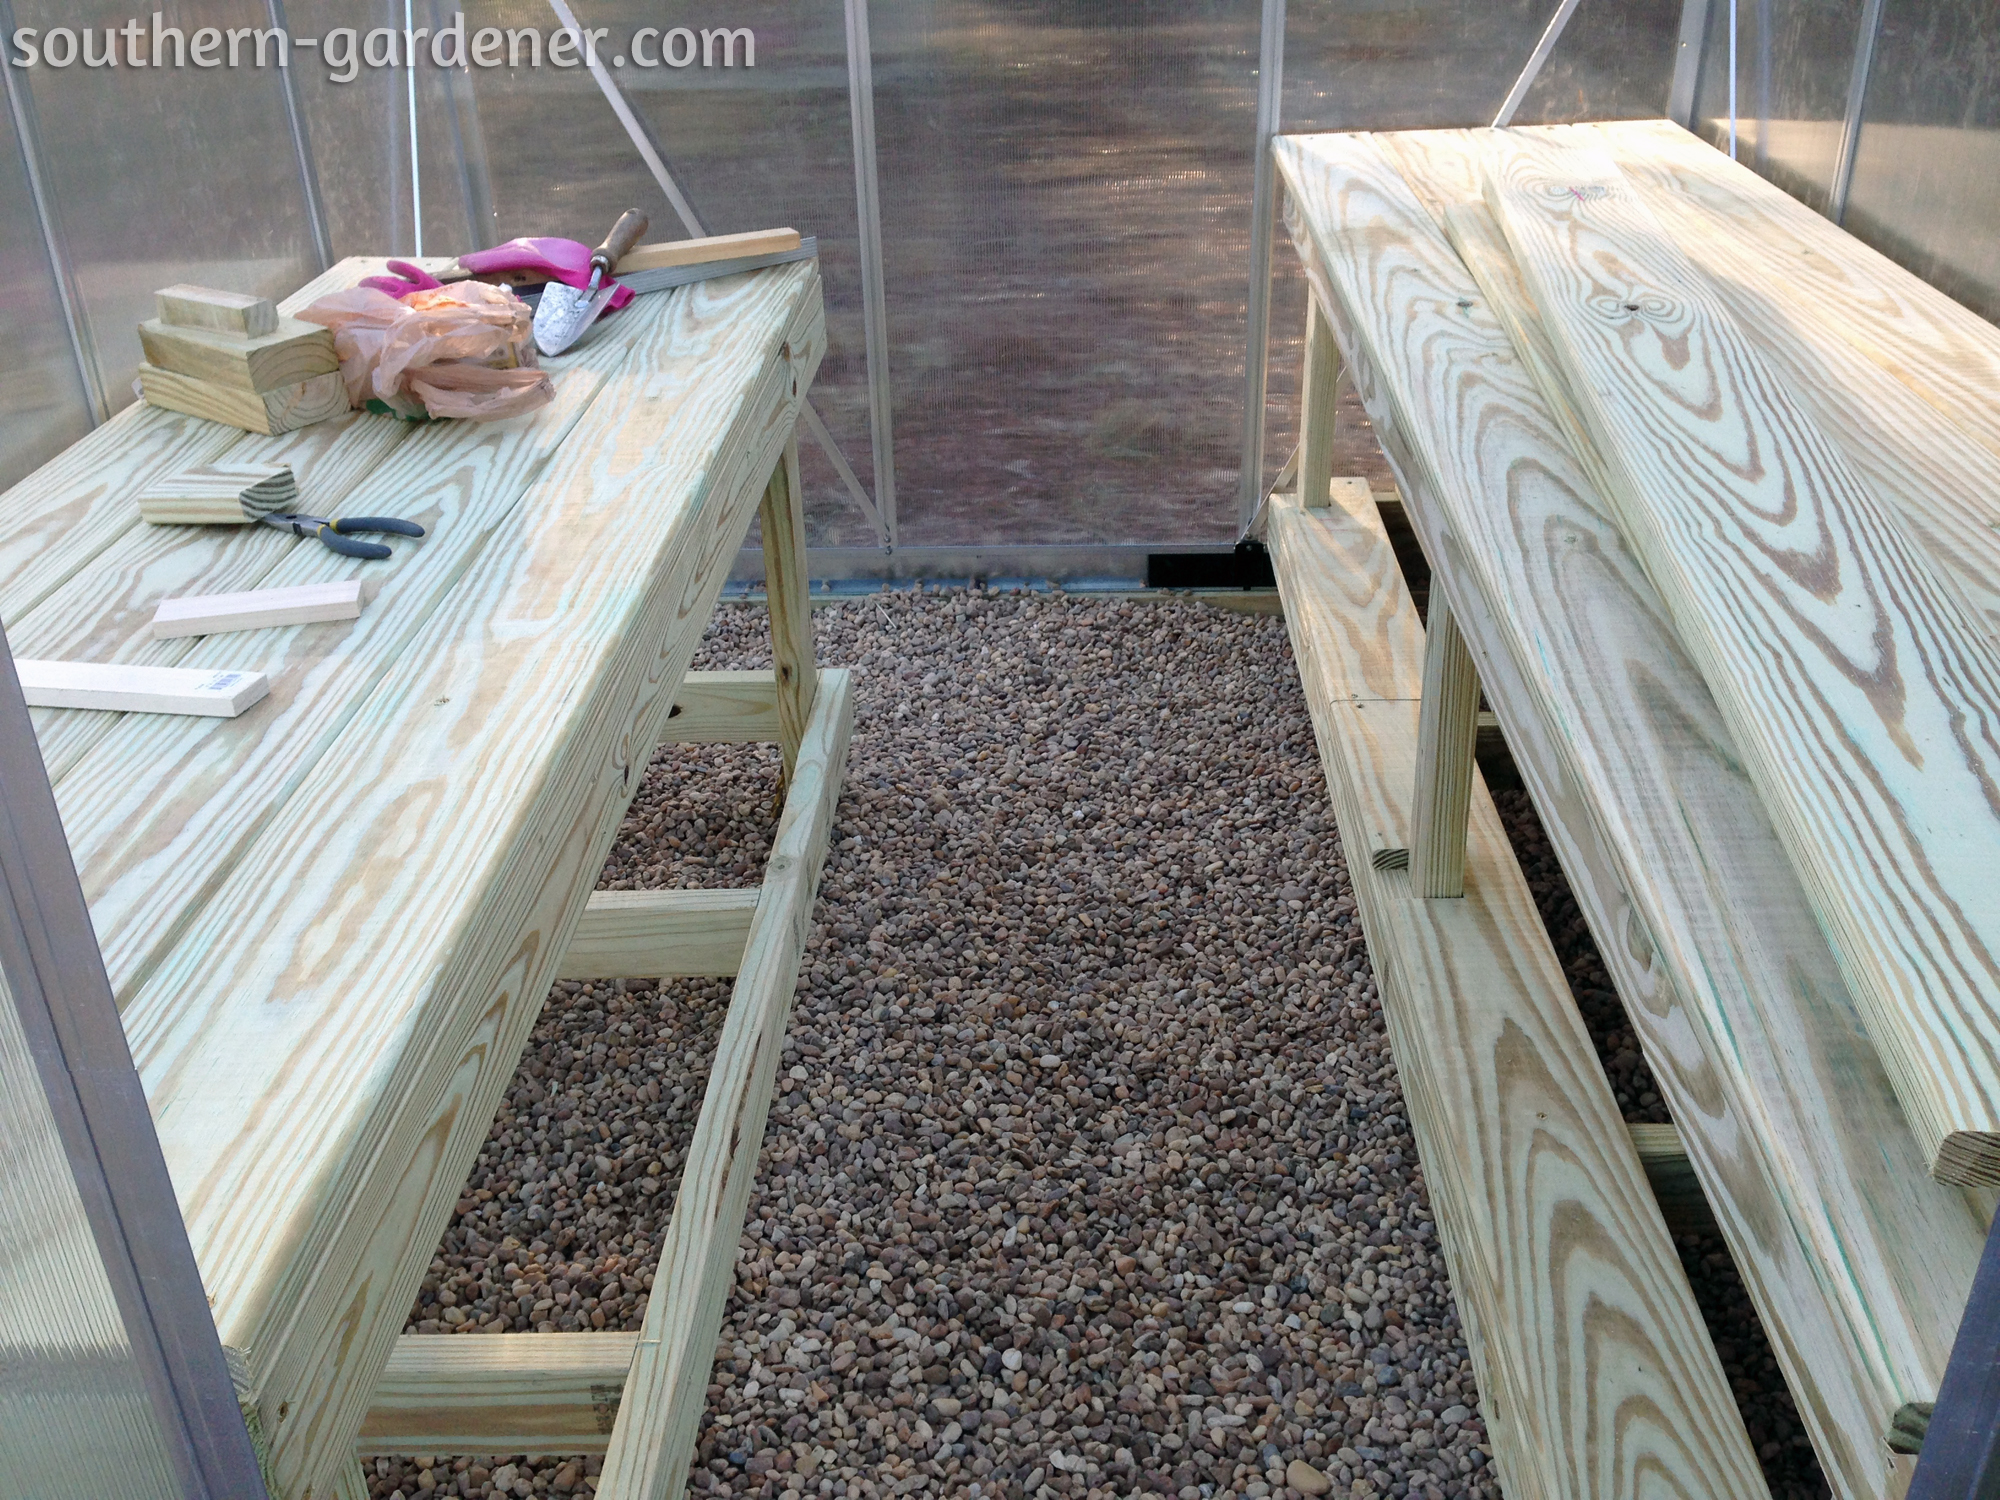
We thought we’d get through with the benches on this day, but it didn’t work out that way. We were so close! We had the 3 boards cut (but not notched) for the bottom shelf of the shorter table.

Day 7: 2 1/2 hours
Day 7 was a short day for us (YAY!) because we essentially finished everything – almost everything. We notched the boards for the bottom shelf for the shorter table so they would fit around the 2×4 legs and attached them. Then we put the pavers down the middle and leveled them (I’m sure they will shift some over time). So day 7 was only about 2 hours of work before my dad headed home.


We had an extra 8-foot deck board and an extra longer piece because I had planned to use 4 boards across for the bottom. My dad took those home so he could use his band saw to cut pieces out to cover the spaces around the 2×4 legs and to fill in the gaps on the bottom shelves.

I originally was just going to leave the gaps because the bottom was mainly for storage or just flower seedlings (because of the treated wood above it). However, Dad said it would be easy for him to rip the pieces we’d need with his band saw, and we had the extra pieces, so I told him to go for it. So that meant the greenhouse was technically just 99% complete.
Since it was still fairly early in the day, I decided to do a little cleaning up around the front area of the greenhouse.

So much better!

Days 8 & 9: 2 hours
I’ve combined these 2 days because they were both really short. Day 8 was just the day my dad used his band saw to cut out the pieces I’d need. He said it took him about 30 minutes to do all of it. Day 9 was the day I attempted to put those pieces on the benches.

Note that I said “attempted.” Nothing is ever easy for me. Some of the pieces didn’t fit correctly. None of the corner notches fit well.

I attempted to use my miter saw and jig saw to fix them, but this is as close as I could get with one corner.

And 2 of the 6 strips for the bottom gaps would not go in. This would be because we didn’t notch out the already-attached boards correctly;the notches were not completely straight because we used a jig saw to cut those out. This makes a big difference in alignment!

By this point, it had started to rain lightly, so I was walking back and forth from the greenhouse to the shop to make a small cut adjustment to see if it would make the fit better on the corner pieces, and I was pretty much over it.

So I quit for the day. An hour and a half of work, and nothing to really show for it on the 9th day… By this point, I was getting annoyed and just wanted to get the dang thing finished.
Day 10: almost 2 hours
Day 10 was finally the finish of the greenhouse assembly and the building of the tables inside!! After cutting on another corner piece to see how it would look, I decided to forget about the corner pieces. Really, it wasn’t that big of a deal, and I doubt I’ll really notice it that often. I was putting way too much work into something that really wasn’t necessary. When I do the post for the plans for these 2 benches, all the errors we made will be corrected.

I used my belt sander to sand the 2 bottom shelf strips at the ends that would not fit into the gaps. Thank goodness that didn’t take as long as I thought.


So once those were in place, the greenhouse was officially done, having invested about 1 hour and 45 minutes for the final day. That means the entire thing took us a little over 39 hours!! 😮


I technically didn’t need to make the right table less wide because the legs would not have been in the way of the pavers after all. However, I didn’t want the table to stick out past the door frame, and I think it might have if I hadn’t shortened the depth of the table. When I post the final plans for these DIY benches, they will have adjusted measurements, ones that I would have done from the beginning had I known what I know now.

I moved all of my gardening stuff I’ve been collected into the greenhouse, so it is ready for use!


I am beyond excited to finally have this finished!! 😀 Now to start thinking about greenhouse landscaping!
Bob Finn
Very nice job and am glad I saw your work because it will help me with my greenhouse that a 8×10 sitting on 2×6 pt double up also, I just finished putting in stone and rubber mats and now it’s time for work tables and then heat.
April
Thank you! I’m so glad to hear that it was helpful for you. Good luck with your tables!