

My dad and I started this project the last Friday in January 2017, and things were more slow-going than we expected. I initially wanted to construct my greenhouse from wood – a combination of treated 2 x 4’s and cedar 1 x 2’s with plastic to cover it. However, the more I researched online, the more I was leaning toward polycarbonate panels. It seemed a lot of people were having to duct tape rips and tears in the plastic, so I wanted something more durable. I found this Palram Mythos hobby greenhouse on Amazon – on sale with an awesome discount at the time. I decided to go with the silver 6′ x 8′ x 7′ size, and I figured with the price of all the lumber and plastic, it would be close in costs to what I would pay for this greenhouse while on sale (I did not price it out to actually see what the difference might be).
I was initially going to wait until summer to build the greenhouse, but I purchased some a lot of seeds online last month and didn’t really have anywhere to start them in the house or basement. I thought it would save me some time getting the Mythos greenhouse since I wouldn’t have to get lumber and cut all of it. I was wrong. 😯 My next greenhouse will be constructed of wood!!
Before Construction
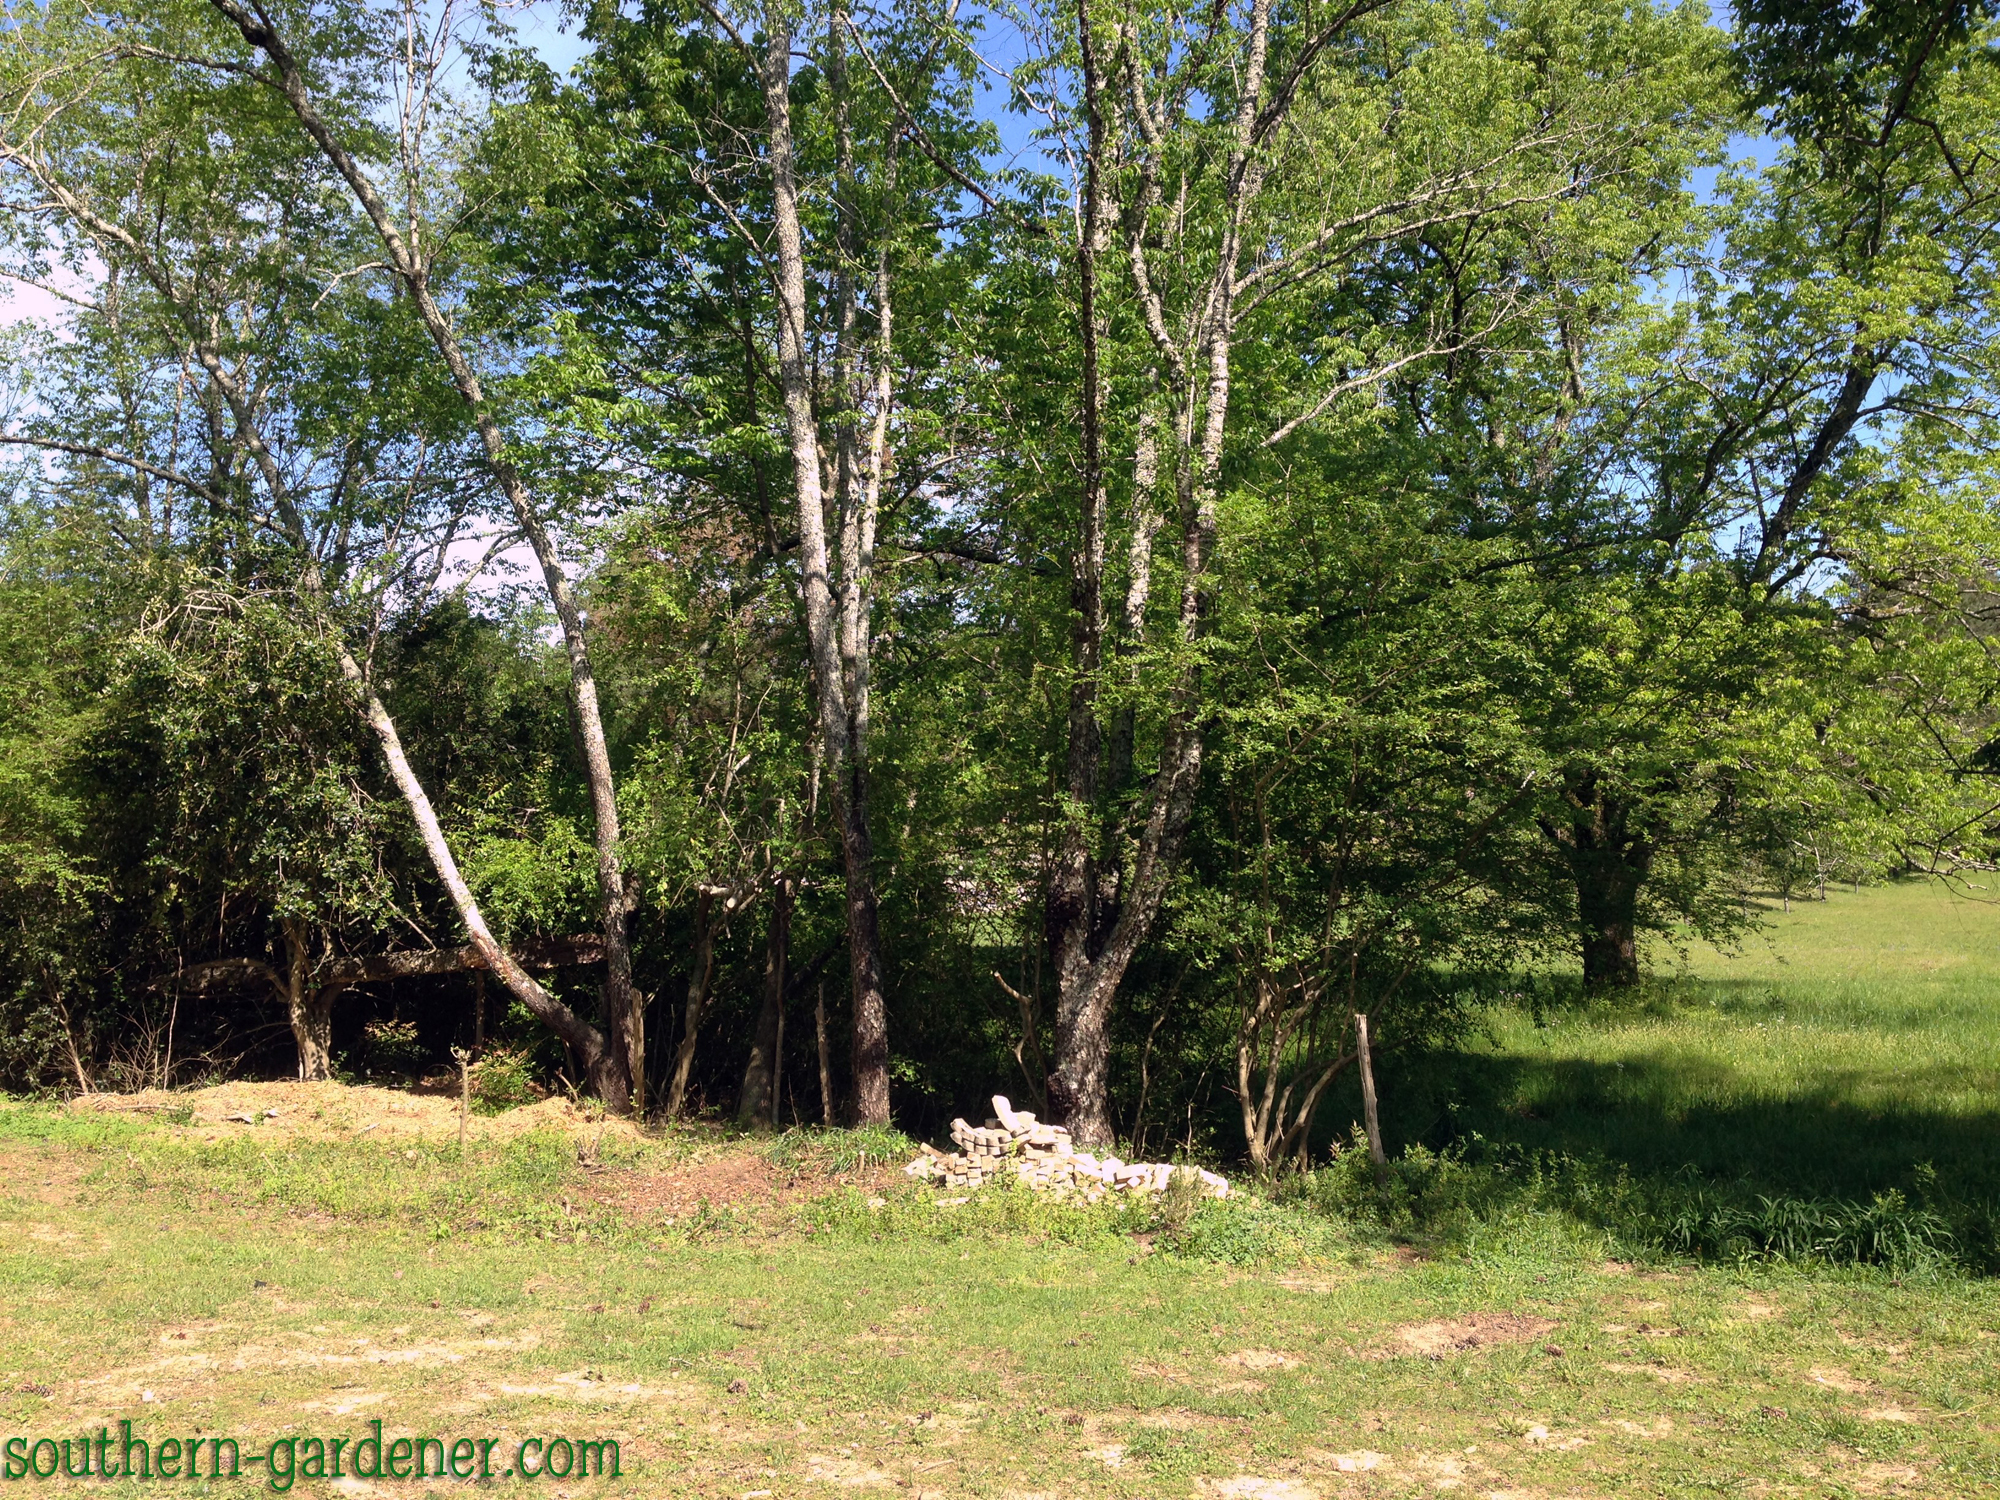
I picked an area for the greenhouse that would get plenty of sun but would be out of our way. This is a picture of the area last April before the area was cleaned up. There is Chinese privet everywhere (that stuff is the devil!), and there is a huge pile of used bricks with mortar still on them left by a previous owner. You can barely see the bricks in the picture below because of the Chinese privet. We’ve been in this house since August 2009 and never bothered to use them or get rid of them.

It took me most of a day last year to clear out the privet. I also got a battery-powered chainsaw to get rid of some of the thicker pieces (later in the year) and used a disposable paint brush to brush on full strength poison ivy and tough shrub killer to kill the privet (on the freshly cut pieces left behind). I’m not sure how well it worked; I imagine some of the larger privet will need several applications. I did see some privet coming back up later in the summer last year around the trunks that were cut. However, spraying full strength tough shrub killer on those seems to do the trick for now.
Here’s what it looked like after the privet was cleared out.
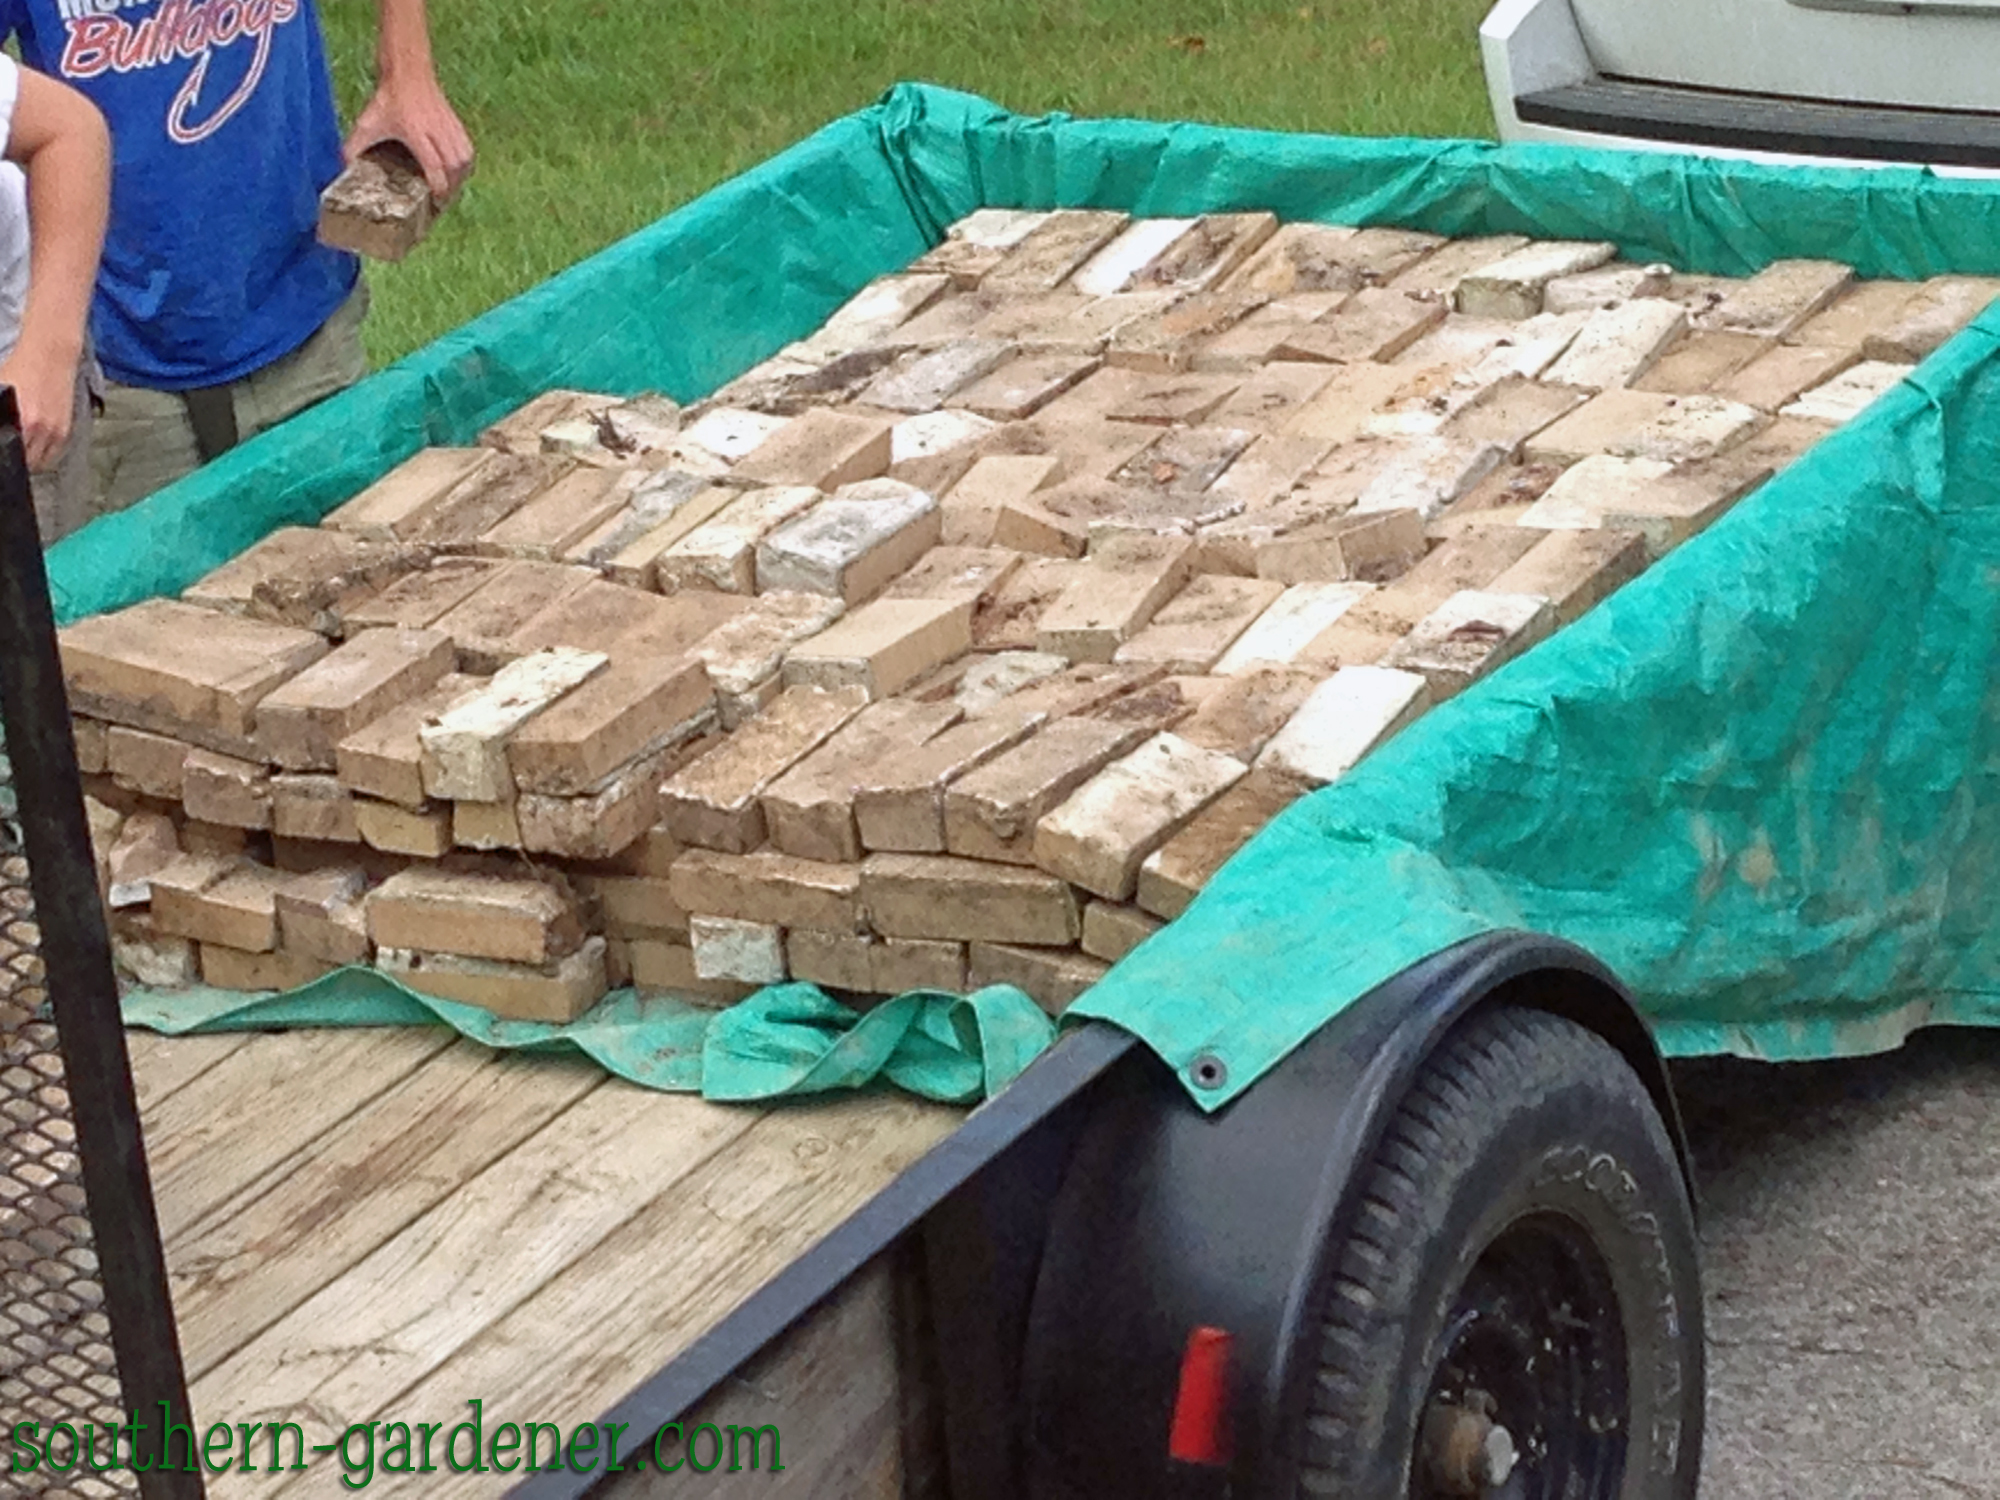
Next, I had to get rid of all those bricks. I thought about using them for something, but I didn’t want to take the time to remove the mortar from all of them. I posted them for free on Craigslist, and someone came and picked all of them up. I had no idea there were sooooo many. 😮
And that essentially got the area somewhat ready last year. I cut away more privet that came up during the year and used the tough shrub killer at full strength in hopes of killing all of it – for good.
I marked the general area where the greenhouse would sit the day before my dad and I started working on it.

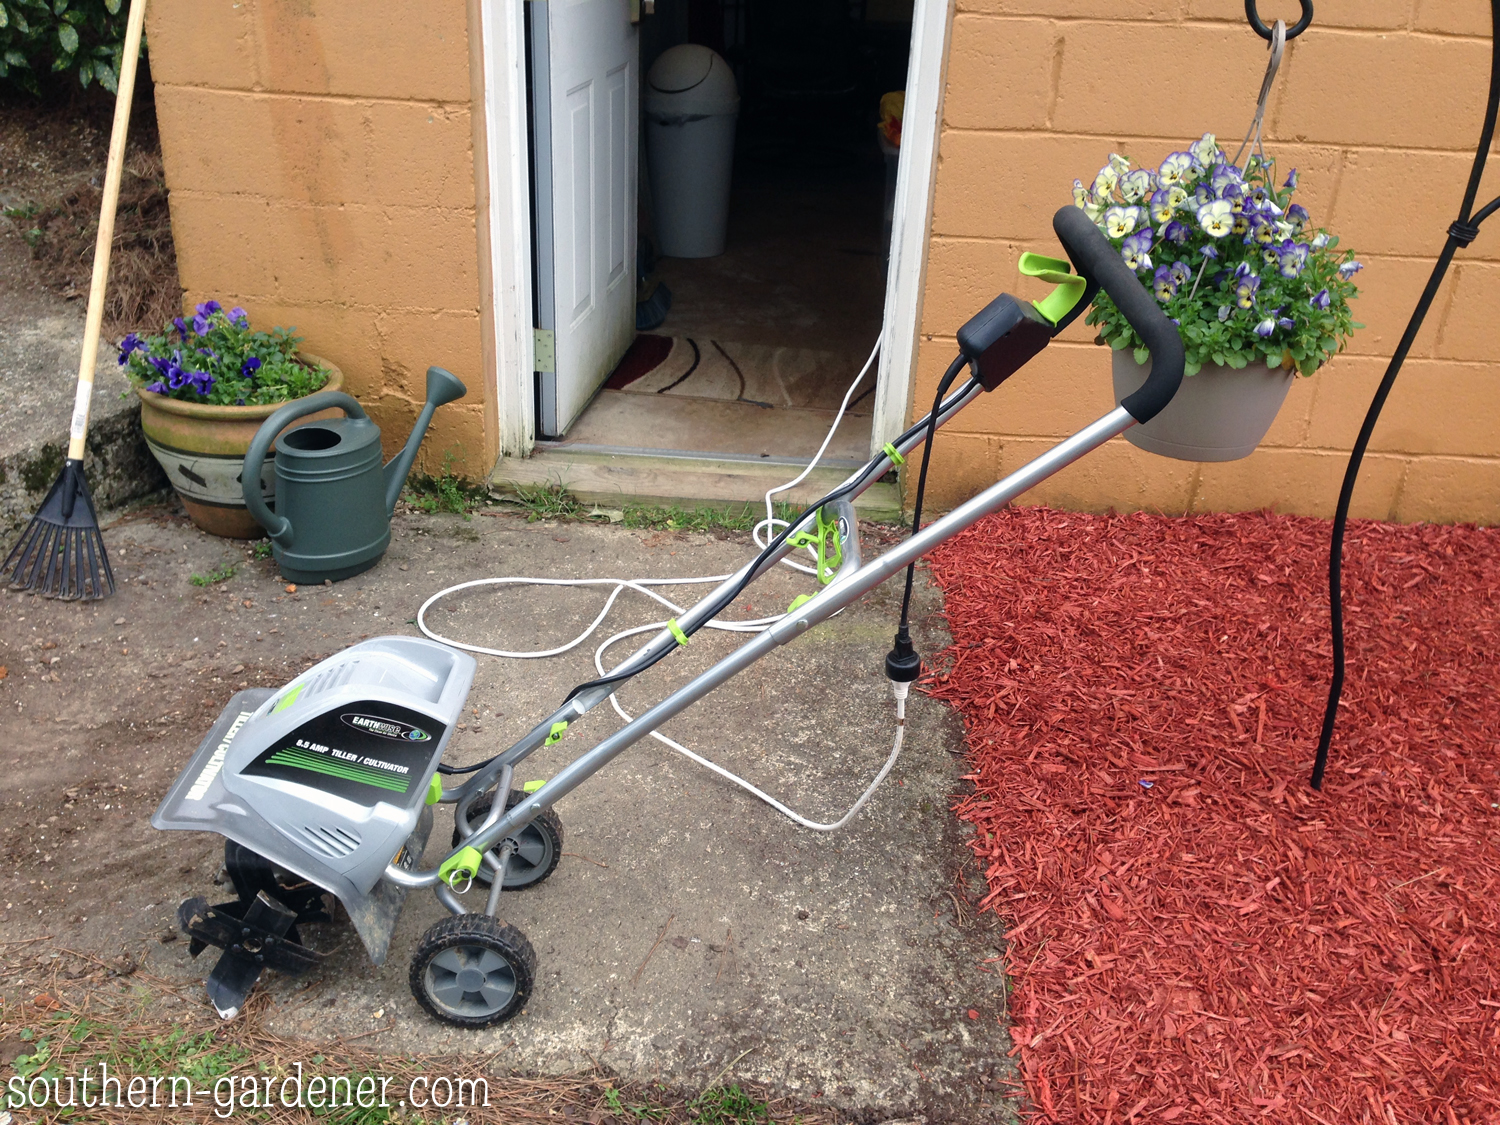
And then I used my electric tiller to get rid of a few high areas on the edges. I love this thing!! We got it from Amazon: Earthwise 8.5-Amp Electric Tiller/Cultivator. I use it in so many places around the house!
Day 1: 7 hours
So on January 27th, my Dad and I began the greenhouse construction. We started the day with a trip to Home Depot to get the 4×4 treated posts to build the frame the greenhouse would sit on, along with a few other materials we’d need. We spent the majority of the time leveling the area, assembling the 4×4 frame, and getting the aluminum greenhouse base frame assembled and attached to the 4×4 frame. We used 3 3/8″ galvanized adjustable L-angle plates from Home Depot to connect the posts on the inside corners, as well as a 3″ deck screw drilled in at an angle on top (sunken in so it sits below the wood and would not interfere with the aluminum frame when we sat it on top).
I went off the measurements from one of the reviews on Amazon for the frame measurements after I calculated to make sure they would indeed work. Once we’d attached the aluminum greenhouse base frame to the 4×4 wood frame, I was thinking the 8′ long posts should have been cut a little shorter because the front and back of the greenhouse (the shorter sides) were not lined up centered on the 4×4 posts.
You can see there is much more wooden post showing on the outside.
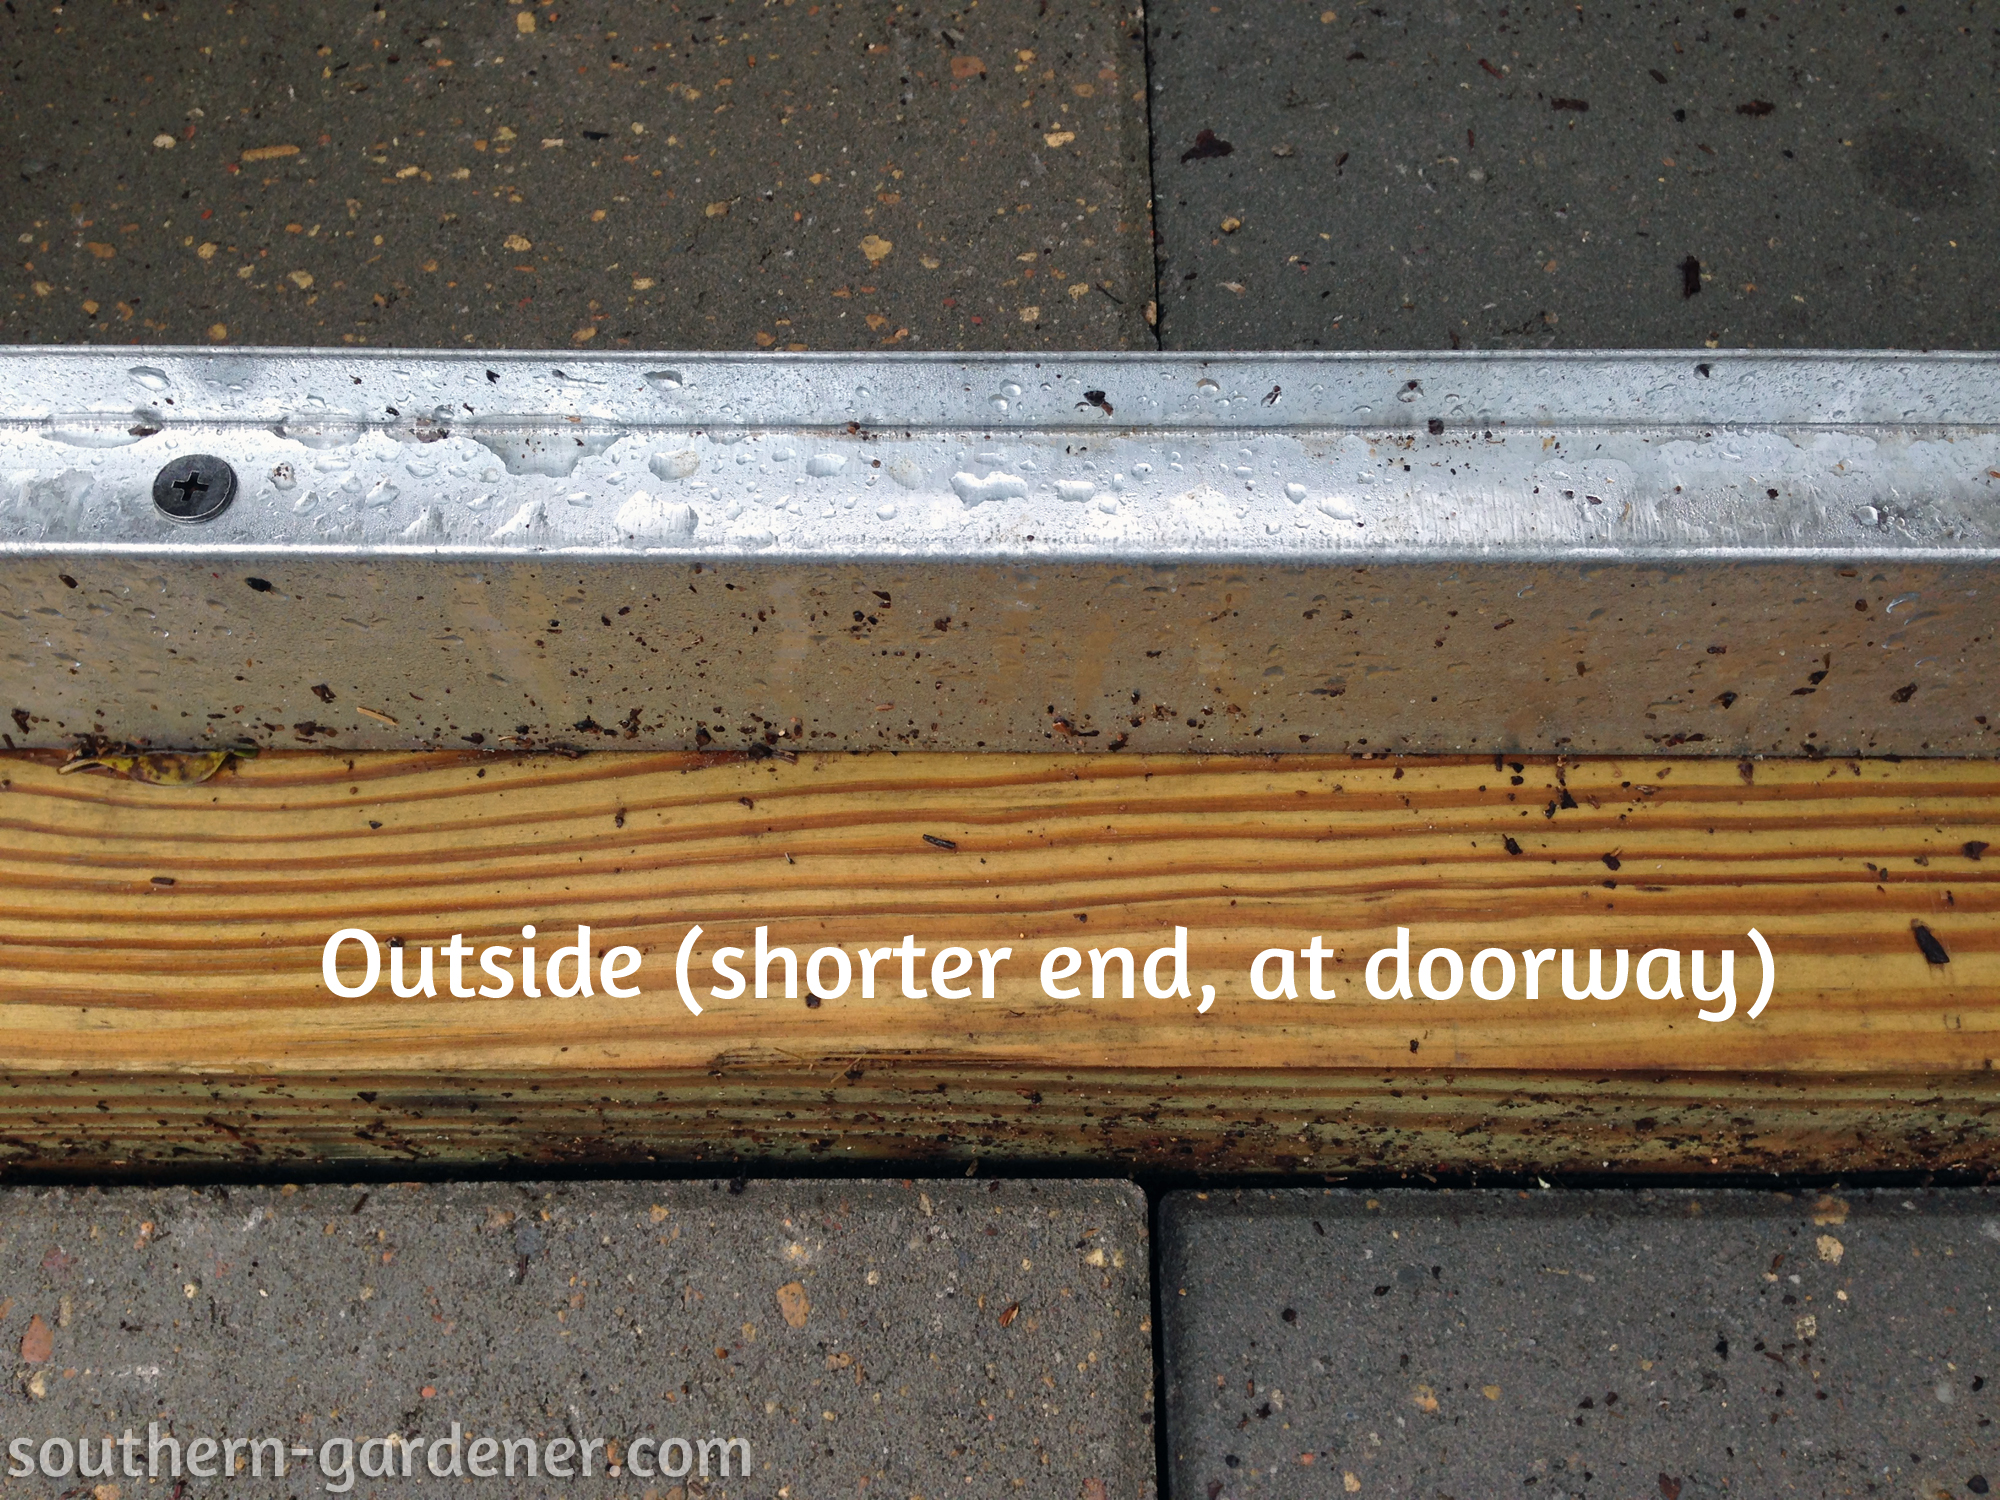
This is really a matter of personal preference. After the greenhouse was done, I was glad we had just left it this way so we’d have more inside inches for benches. However, if we had shortened the longer sides some, it would have only taken away about 2 1/2″ from the inside length, front to back (for table space). It’s not really a big deal to me since I plan to make flower beds down the long side facing the house and in front to the left and right of the door. By the way, the 8′ posts were actually 96.5″ instead of 96″.
The actual aluminum frame measurements are 72.5″ wide x 96″ long (give or take 1/4″). These are the measurements we used for the base frame and how we laid the pieces out to connect them.
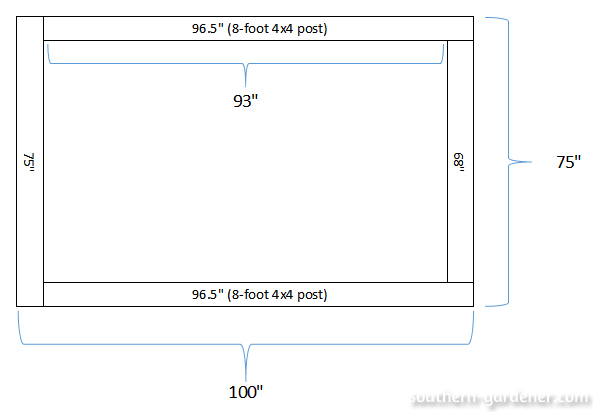
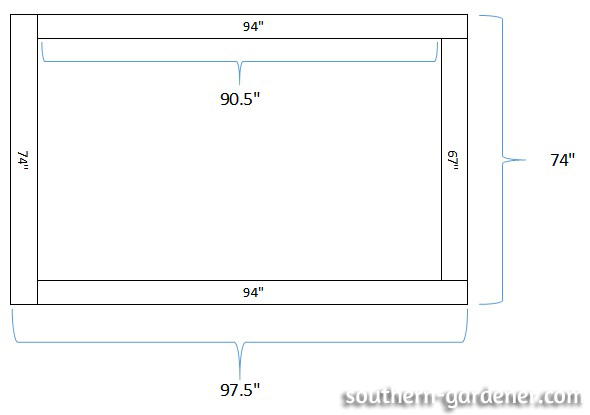
If you are not concerned about losing space inside, you can use the dimensions below so there isn’t as much of the 4×4 frame showing on the outside.
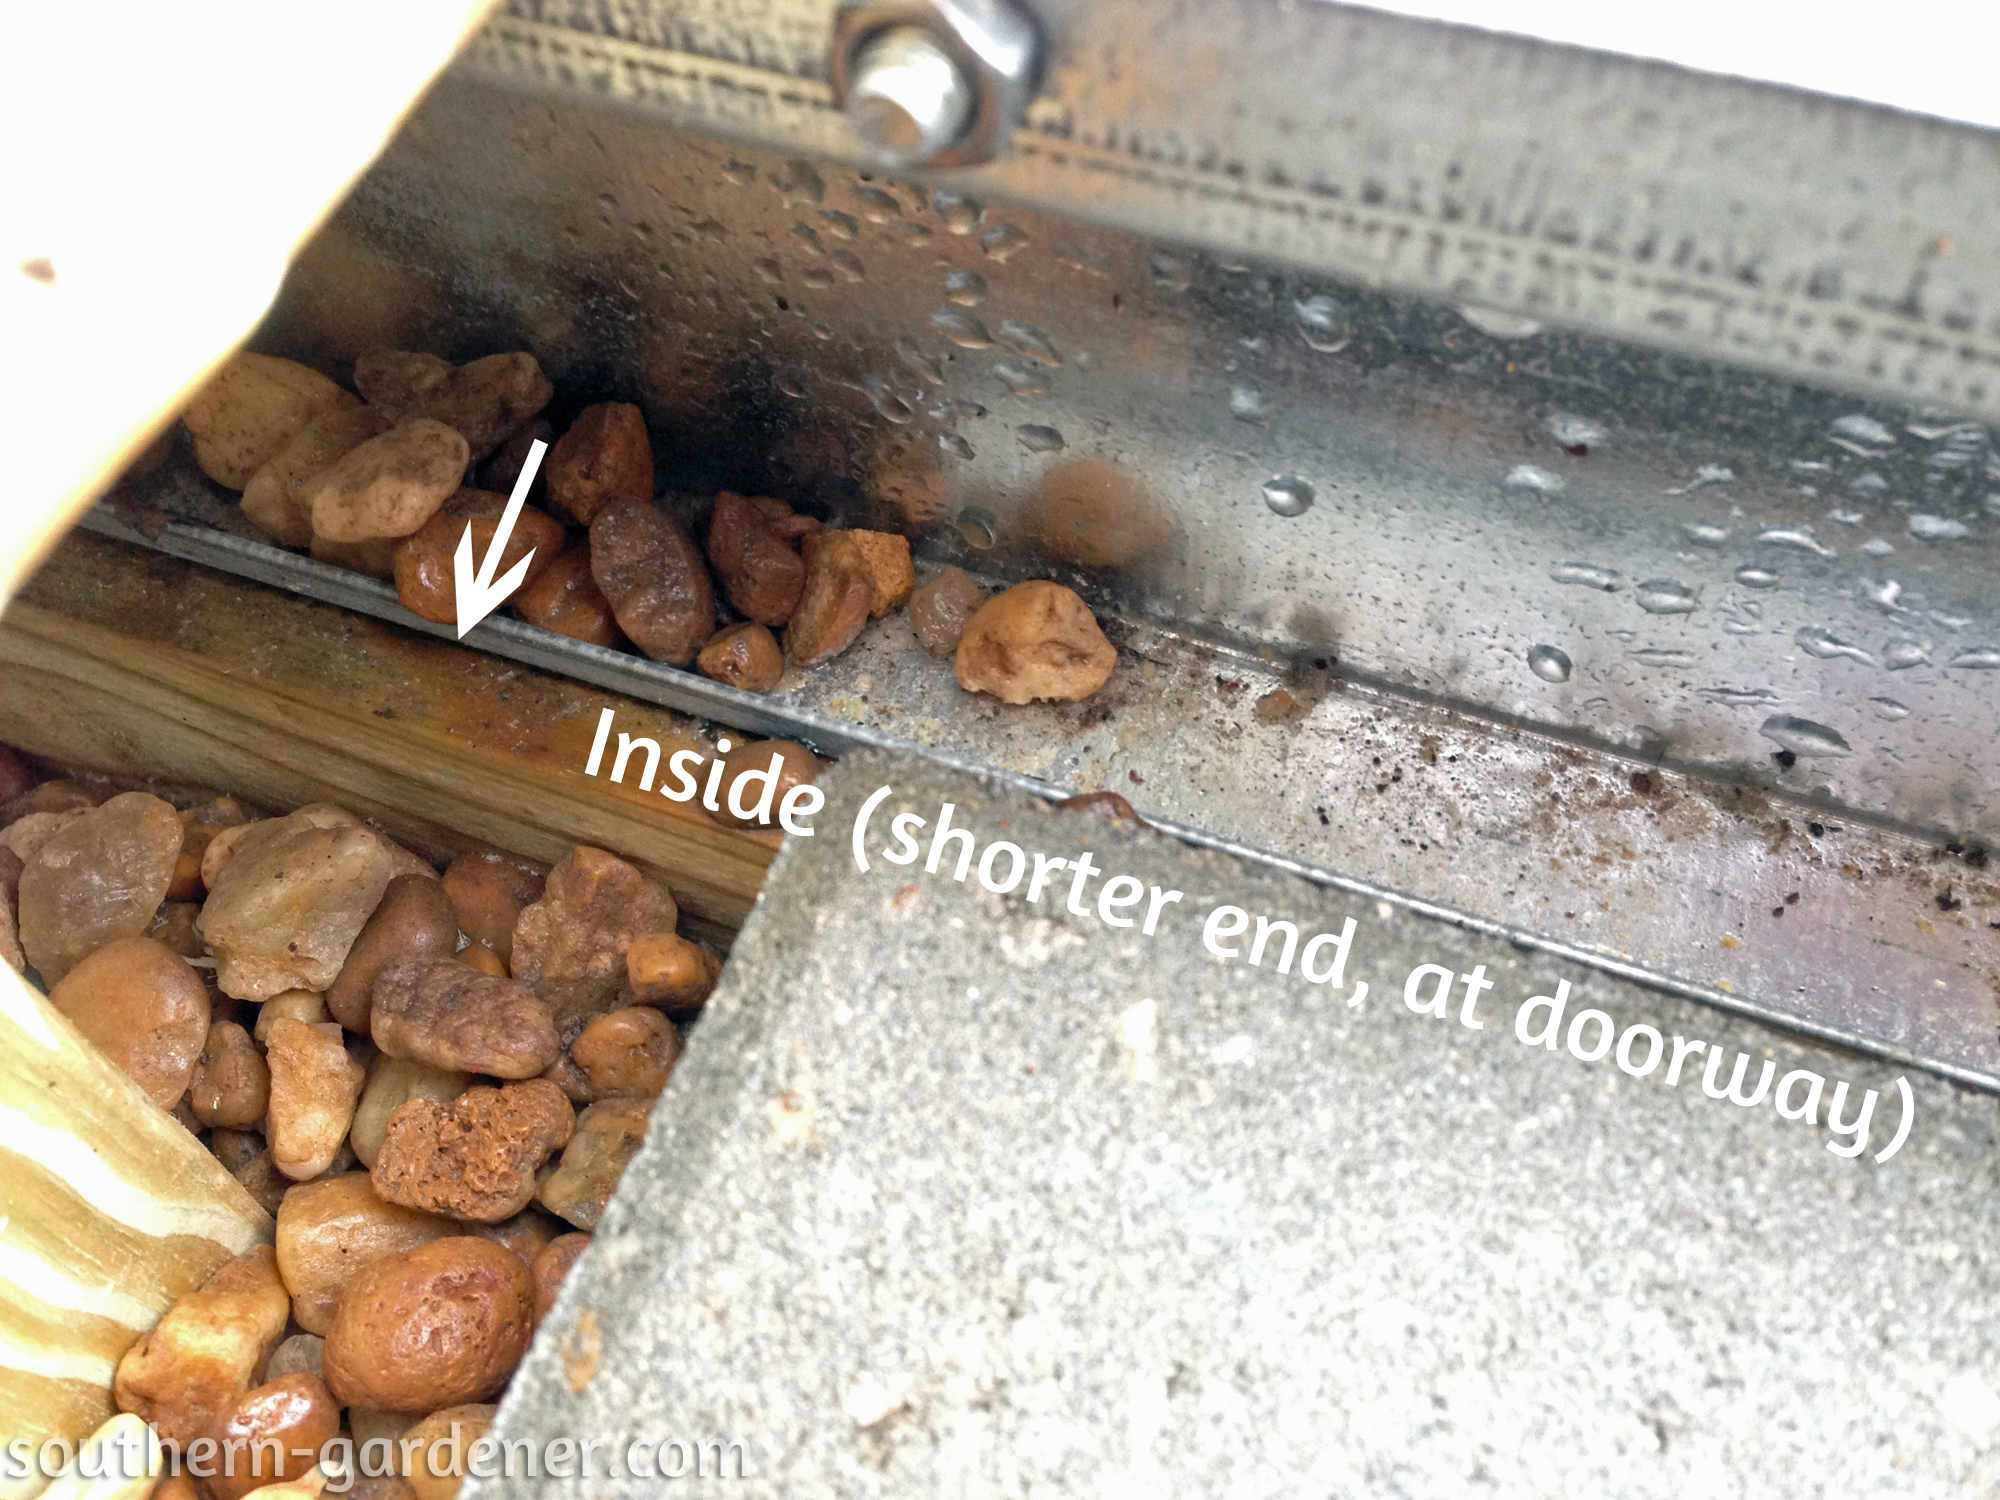
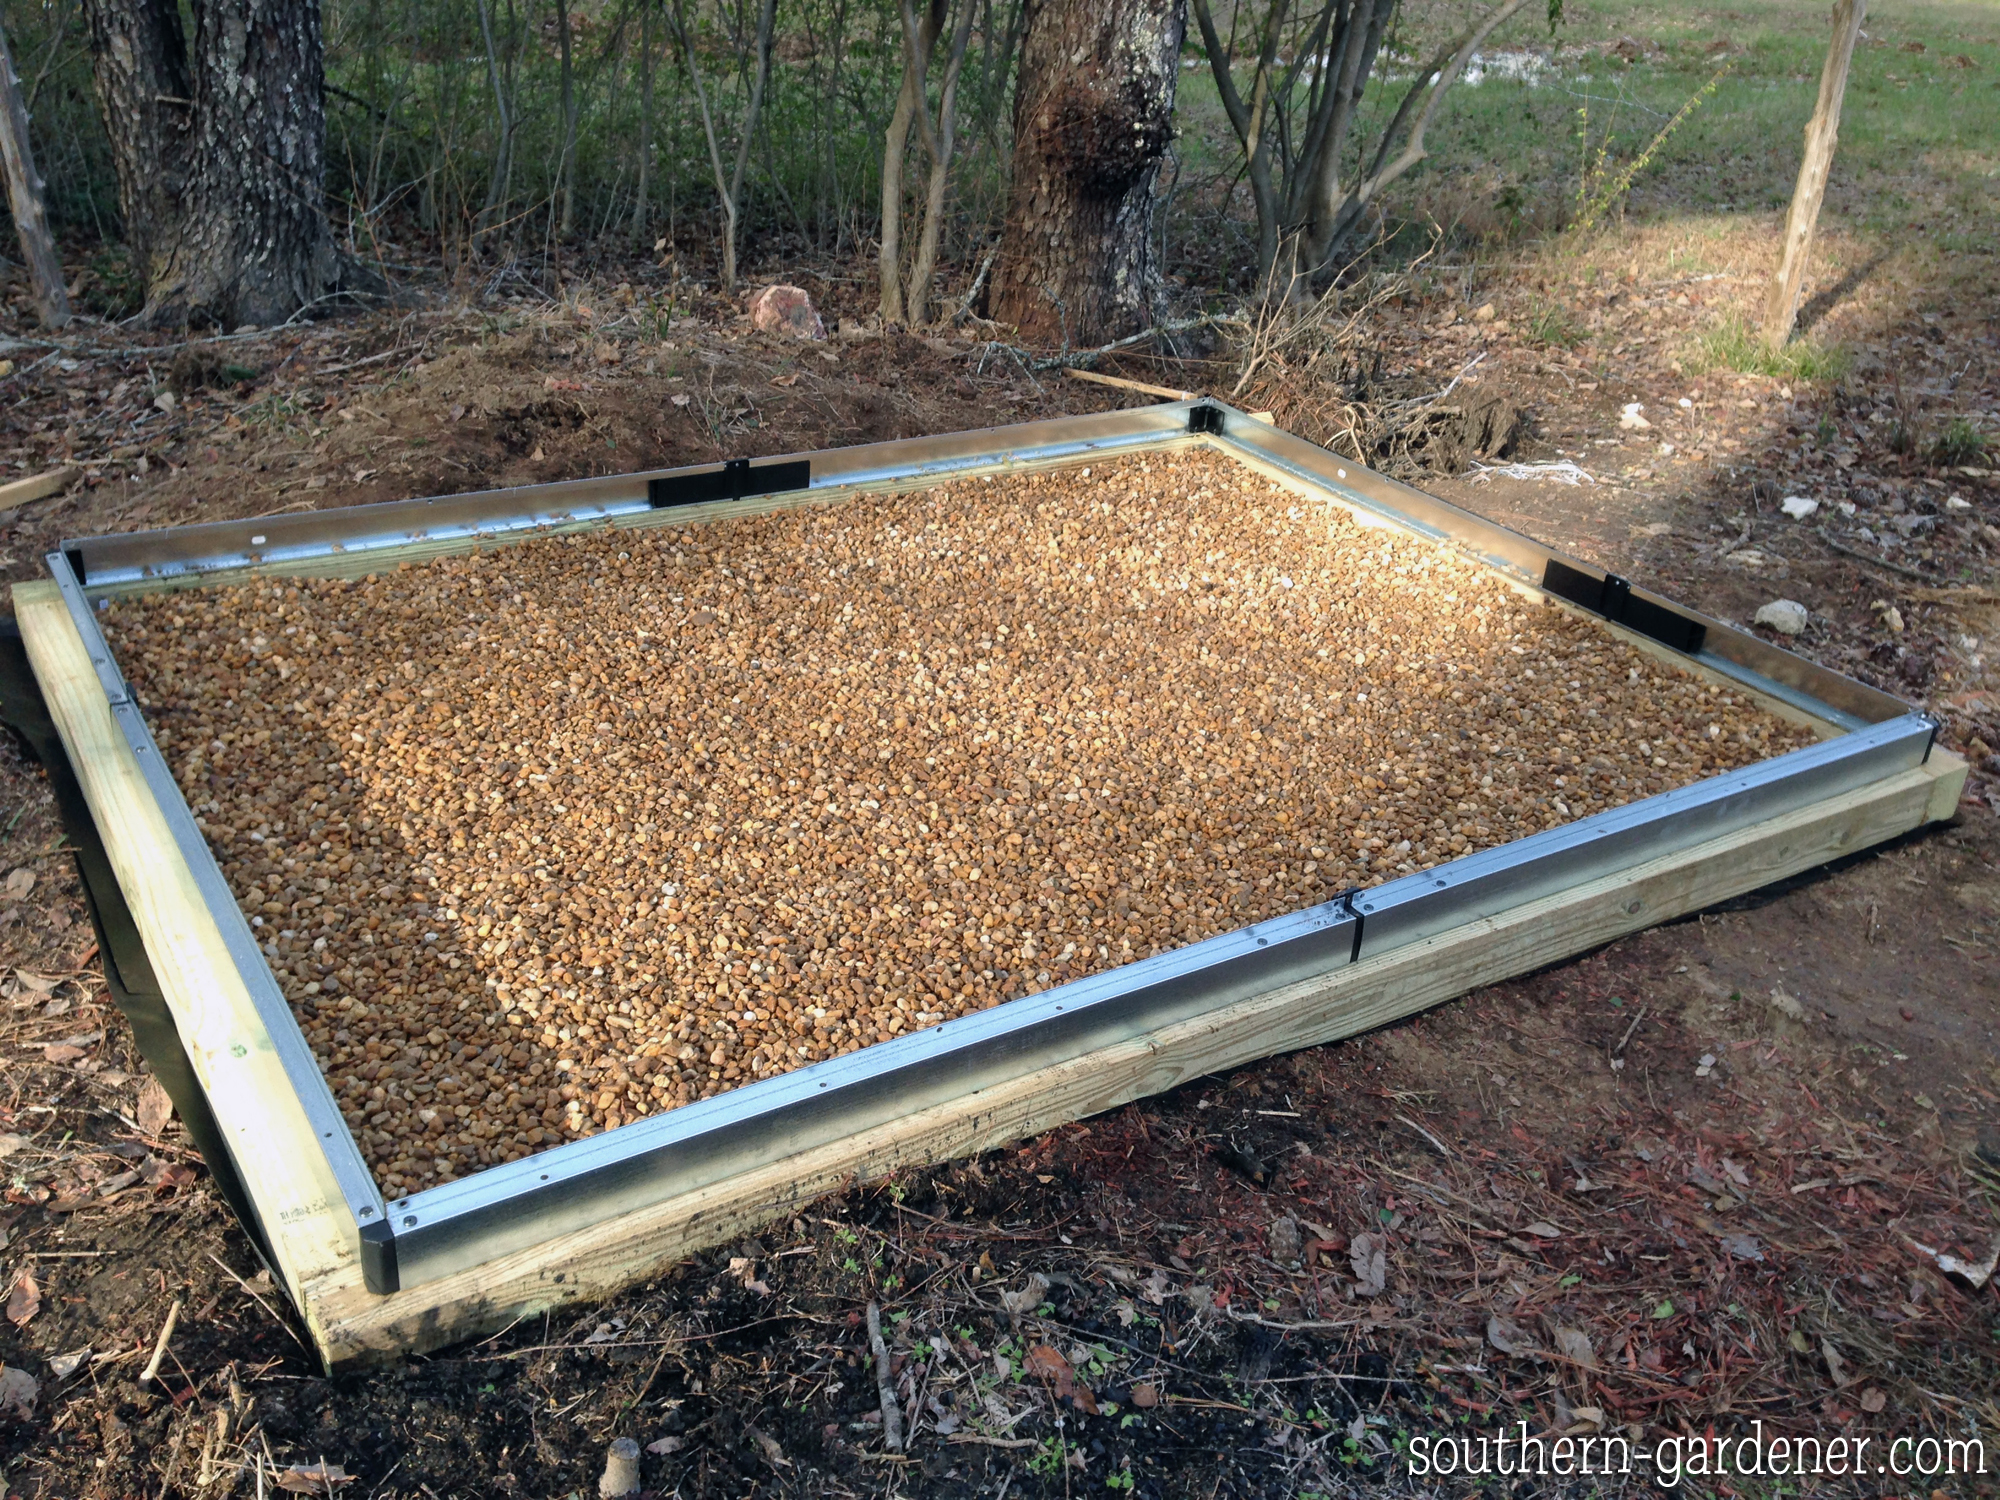
Once that was complete, I put down a double layer of Dewitt weed barrier fabric (from Amazon), going under the 4×4 frame to hold it in place. I skipped using fabric pins. Dad and I made a quick run to a local nursery to get half a cubic yard of pea gravel for just $30. Once we got the pea gravel down on top of the weed fabric, we called it a day.
Day 2: 6 hours
Day two consisted of constructing the lower section of frame for the greenhouse so we could slide in the panels. The instructions (which is a booklet of 63 pages of just diagrams with no words) were fairly understandable for the frame construction on the bottom half of the greenhouse. Once that was finished, it was time to slide in the panels, a task my Dad and I thought would be fairly easy. Wrong. The pieces touching the corners of the greenhouse were next to impossible to slide in. And it’s not like you can force them in, or you will start warping the panels and shifting the unstable framing pieces at this point. These panels were by far one of the most difficult things we encountered. We decided to use Dawn dish detergent to lubricate the edges that connect at the corners.
Let me warn you. If you try to put force into sliding these panels in without some type of lubricant and then decide to go with lubricant because the panels will not budge otherwise, DO NOT put your full force into pushing them in with lubricant. I made that mistake, and the first panel slid way easier than I expected. This resulted in my hand hitting the top of the aluminum framing piece, and it took off about 1/16″ layer of skin. OUCH!

There were still some panels that did not slide as well as we’d liked, even with Dawn detergent lubricating them. For those, we took a flat-head screwdriver and widen the channel just a tiny, tiny bit. Also let me say this. You need 2 people to put this together. Some reviewers on the greenhouse say they put it together by themselves. I have no idea how some people managed to put this thing together without any help. I am a very handy person and built my own aquarium stand and my own workshop bench table that measures 119″ long, but there is no way I would have been able to assemble this on my own. You need 2 people for some parts so one can hold pieces in place while the other person attaches stuff, etc. My dad volunteered to help me when I mentioned I’d purchased the greenhouse, and I’m glad I took him up on his offer! {You can see the bottle of Dawn detergent on the far left in this picture on the stack of pavers! 😆 )
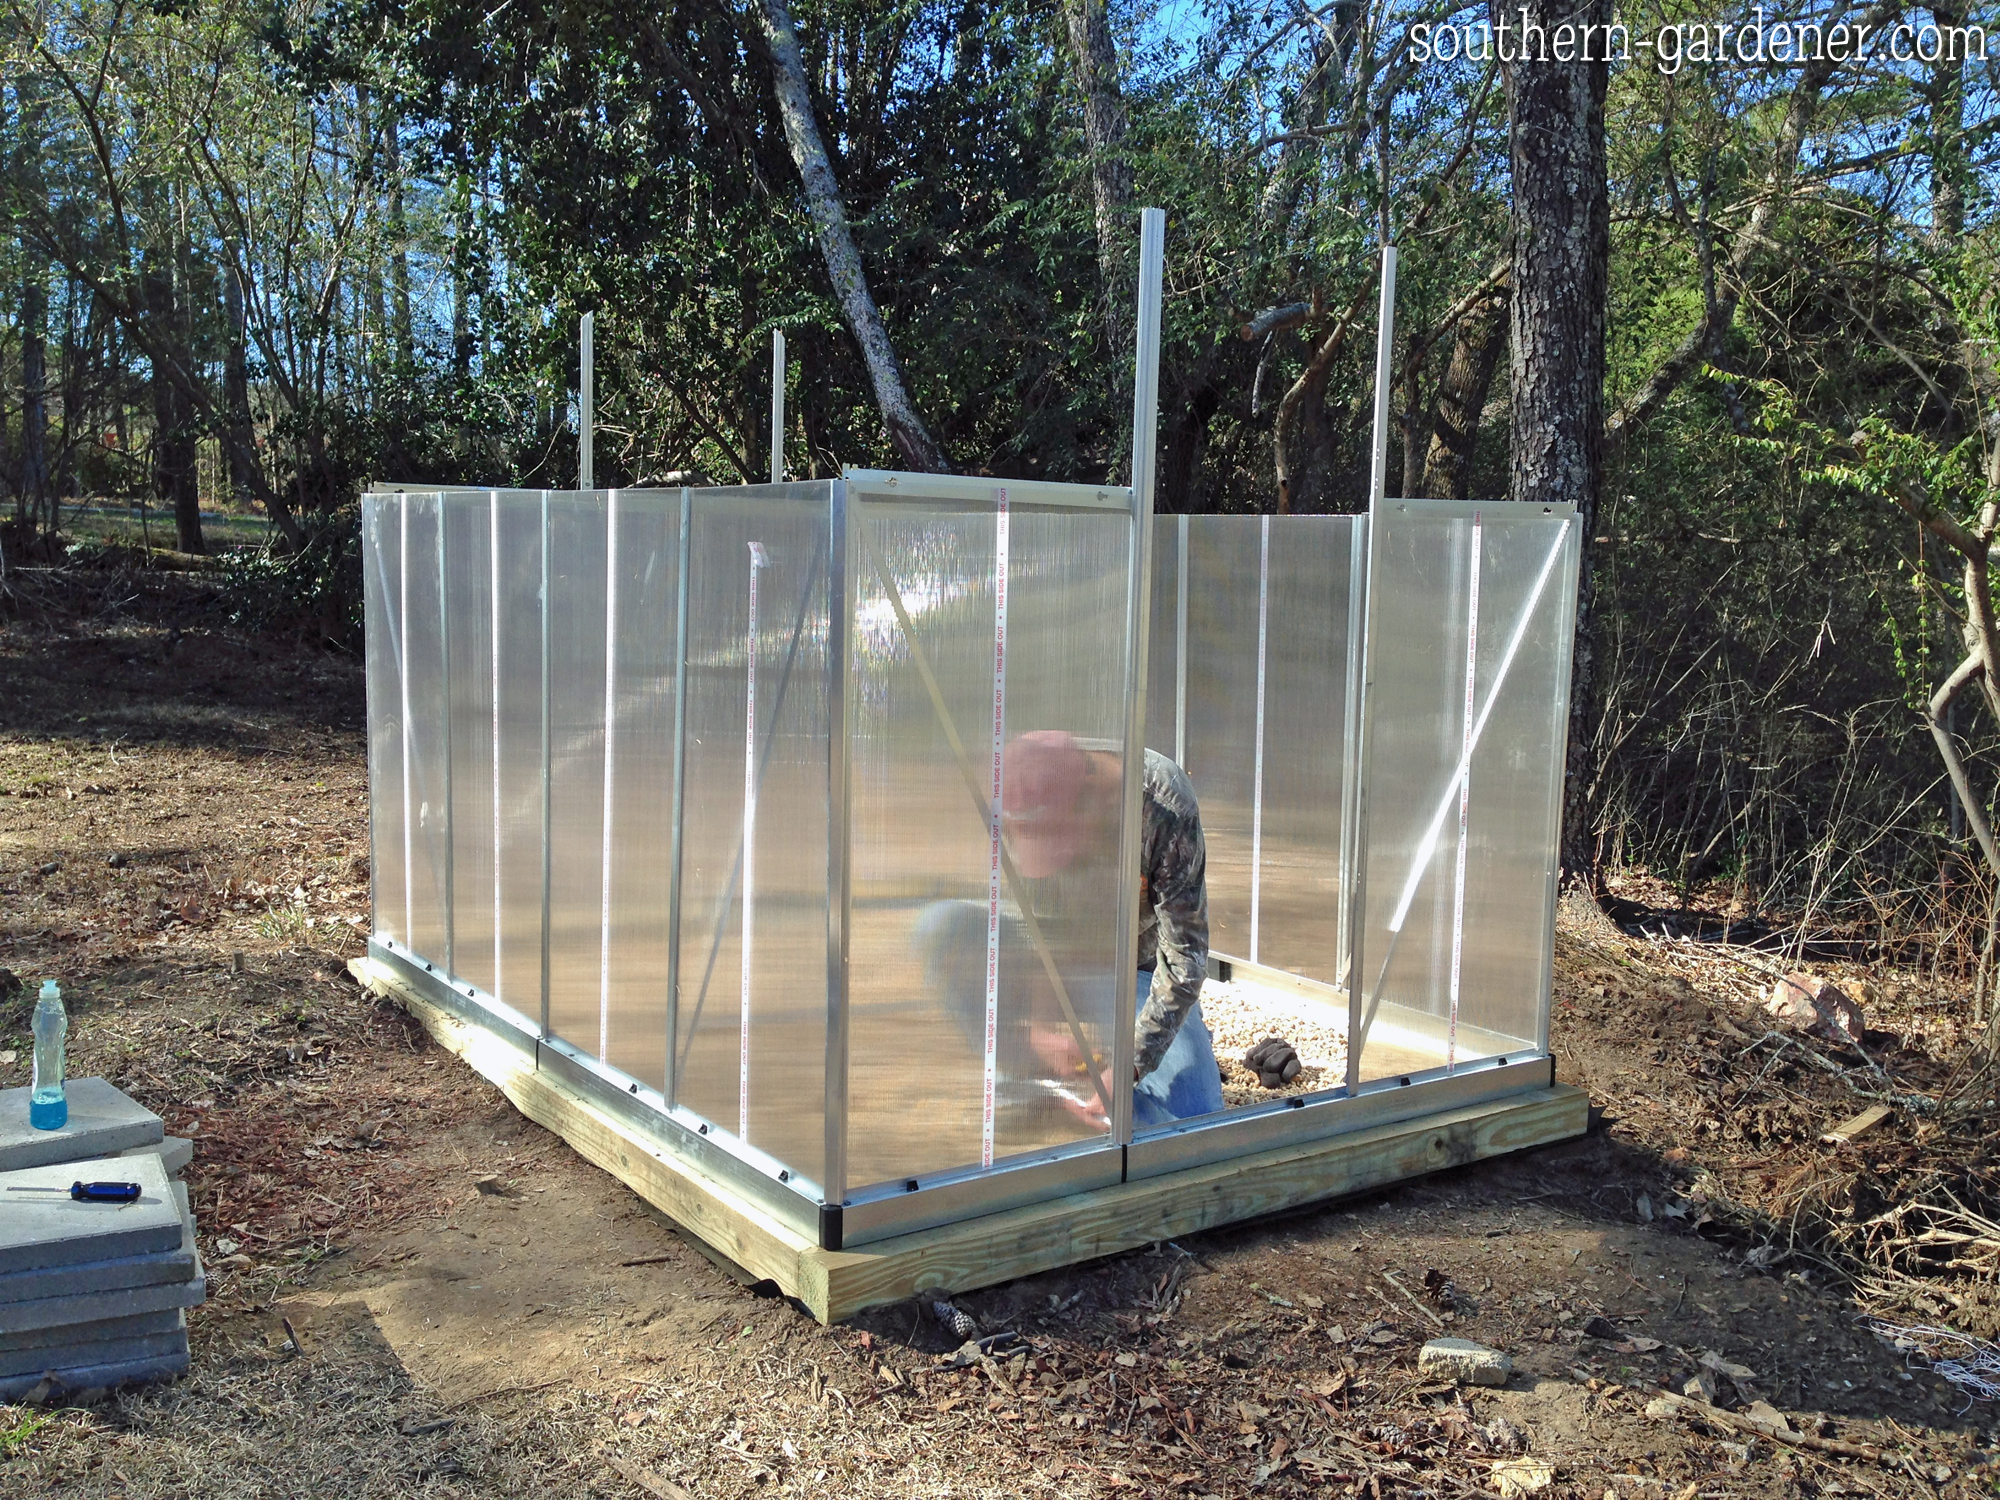
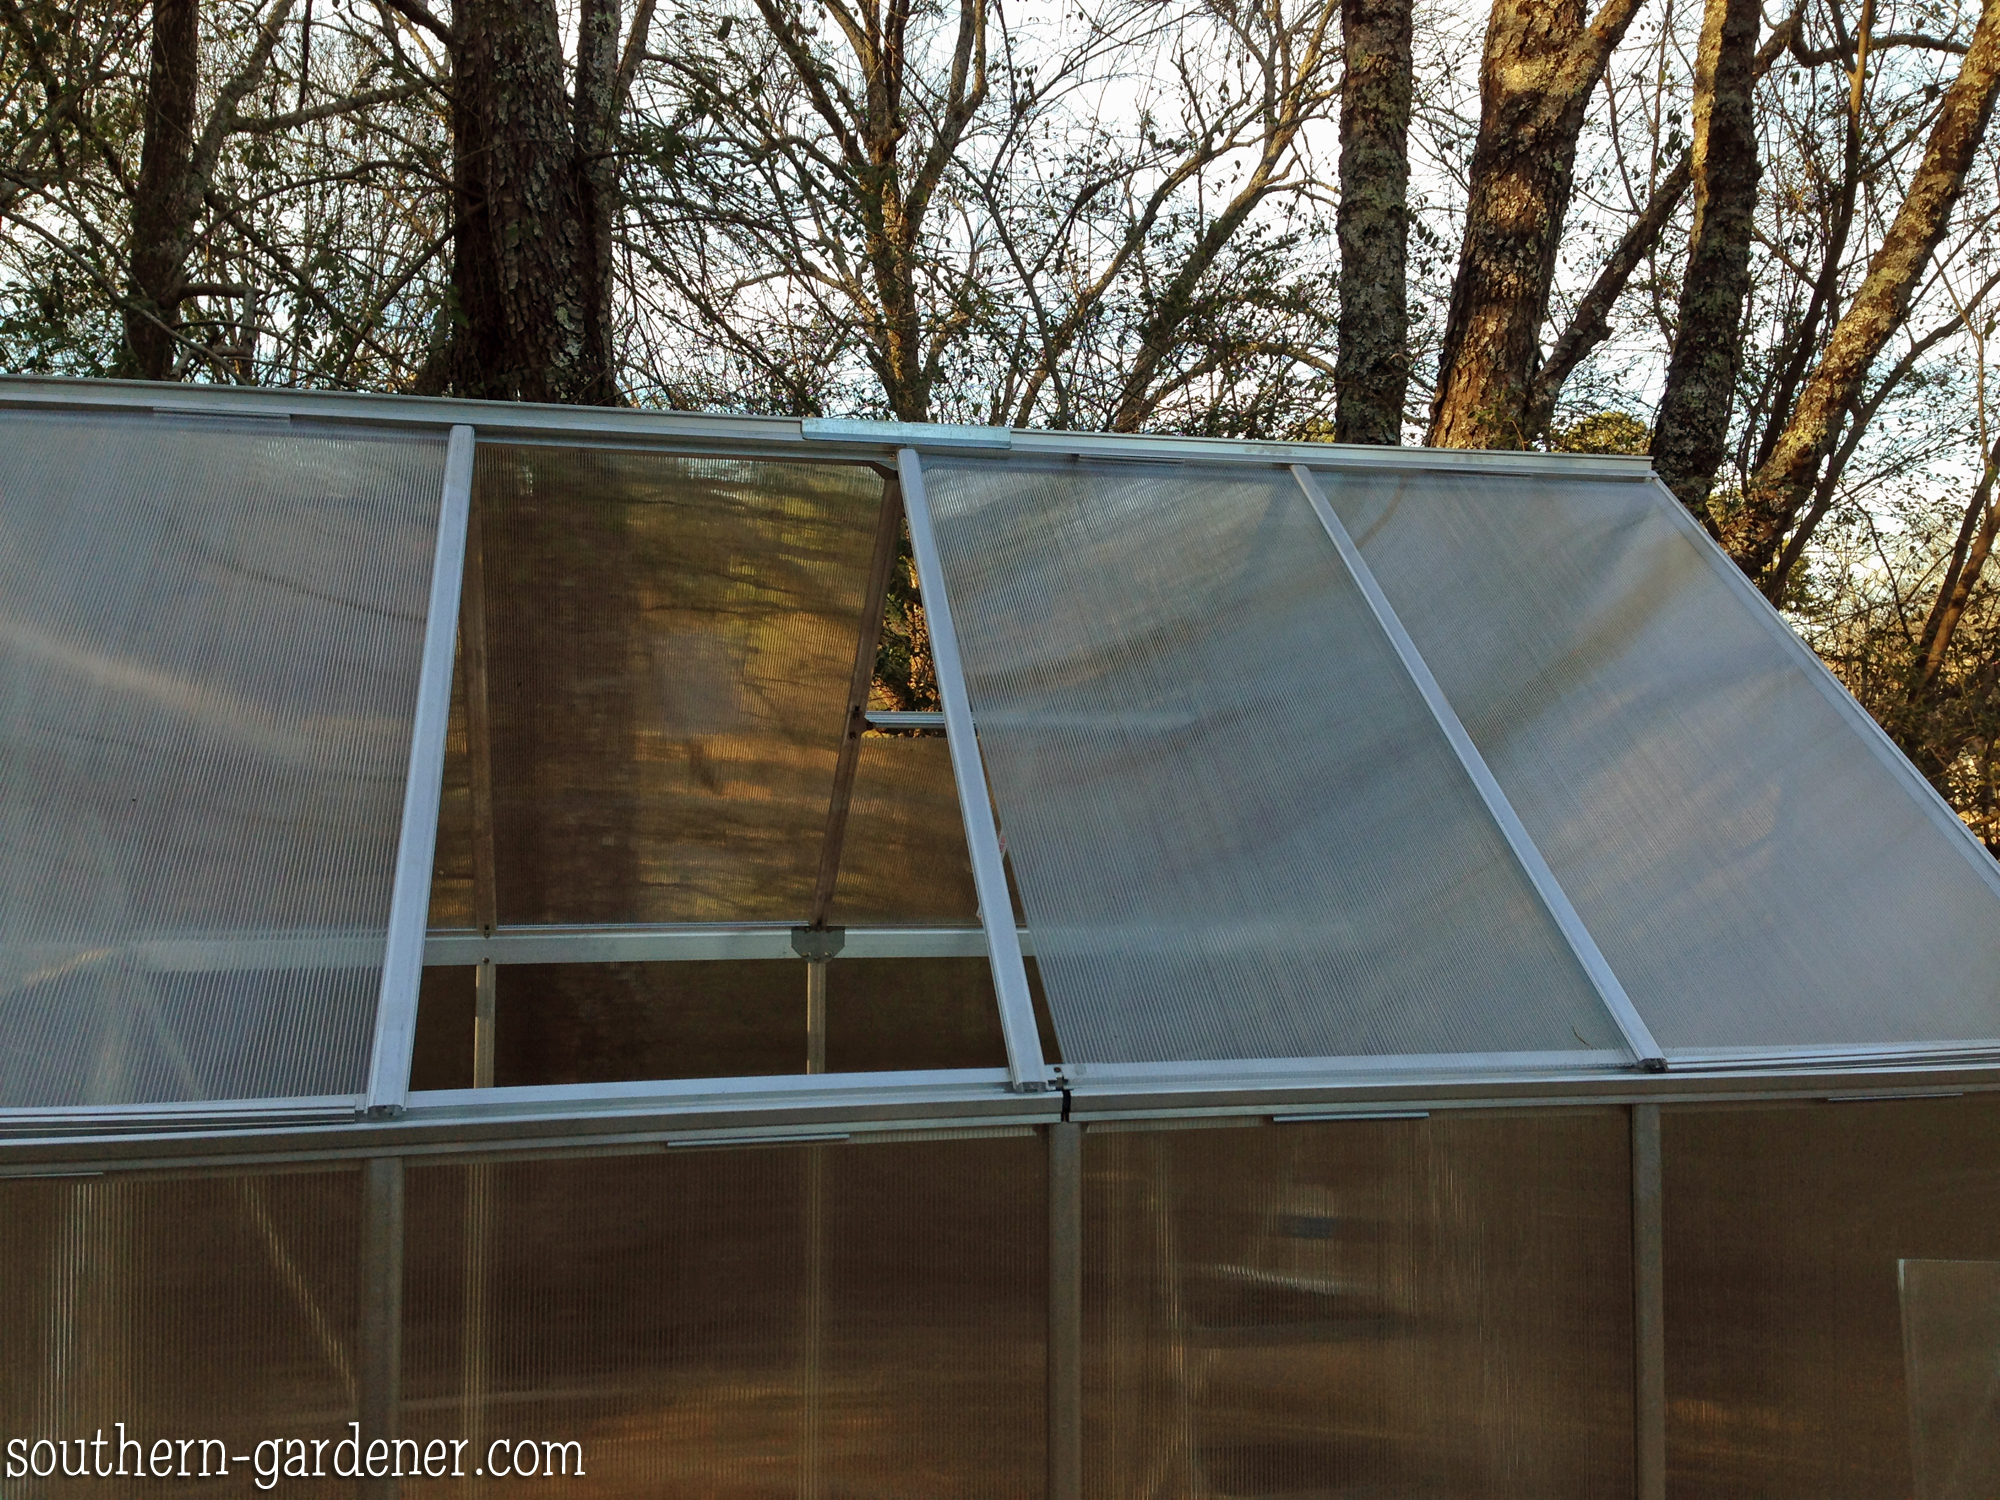
Day two ended with having all the lower panels in place, and we put together the A-frame that will go above the door (seen inside the greenhouse below). We did not want to attach it to the greenhouse without being able to do the other end so we could get the connecting top beam up for support.
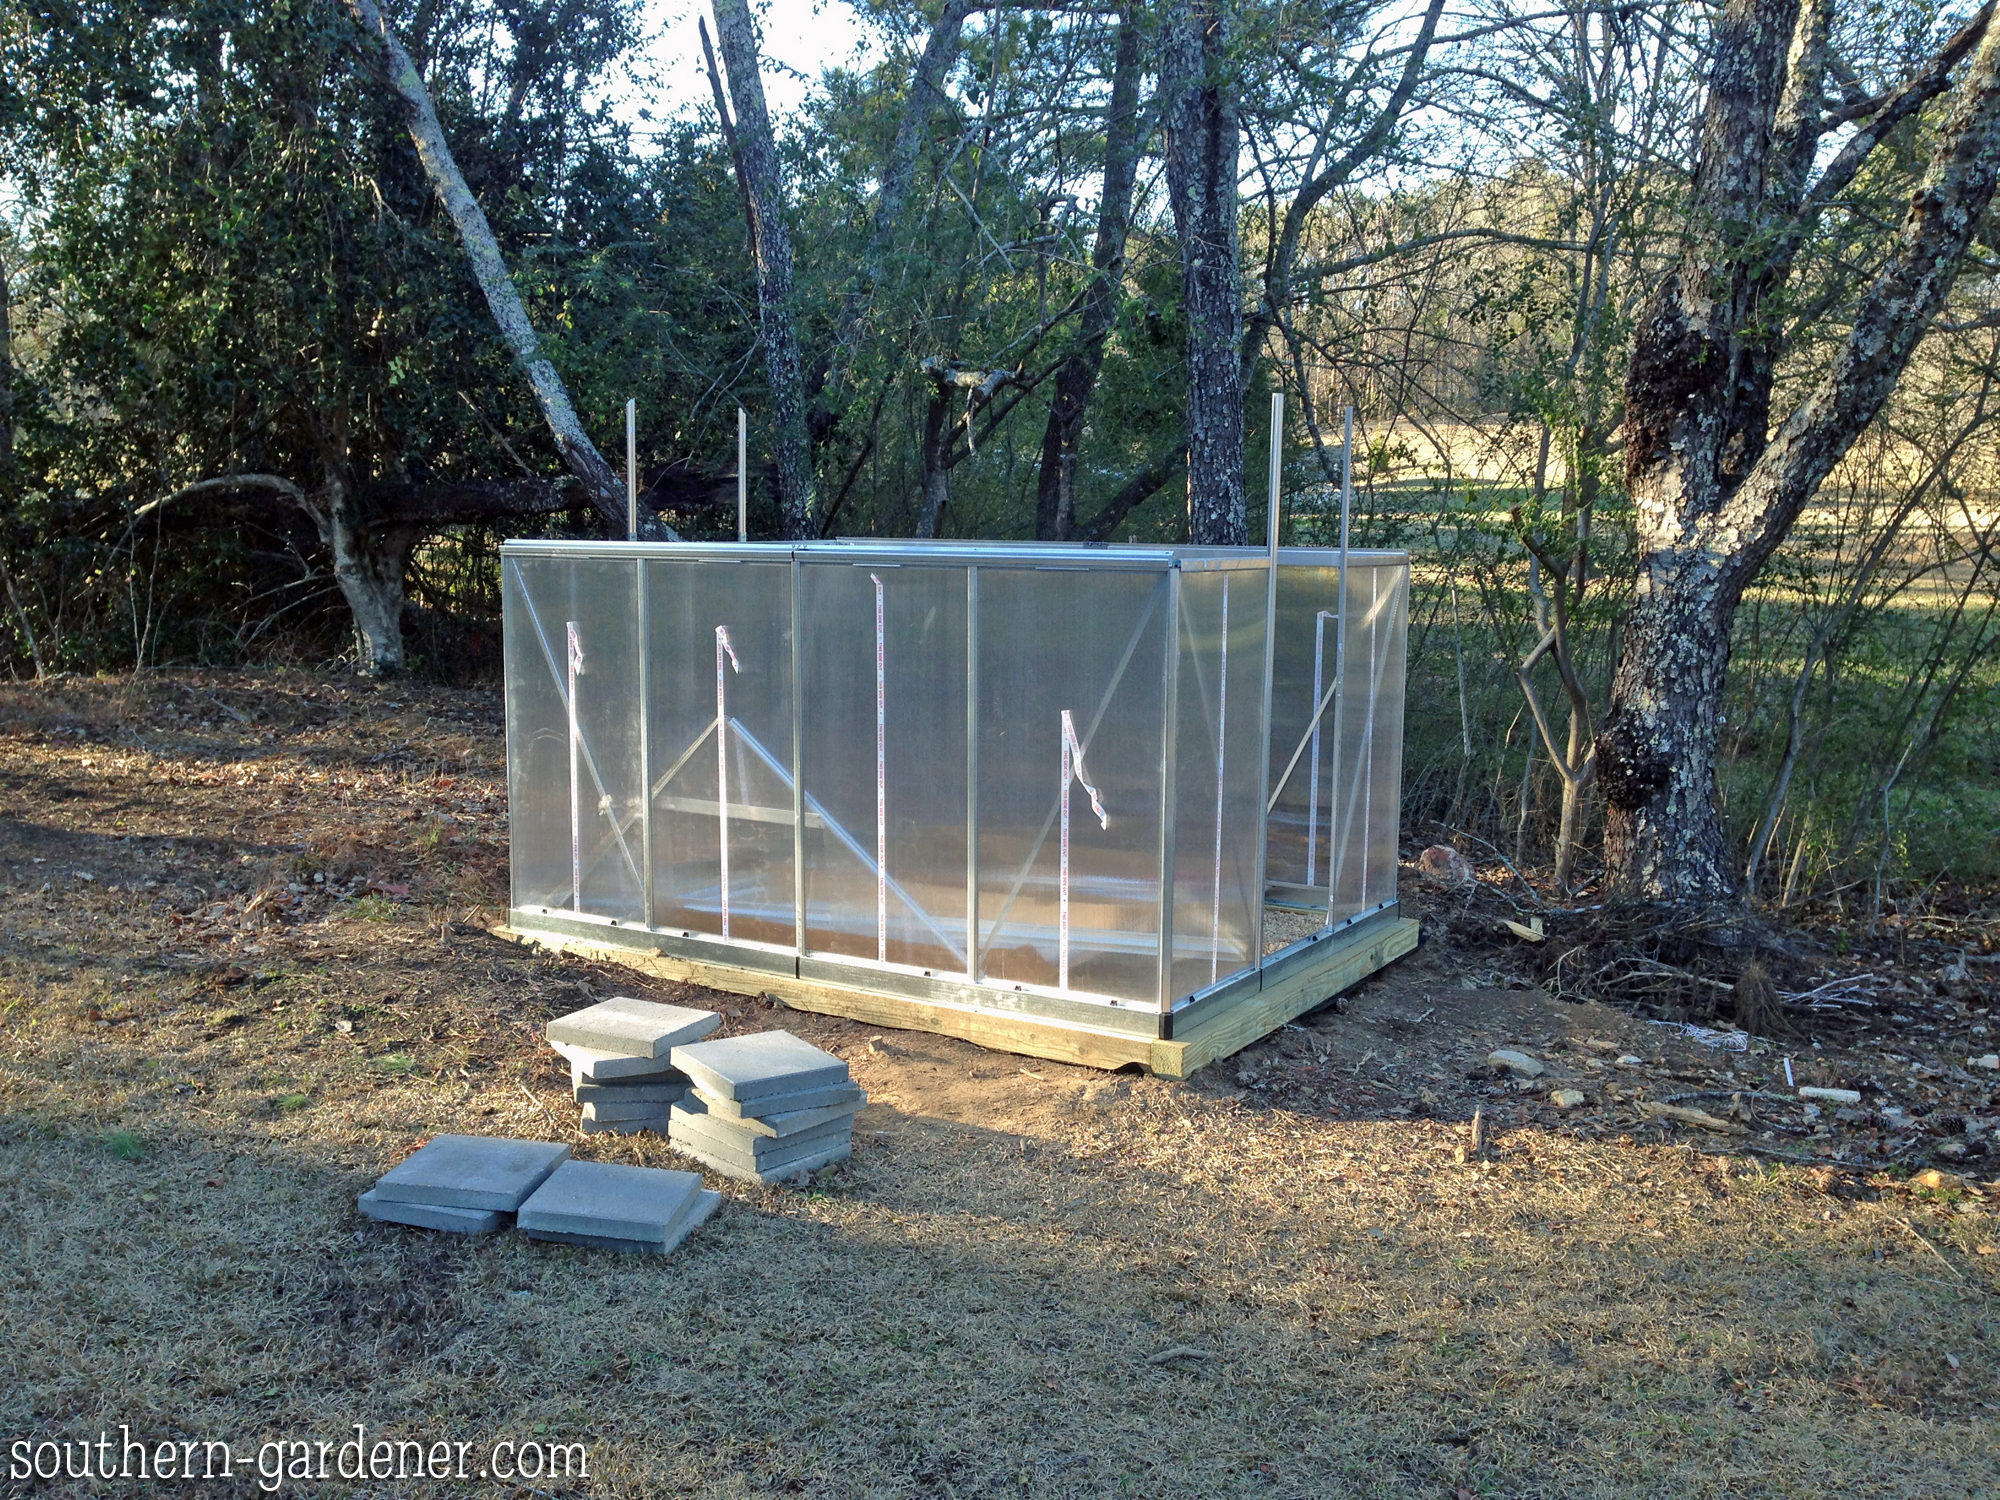
Day 3: 3 1/2 hours
The instructions for the top is where it got tricky with us. A few words here and there on the diagram would have been appreciated and would have made this part go a lot faster. We eventually figured it out.
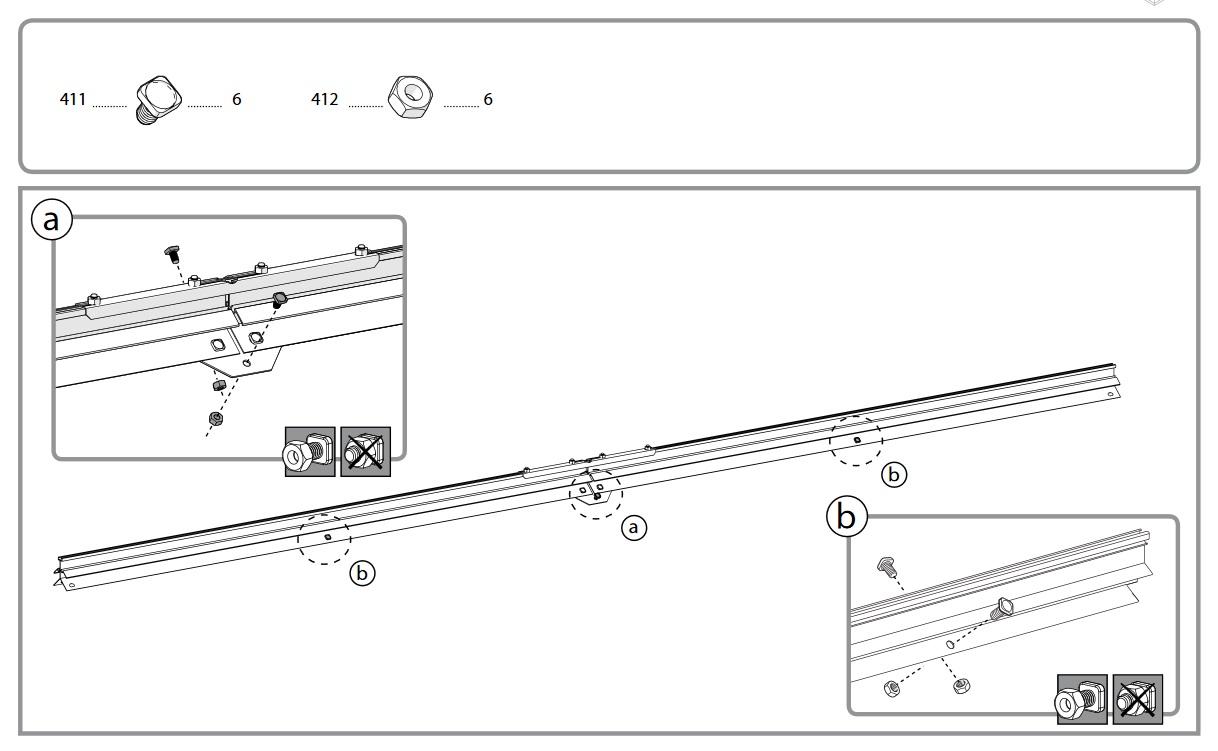
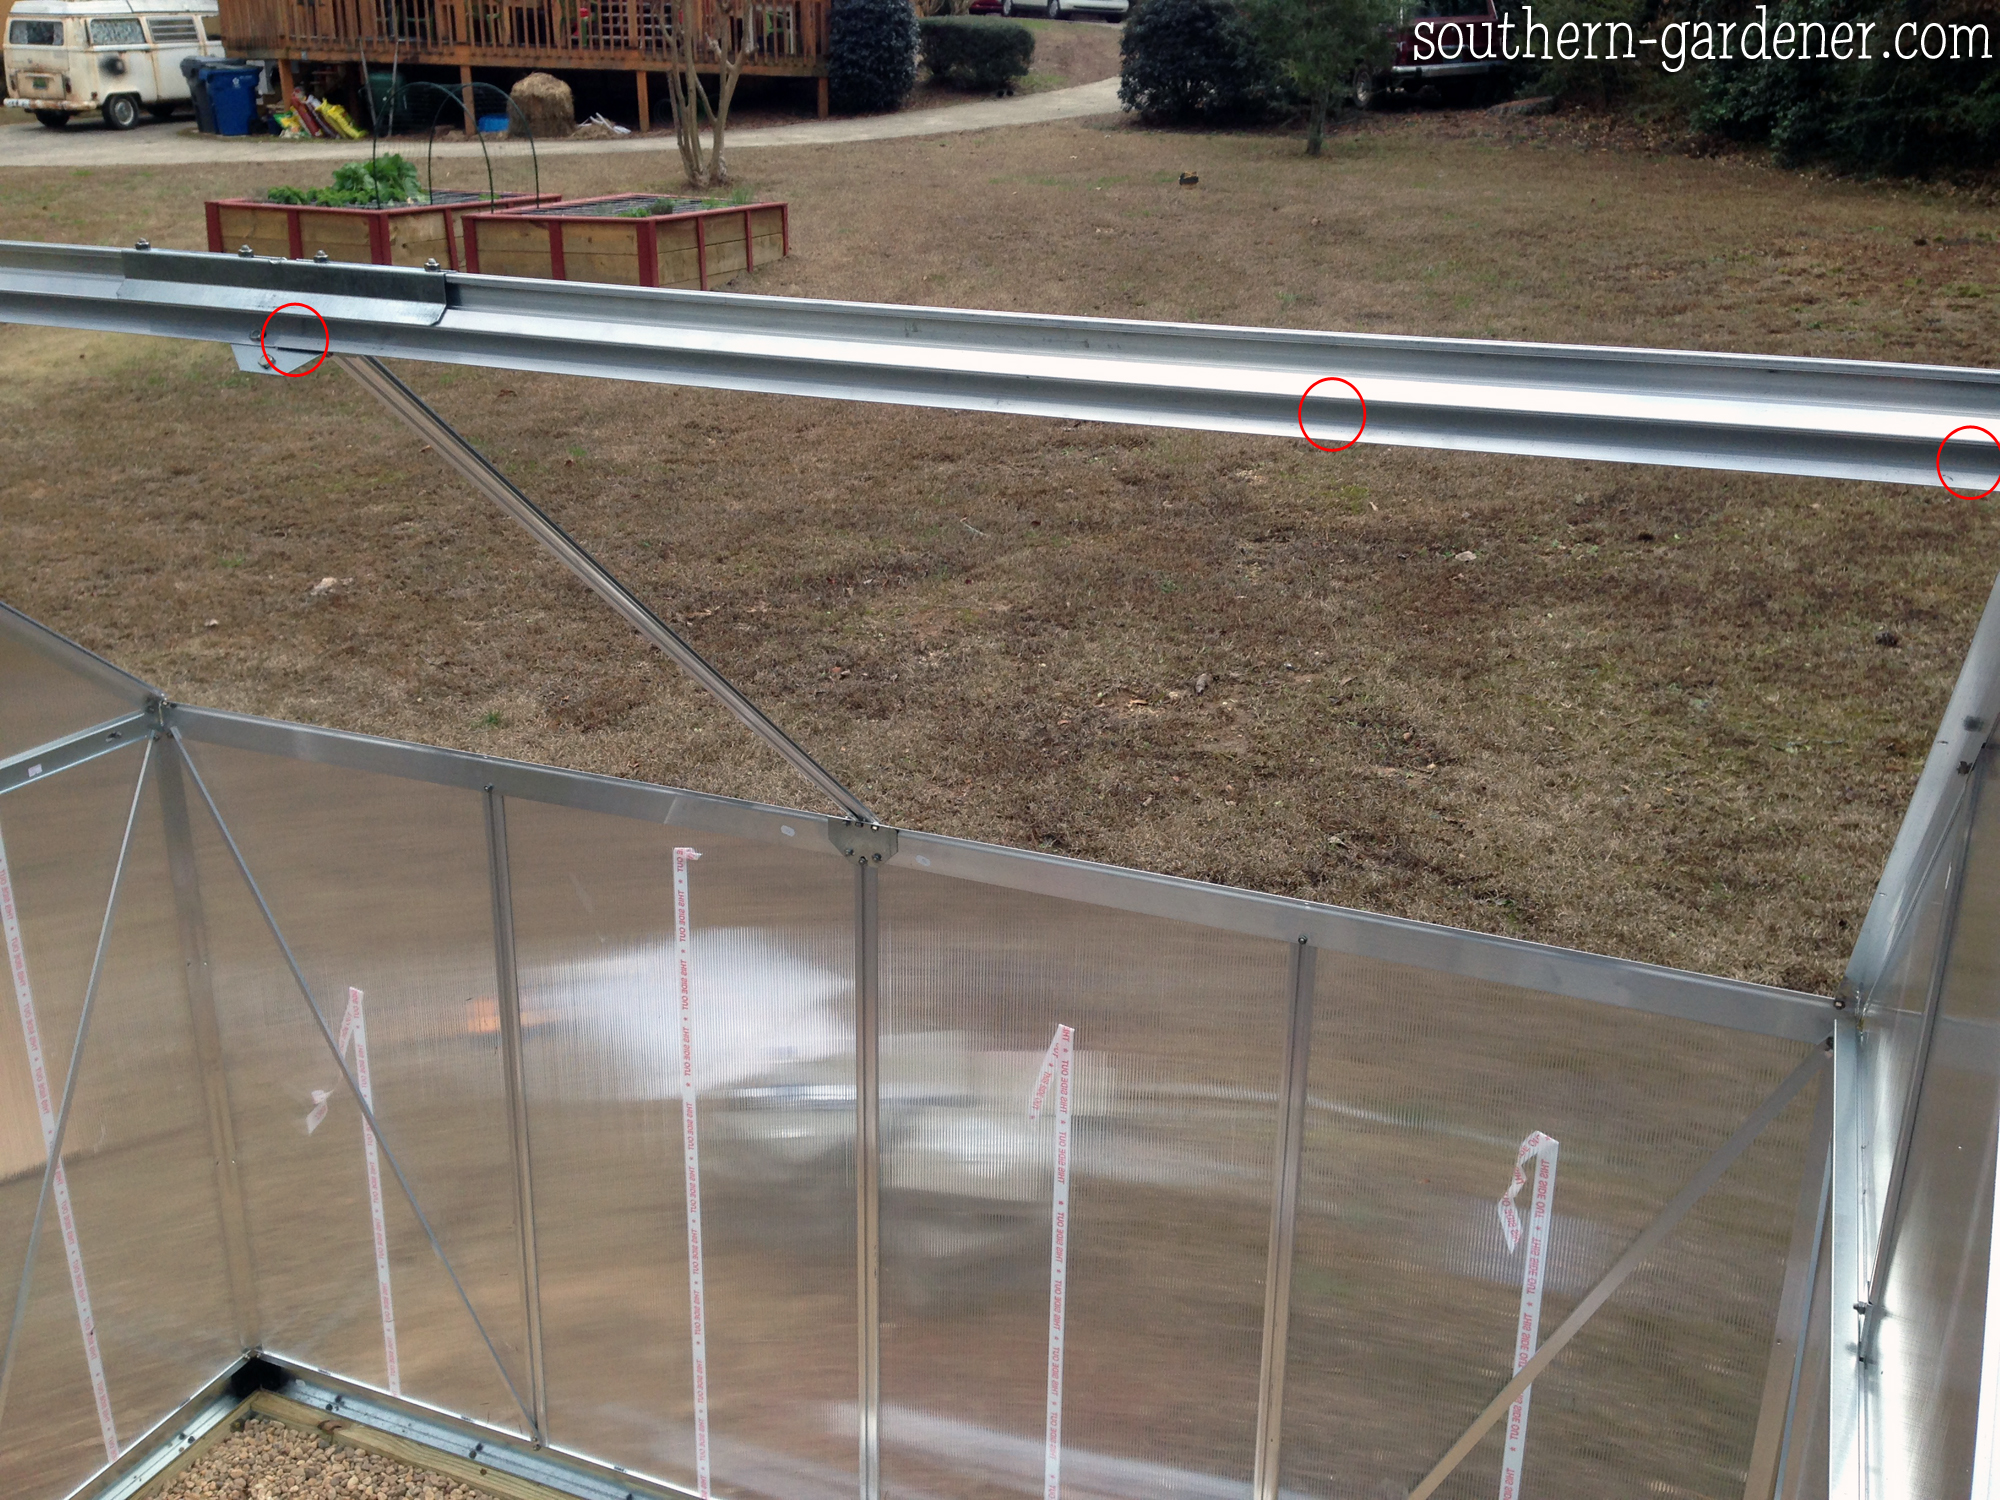
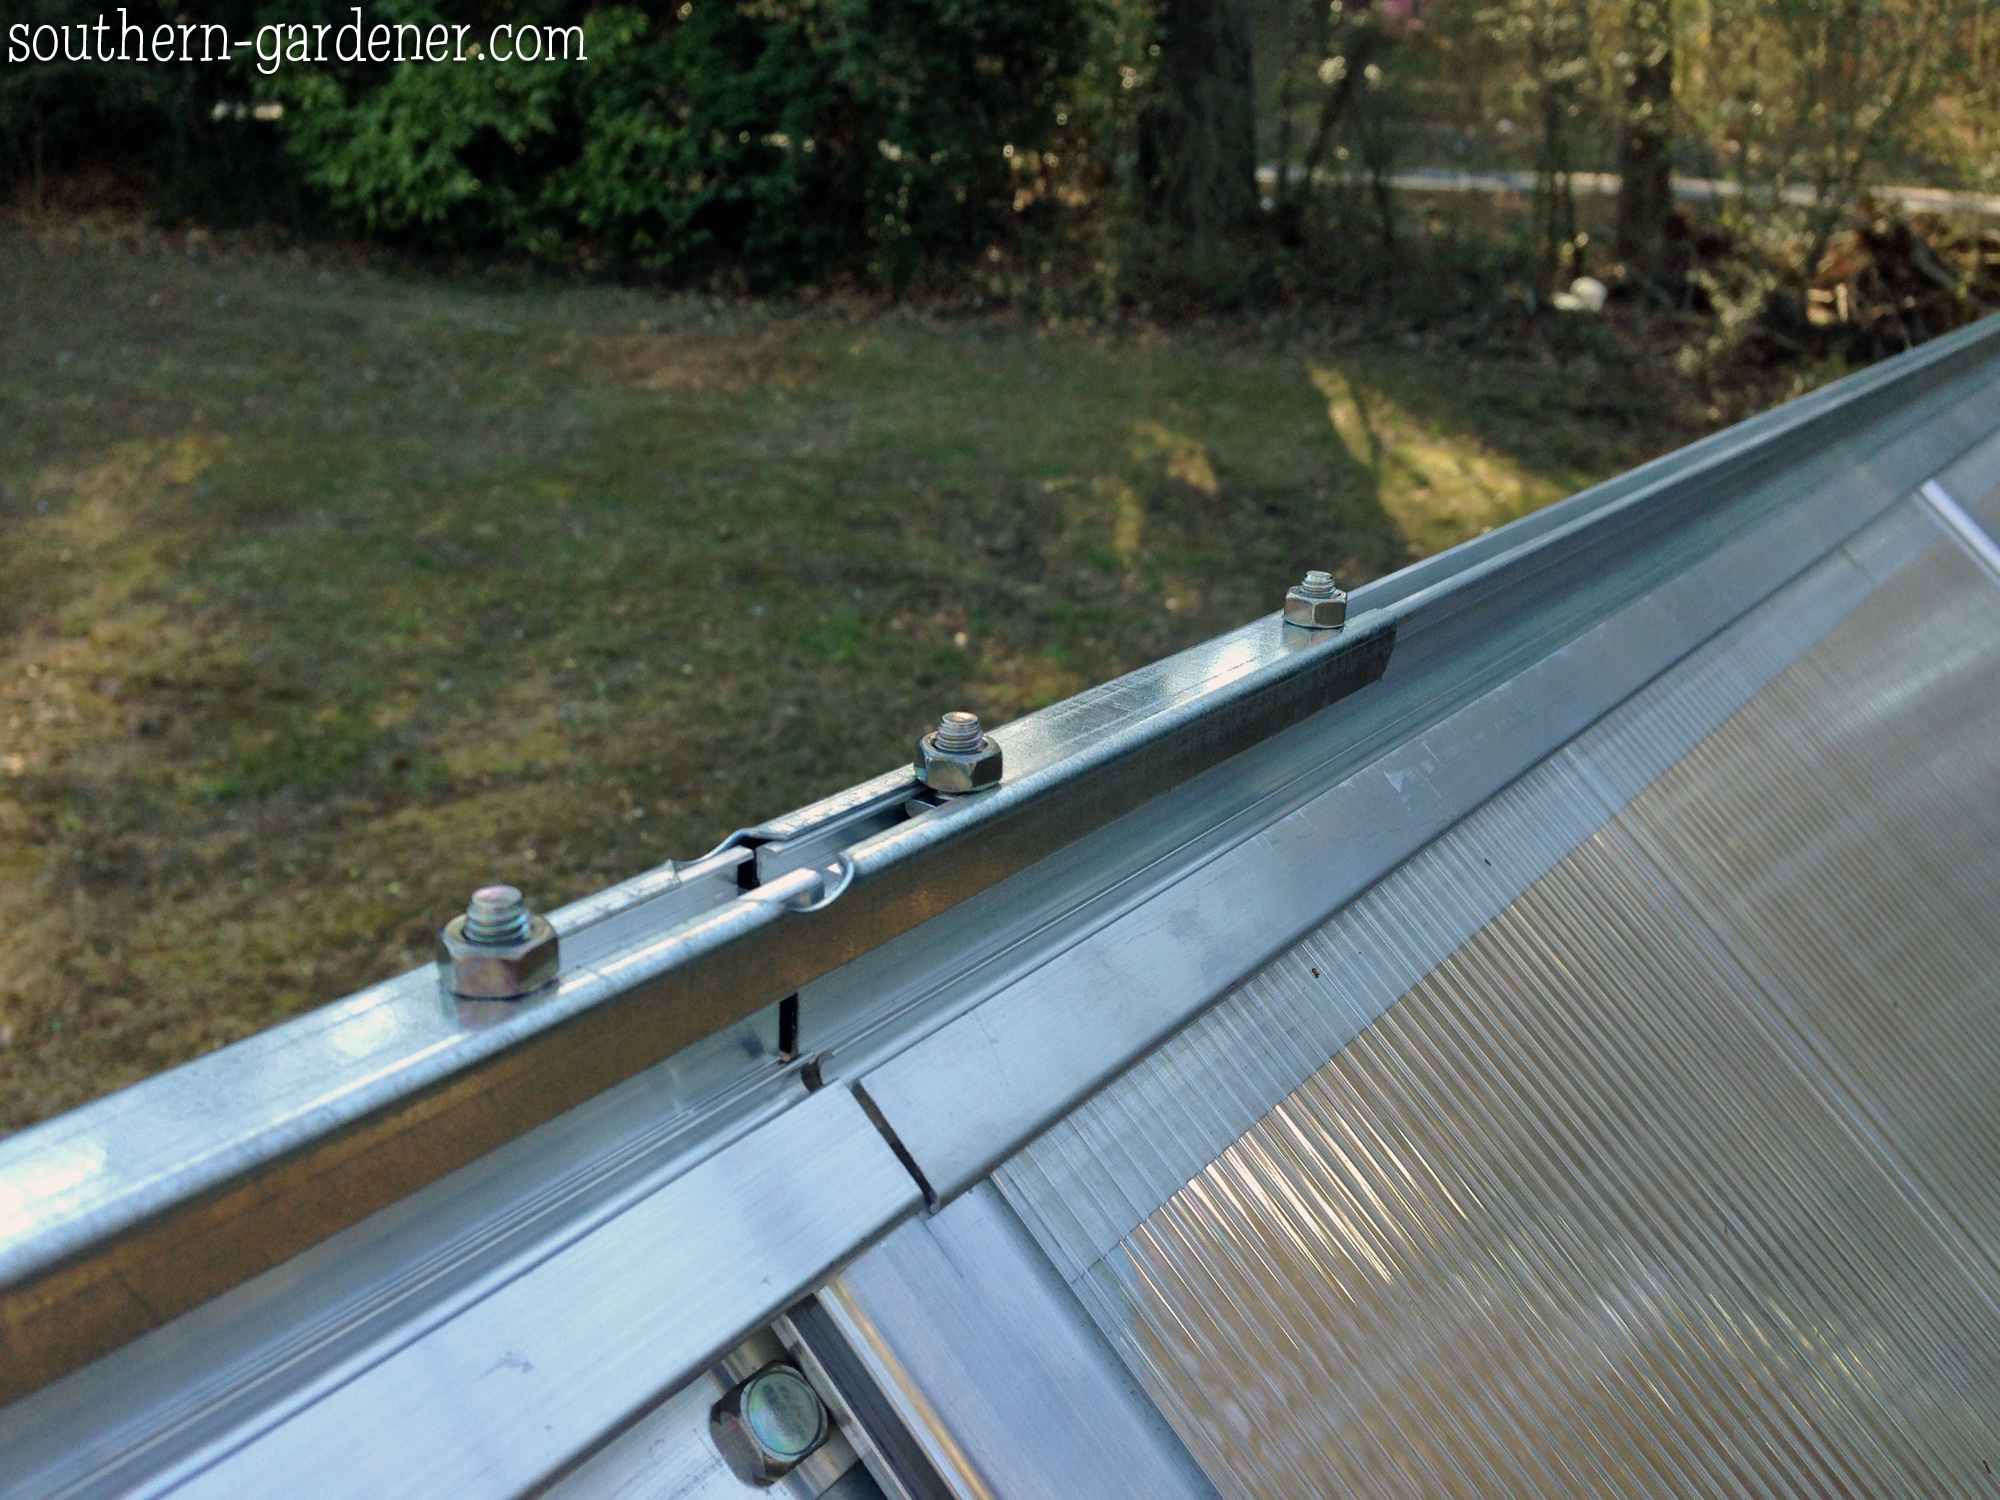
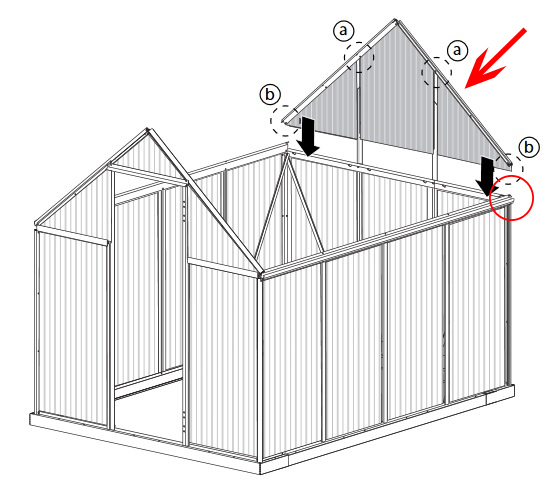
Whoever did production on the parts for this box screwed up. The top beam that goes across the length of the greenhouse should have had 6 holes on each side (to connect the end pieces and rafters to it). The top beam is actually 2 pieces connected together as shown below.

As you can see in the image below, each side of the beam should have a total of 6 holes pre-drilled. Two of them are for the connecting bracket in the middle (circle A below), then one on each end, and then 2 for attaching rafters (circles B below).
One of our pieces (half the beam) was missing the 3 holes that should have been on one side; the other side had the 3 holes like it should have. Here you can see where there should have been a hole for the connecting bracket that holds the 2 pieces together to make the top beam (which is circle A above).
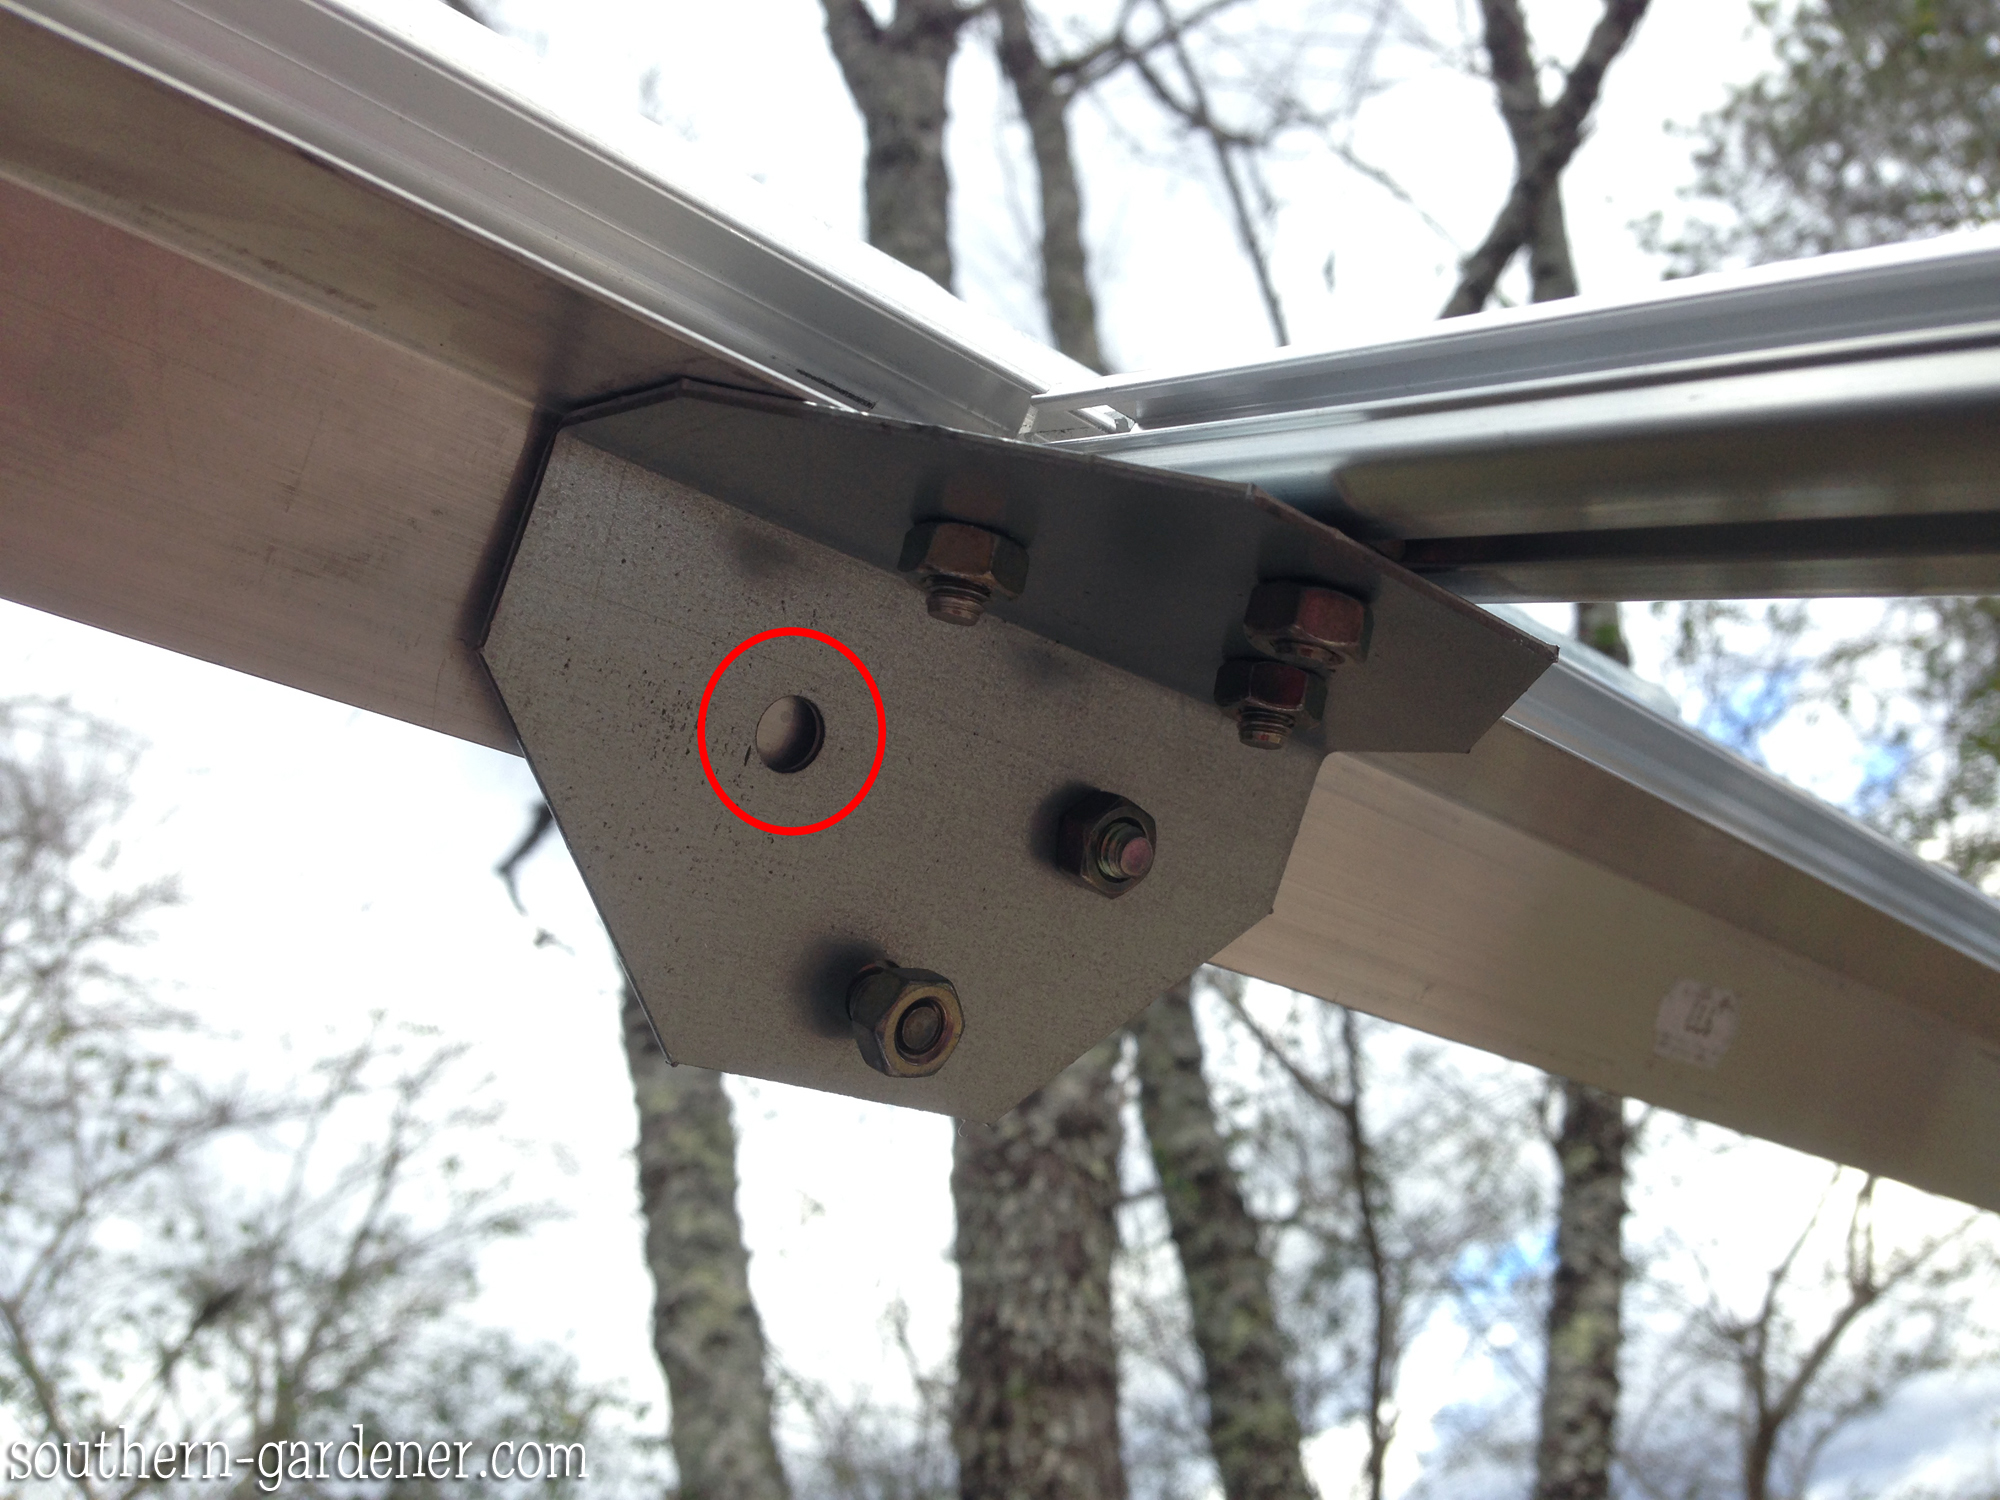
And the picture below shows the missing holes on the rest of the beam. We had to use a 13/64 drill bit to make holes in the places needed.
I also thought we were missing a piece that did not allow us to put the lower half-panel on the upper section that will have the window that opens and closes. Once the top frame pieces were up, you are supposed to put this lower half piece up. We skipped that and finished putting in the rest of the panels on the top. They were a pain in the butt also, so we used the flat-head screw driver to widen the channel a tad and skipped the Dawn detergent for these. This concluded day 3 of our work. This was a shorter day for us because I had a prior commitment that morning.
We skipped a day to tend to an unexpected family event. I called the company about the missing part, and surprisingly, a human answered on the second ring! It was a rather quick phone call, and they said I should have the missing part by mid-week. {It arrived 4 days later at the end of the week.}
Day 4: 2 1/2 hours
Since we thought we were missing a piece, I decided to do a little work on my own for day 4 because it was another short day for me. I was just going to assemble the window that would open and close as well as the door. However, as I started work that afternoon, I realized an error. While putting this piece on the top beam, I could not distinguish between the “this way or that way” picture they showed in the diagram.
Obviously it’s clear to me the difference now. How did I miss that?!
After looking at the diagram again, I realized one side had an overhang while the other didn’t. And the piece that overhung should go on the side of the greenhouse were the window would NOT be. And we had it on backwards of course.
Thankfully this was an easy fix; I just had to unscrew the bolts on top and flip it around!
I also discovered that we were NOT missing a piece. Apparently the 2 plates I needed were connected to the magnetic door latch piece, and I thought this was one piece together for something later on down the road. So obviously I did not sort all of my parts before we started on this. Had I done that, I would have known this. I recommend doing this before you start, in case you are missing parts. This way, it won’t hold up the entire assembly process while you wait for the missing pieces to arrive. I picked this piece up and accidentally squeezed it, which caused the 2 plates to come off the magnetic piece. I was like, “Oh. This is 3 different parts, not 1. Hmmm, I’m not missing anything after all.”

So I loosely attached them to the frame for the window section, put the window together, and started on the door. That’s when I realized a mistake we made on day 2. When constructing the lower framing, it shows 2 self-tapping screws going into the middle pieces on each long side:
However, on the side we started with, there seemed to be nothing for the screw to go into. It looked like the screw was trying to go into part of the polycarbonate panel in the crevice, so we didn’t put them in. While putting the door together, I realized there were small holes for the screws to screw into. This picture below doesn’t show the actual piece they screw into, but the end looks exactly the same (same part number).
So, I unscrewed the lower part of these two rafters (you have to go inside the greenhouse to get to the screws) so I could move them to the side, allowing me to angle the screwdriver the way it needed to be to get the screws into the holes. I had no problems with the side missing the lower panel and window. The other side (the one we originally started with on day 2 when assembling this) was a pain! I had to take a top panel out, and I had one hell of a time angling the screw and getting it into the hole. And then I wound up stripping the hole, so it was pointless anyway.
Oh the time I wasted on this… And then I couldn’t get the panel back in by myself (which was annoying because it slide out like butter), and I couldn’t get the screw to slide in to the hole on the inside so I could tighten it back down (again, I don’t know how one person can do this by themselves). I decided to call it a day before I got too mad and broke something. At least I had the window assembled, about 85% of the door assembled, and a few errors almost fixed. That’s all… GAH! 😐
Day 5: 8 hours
Day 5 was February 1st, and it was exceptionally warm. The previous days, Dad & I were either bundled up or wearing jackets, with temperatures ranging from 48 – 55° F, but we were out in short-sleeved shirts with the temperature in the low 70’s on day 5, which is unusually warm for February. This Alabama weather has been crazy this winter!
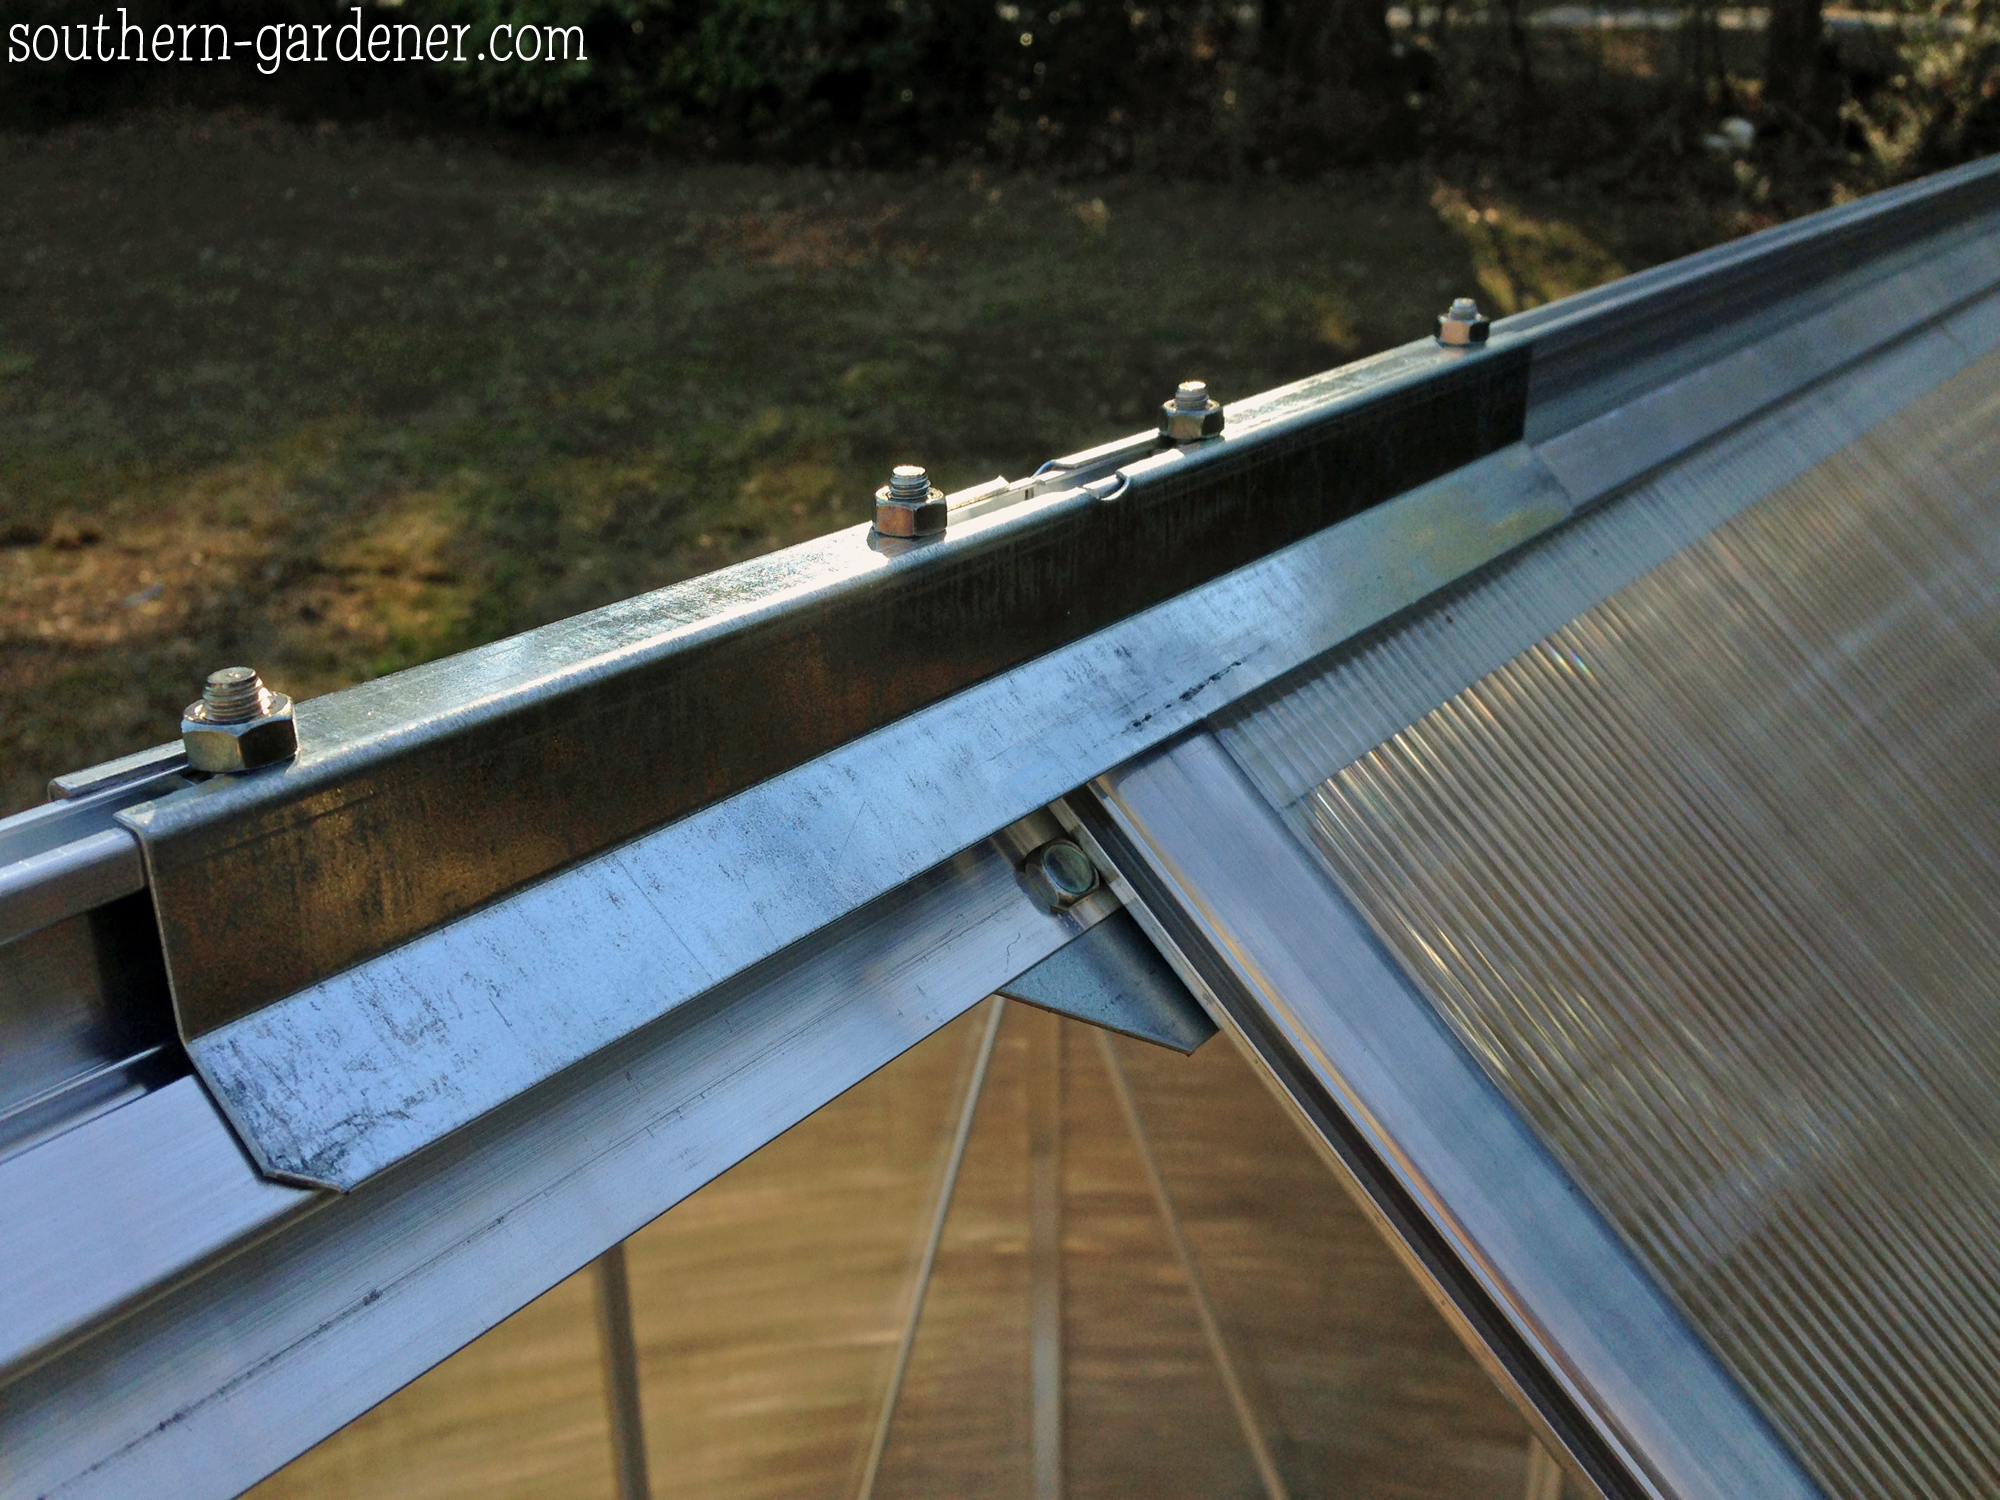
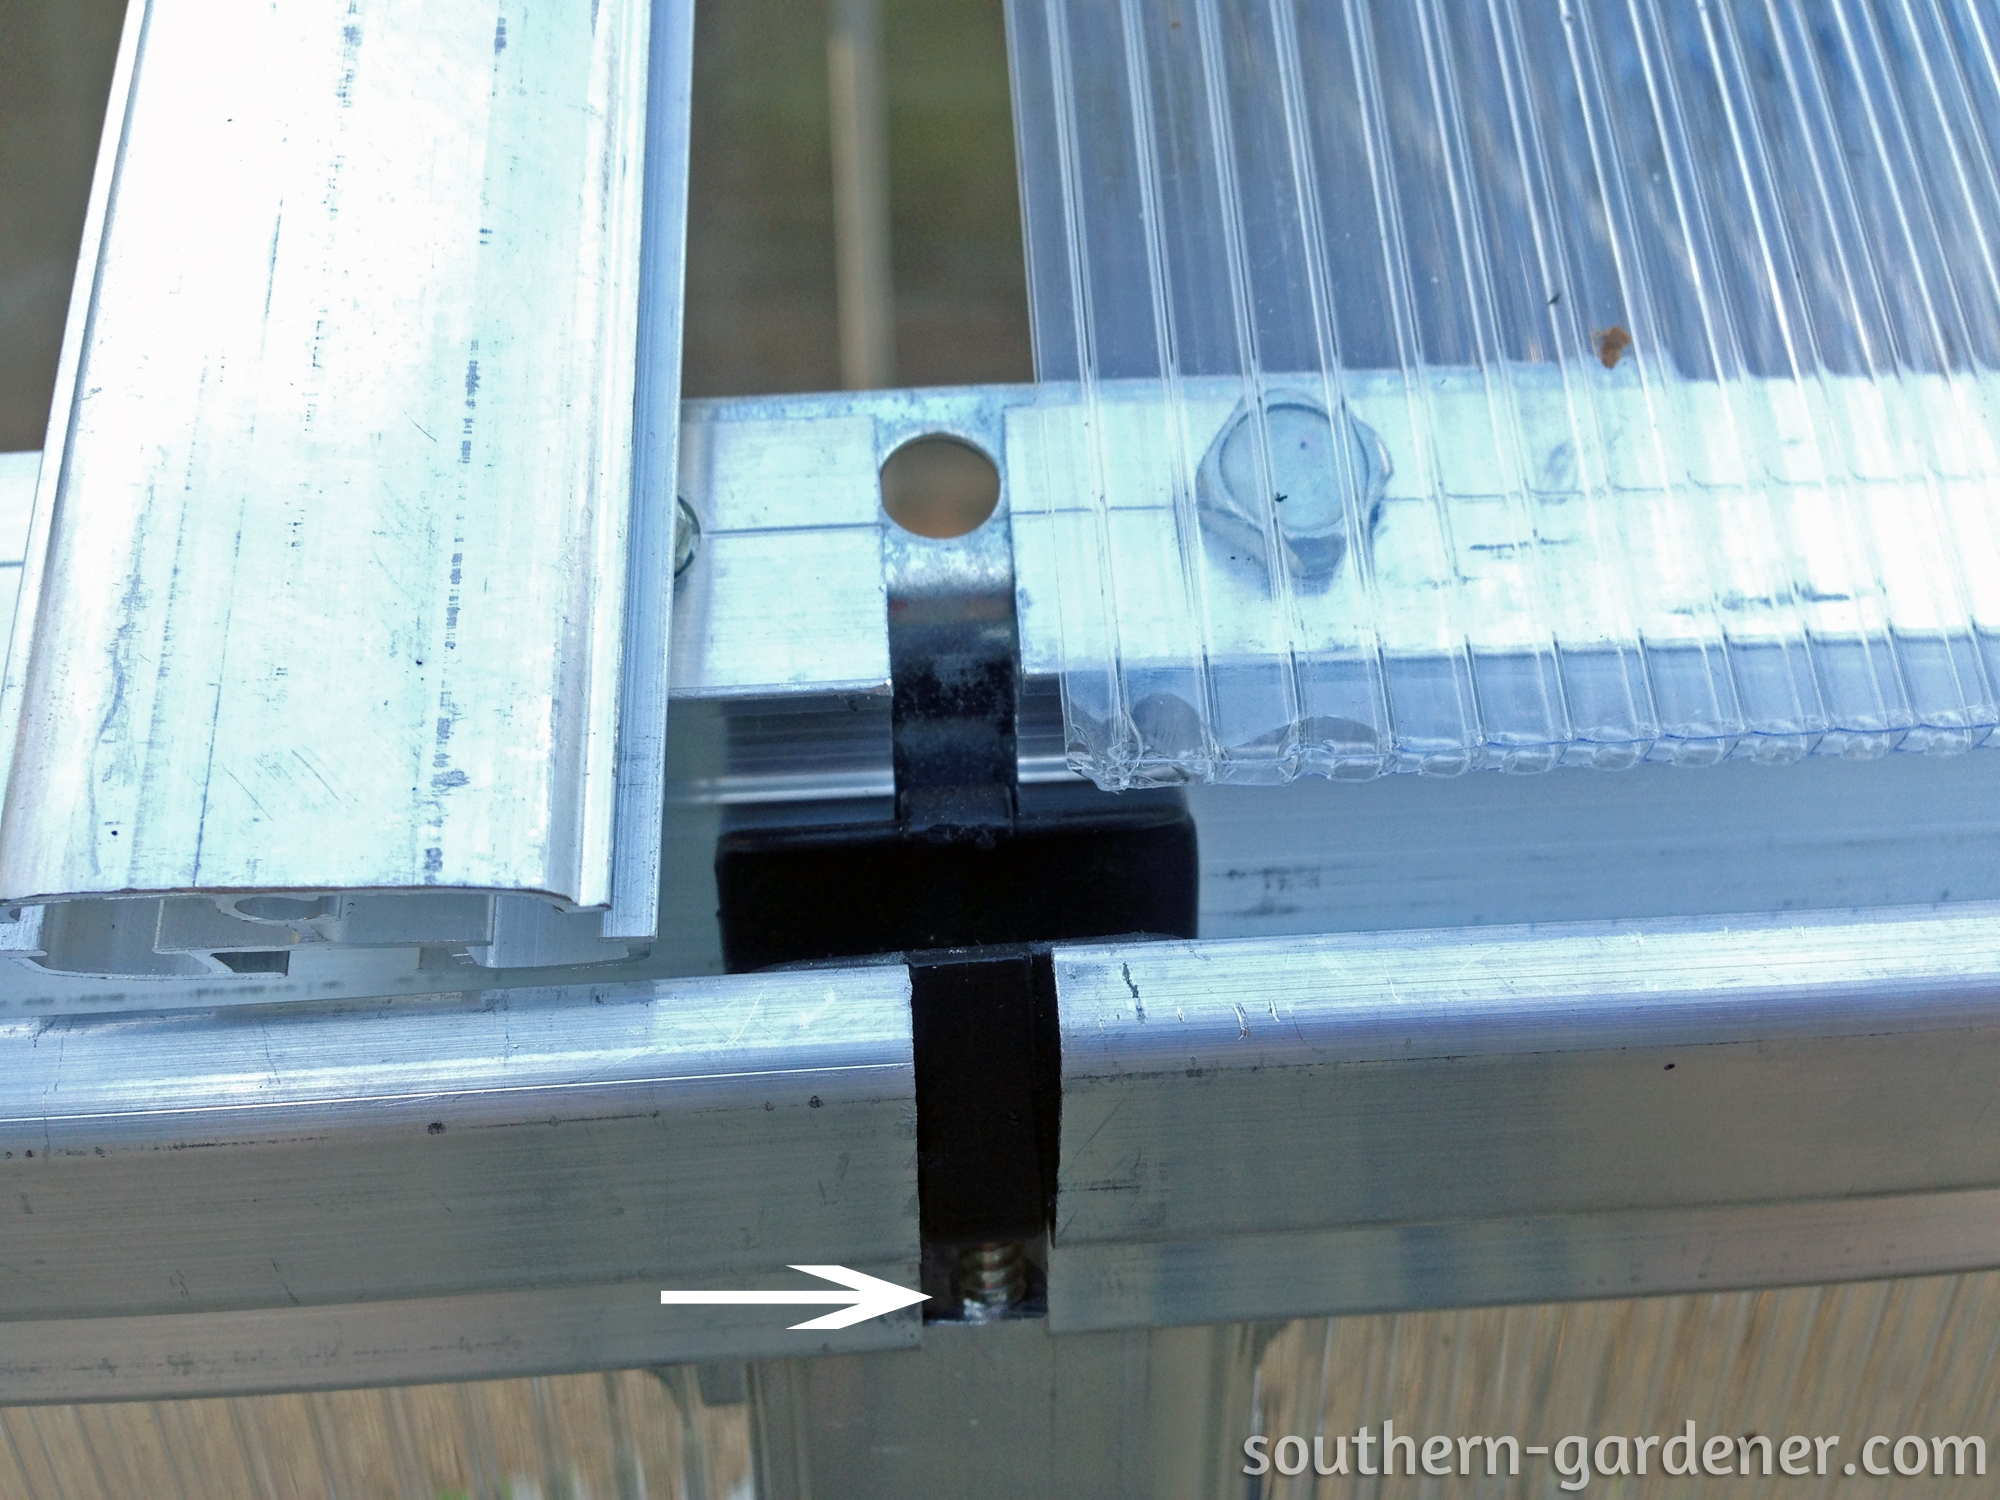
When Dad arrived, we fixed the pieces I couldn’t get back into place, along with a corner piece we had issues with. This top frame piece (red arrow piece below) was sticking too far down, past the part where it should stop (the red circle in the diagram below).
This in turn was not allowing us to pop on the bottom edge piece for the panel on that long side because the lip that the edge piece was supposed to sit on and snap onto was covered by the top frame piece coming down too far (if that makes sense).

This is how it’s supposed to look when finished; you couldn’t see that little lip the arrow is pointing to before we fixed it.
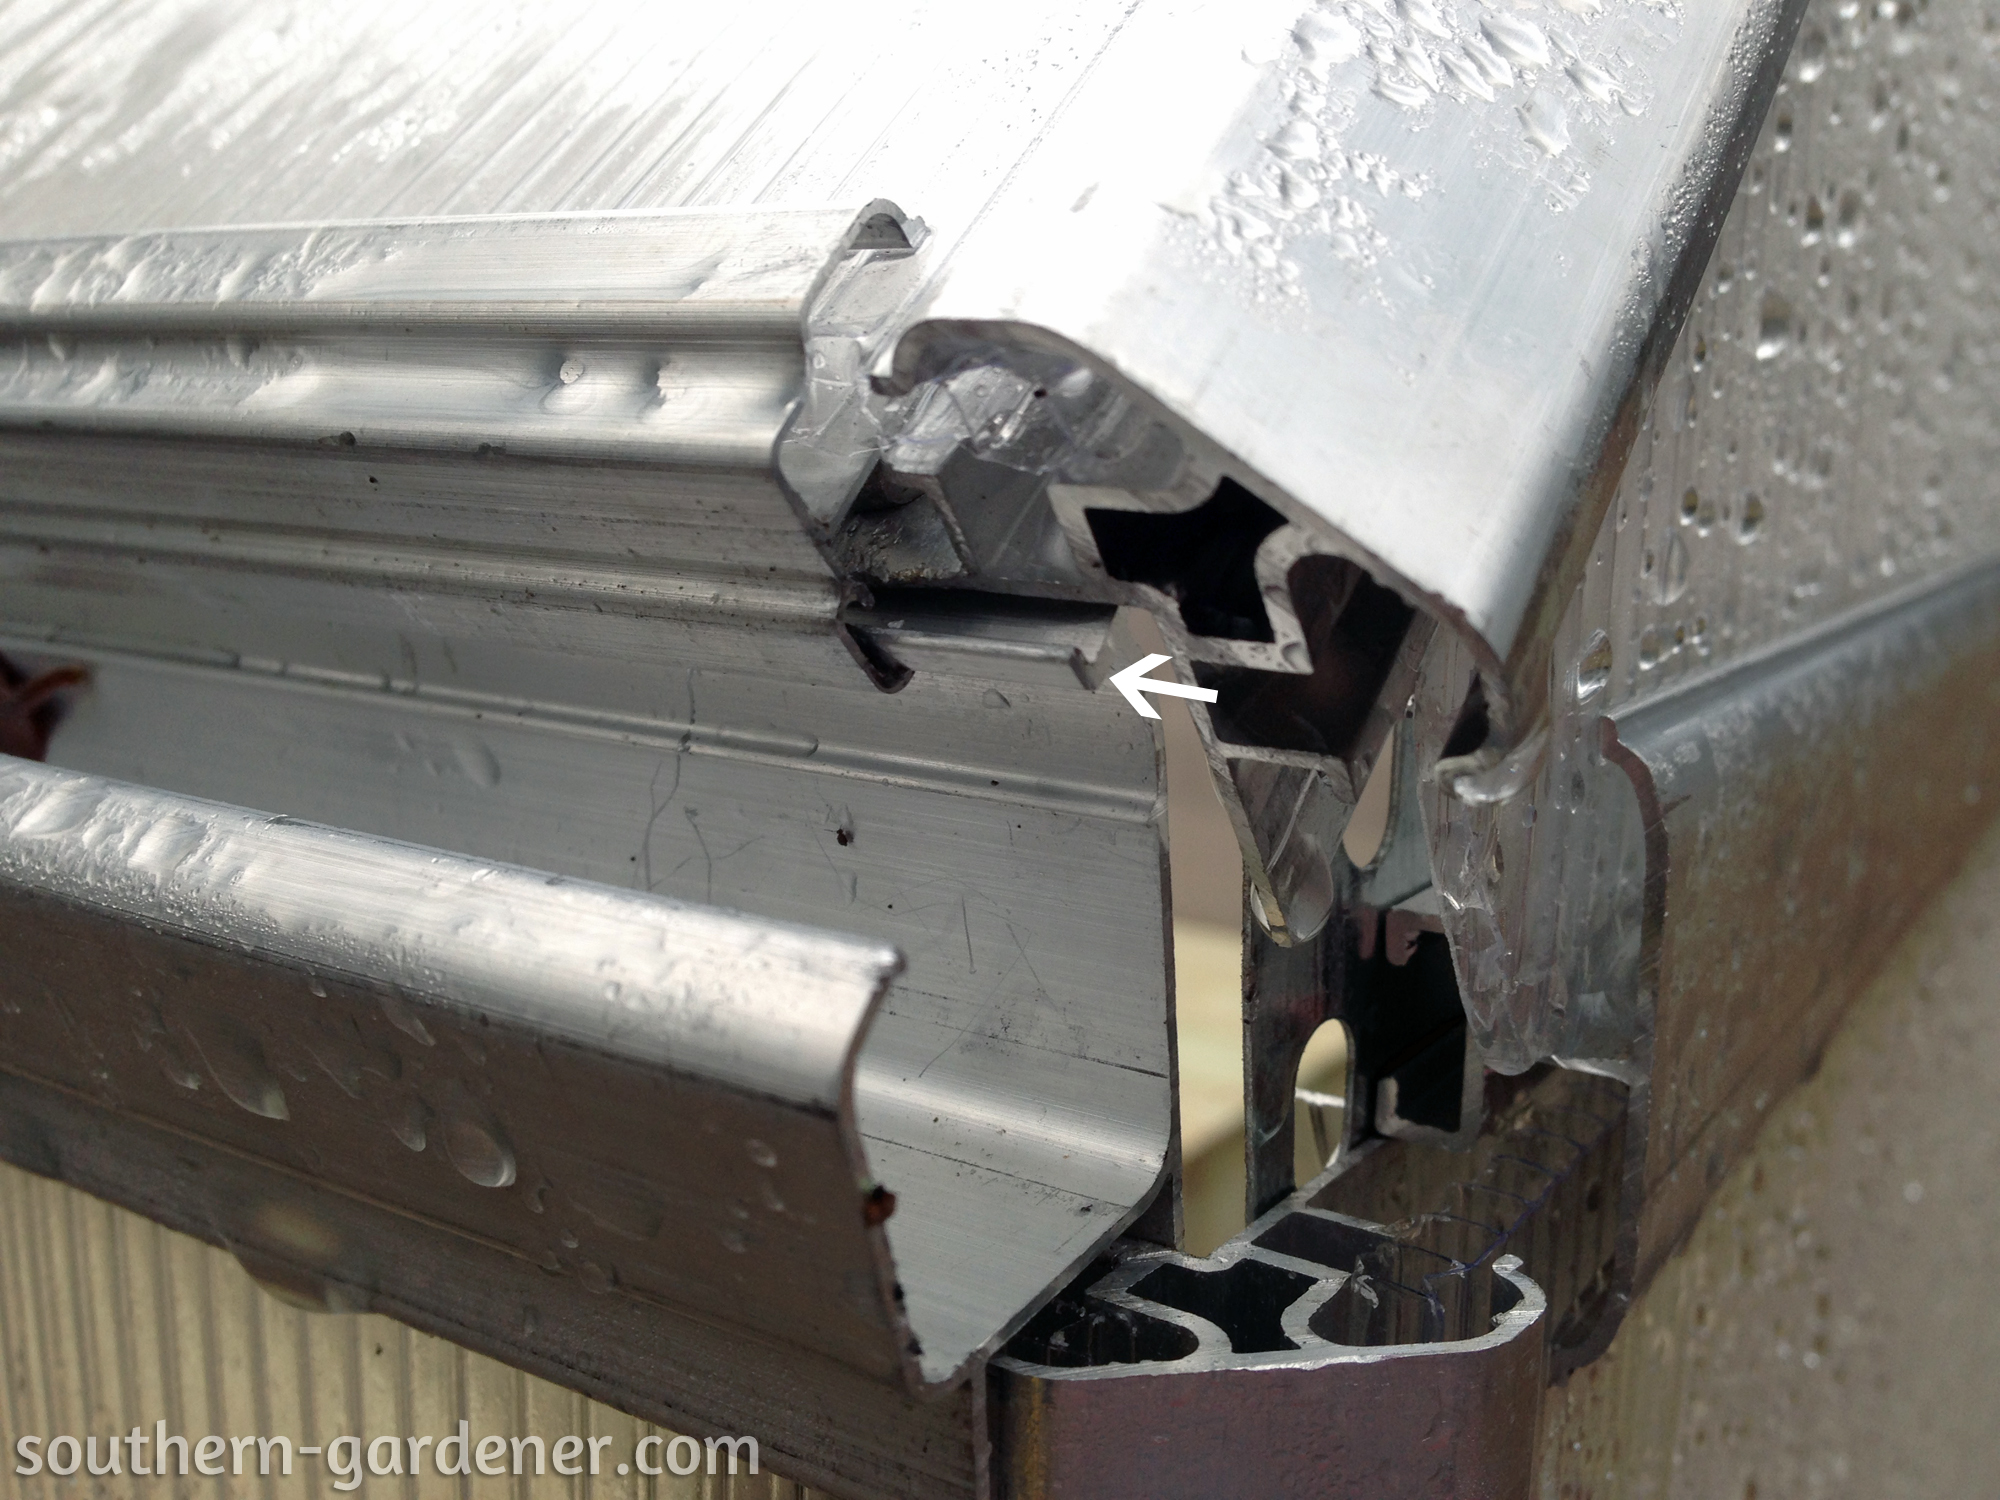
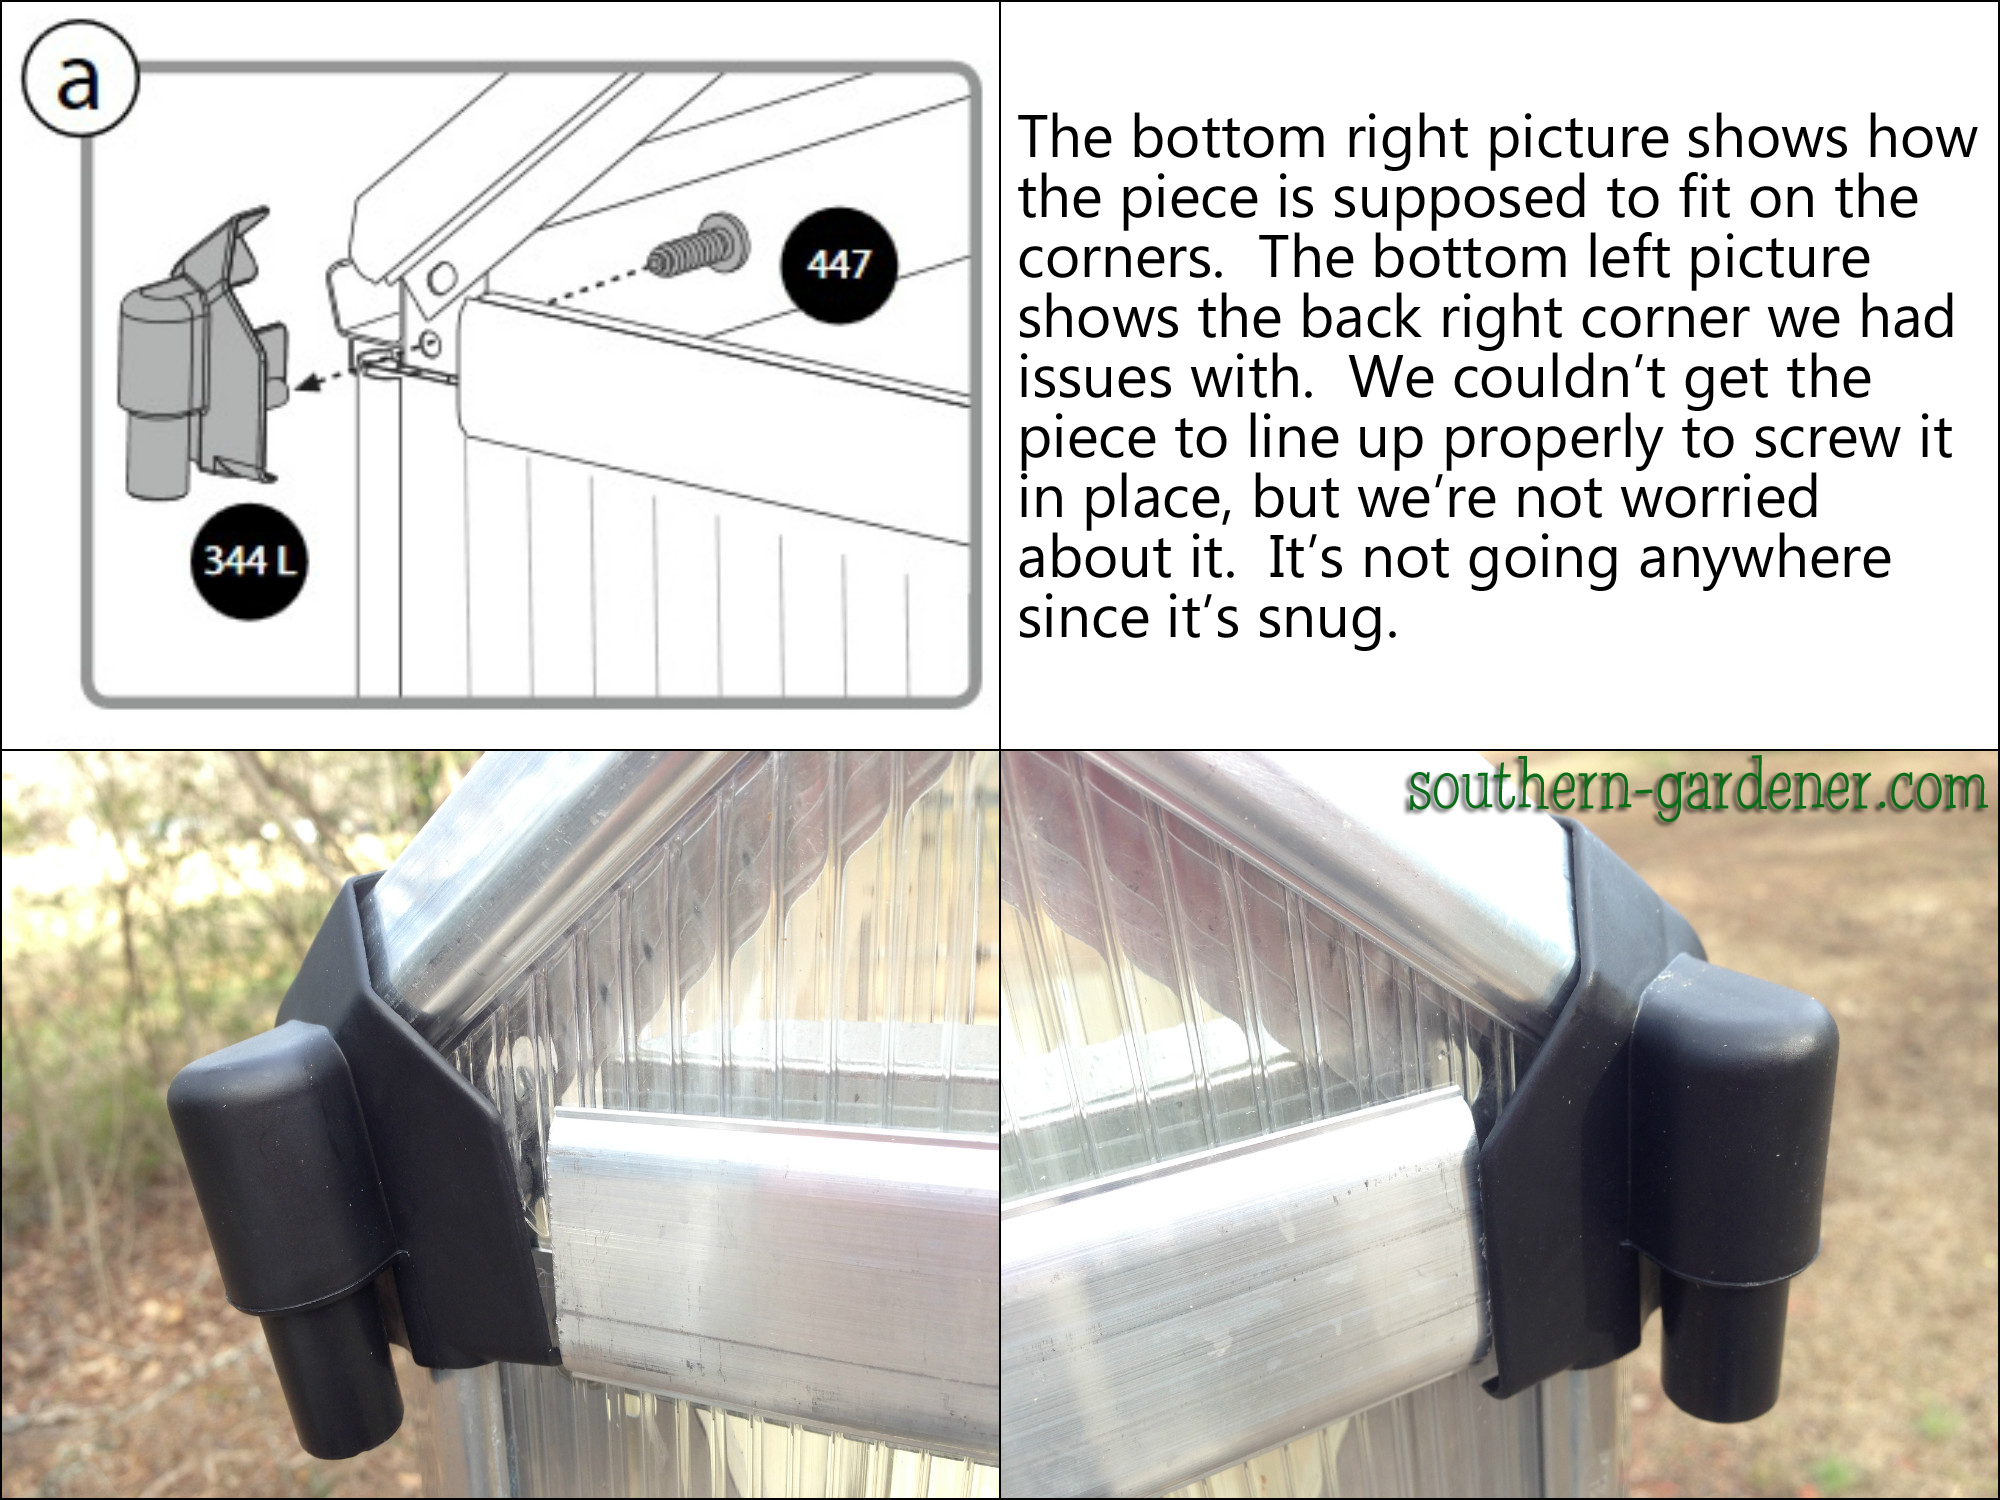
So we had to loosen some of the bolts and readjust that so we could snap it into place properly. That was a MUCH easier fix than I thought it would be. I was pretty worried about this because it was going to cause us issues when we got ready to snap in the plastic corner pieces for water drainage. I lost count of the number of times we had to loosen and readjust when putting this greenhouse together! Once we fixed this, we positioned the half-panel top piece where it should go, and then we put all the black plastic pieces on the corners and the frame points above the door and in the back. However, we still had trouble with that one corner we fixed. The corner piece goes in, but it’s not as tight or as straight as the other corners, and we couldn’t get the screw hole on the inside to align properly. This is a corner no one will see, and the piece fits in snugly, so it’s not going anywhere.
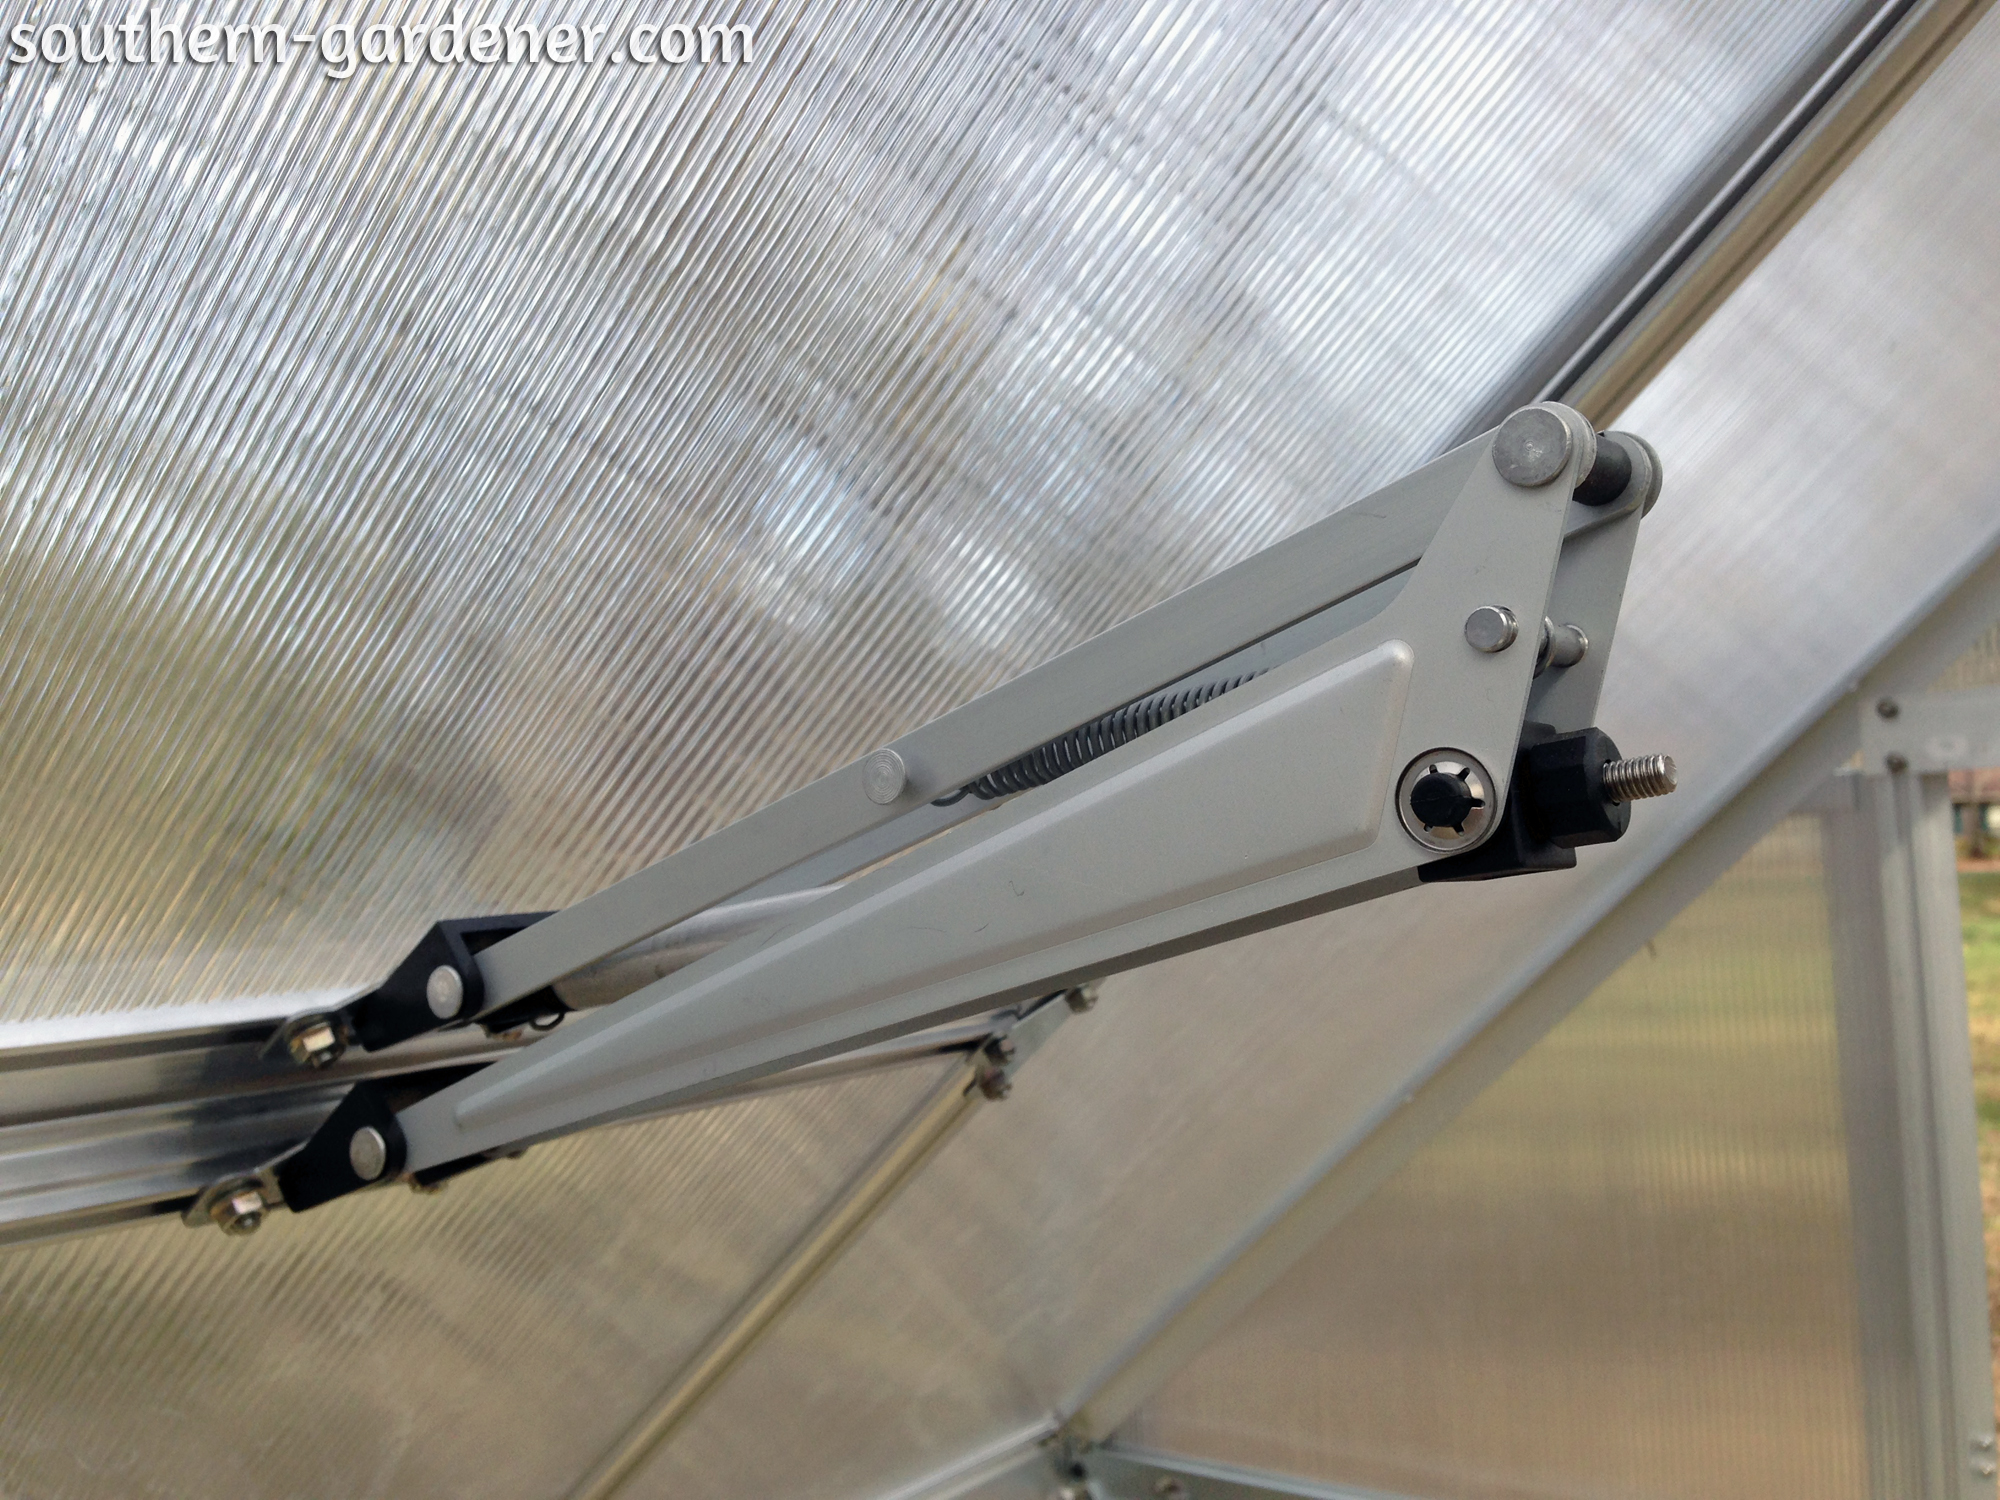
Then we attached the auto vent kit for the window that would open and close. I purchased this separately; the greenhouse comes with a small one you can open and close manually, but I wanted one that would open automatically when it reached a certain temperature. I was dreading this part for some reason, but it was surprisingly easy!
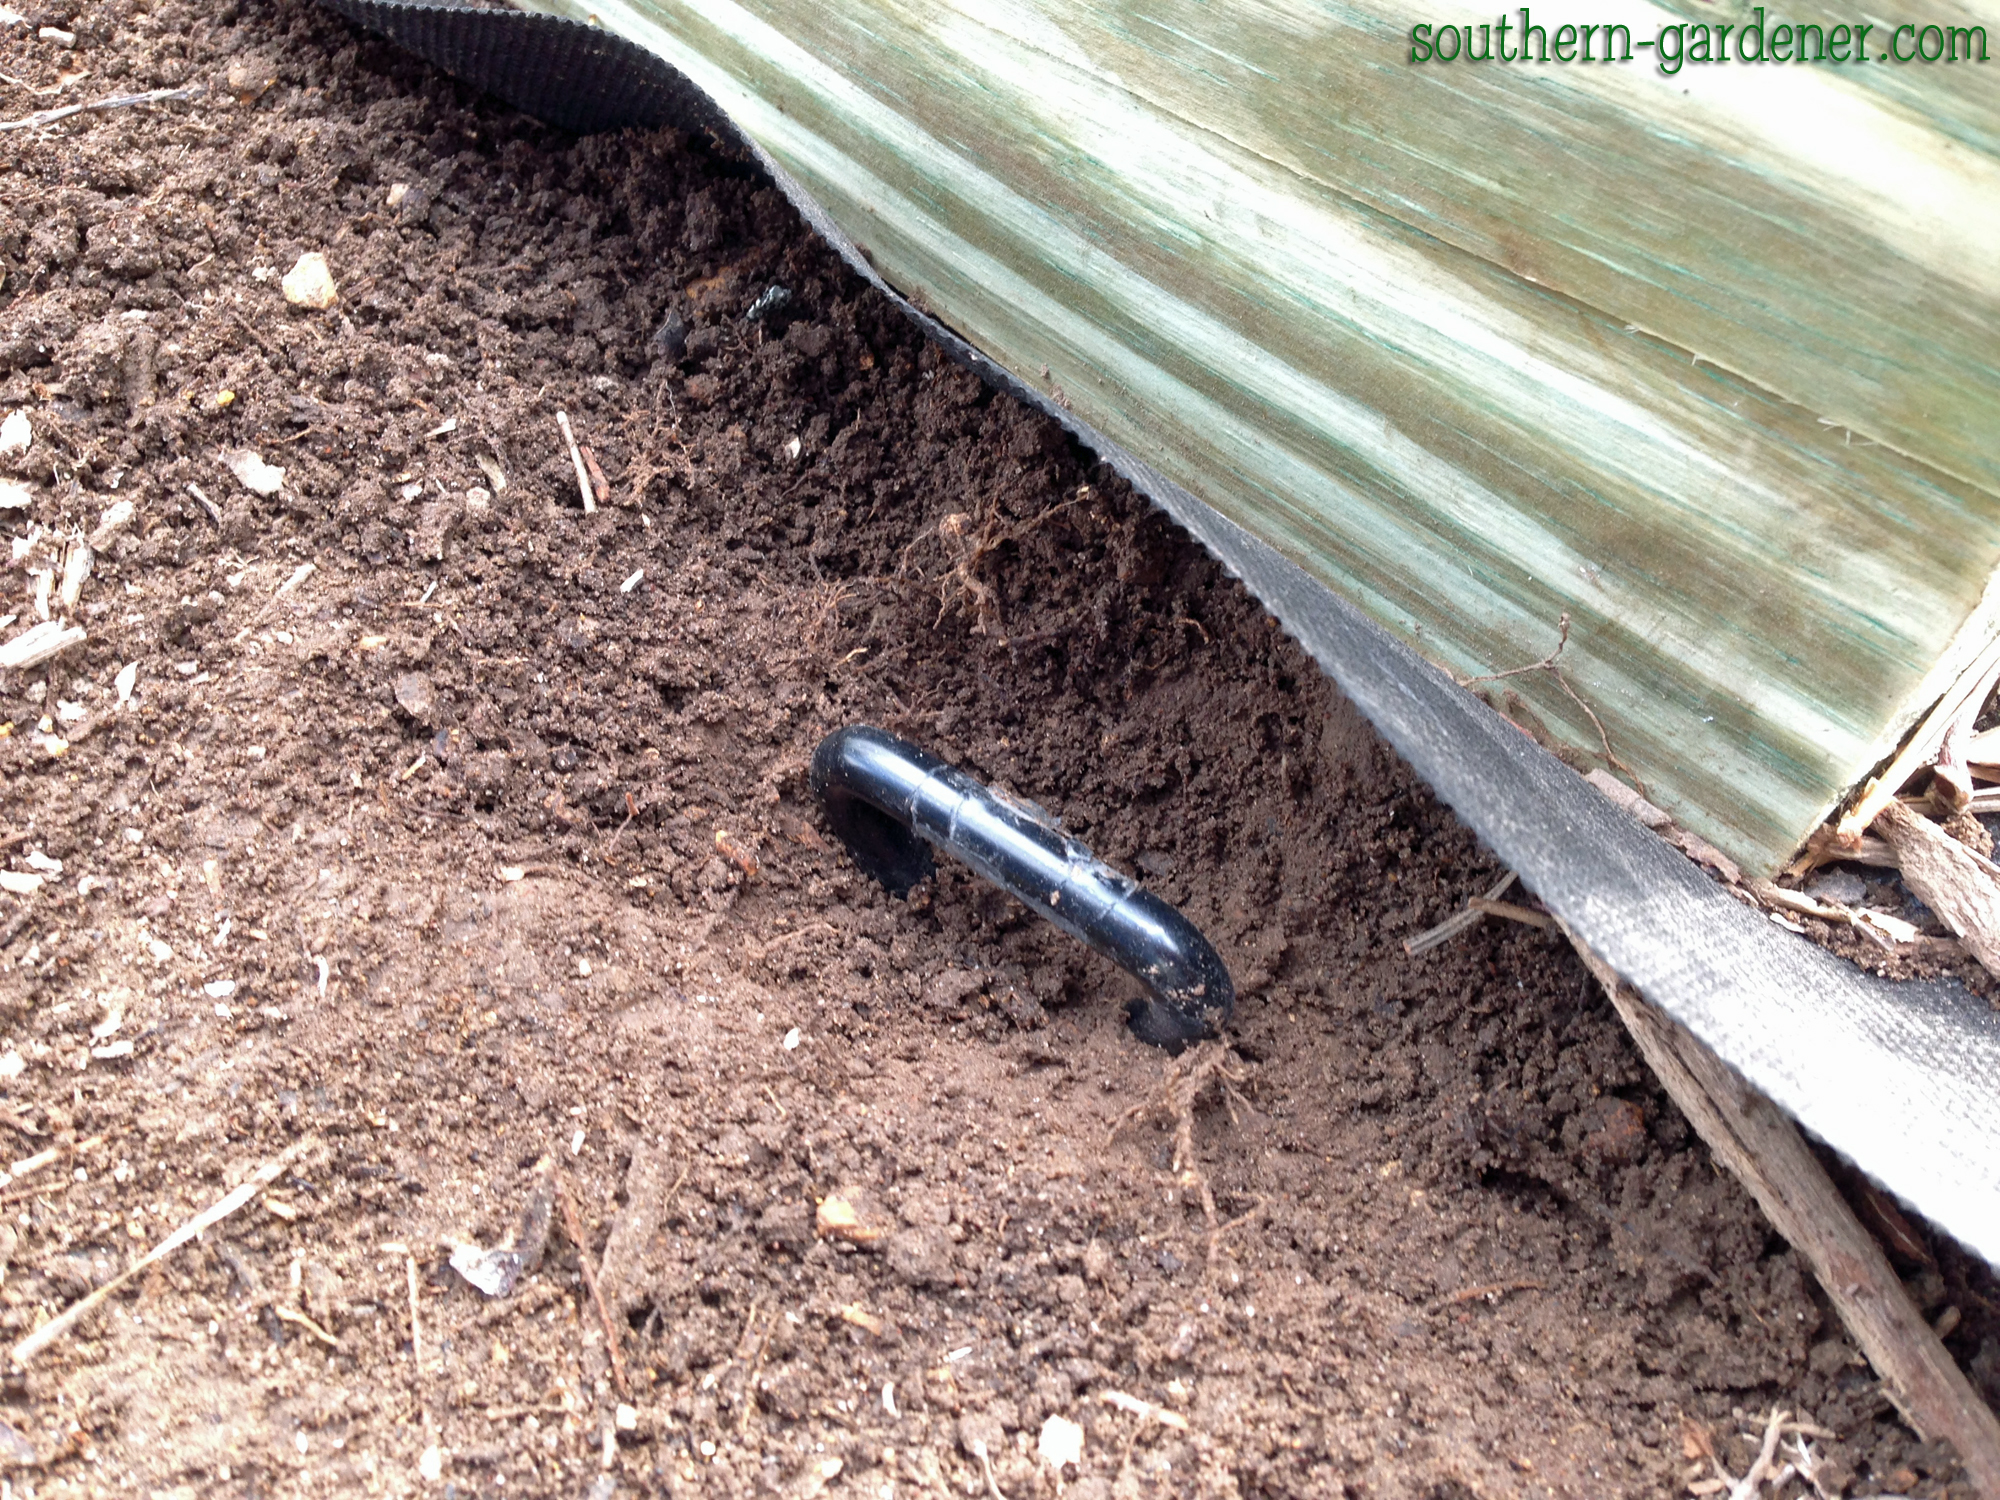
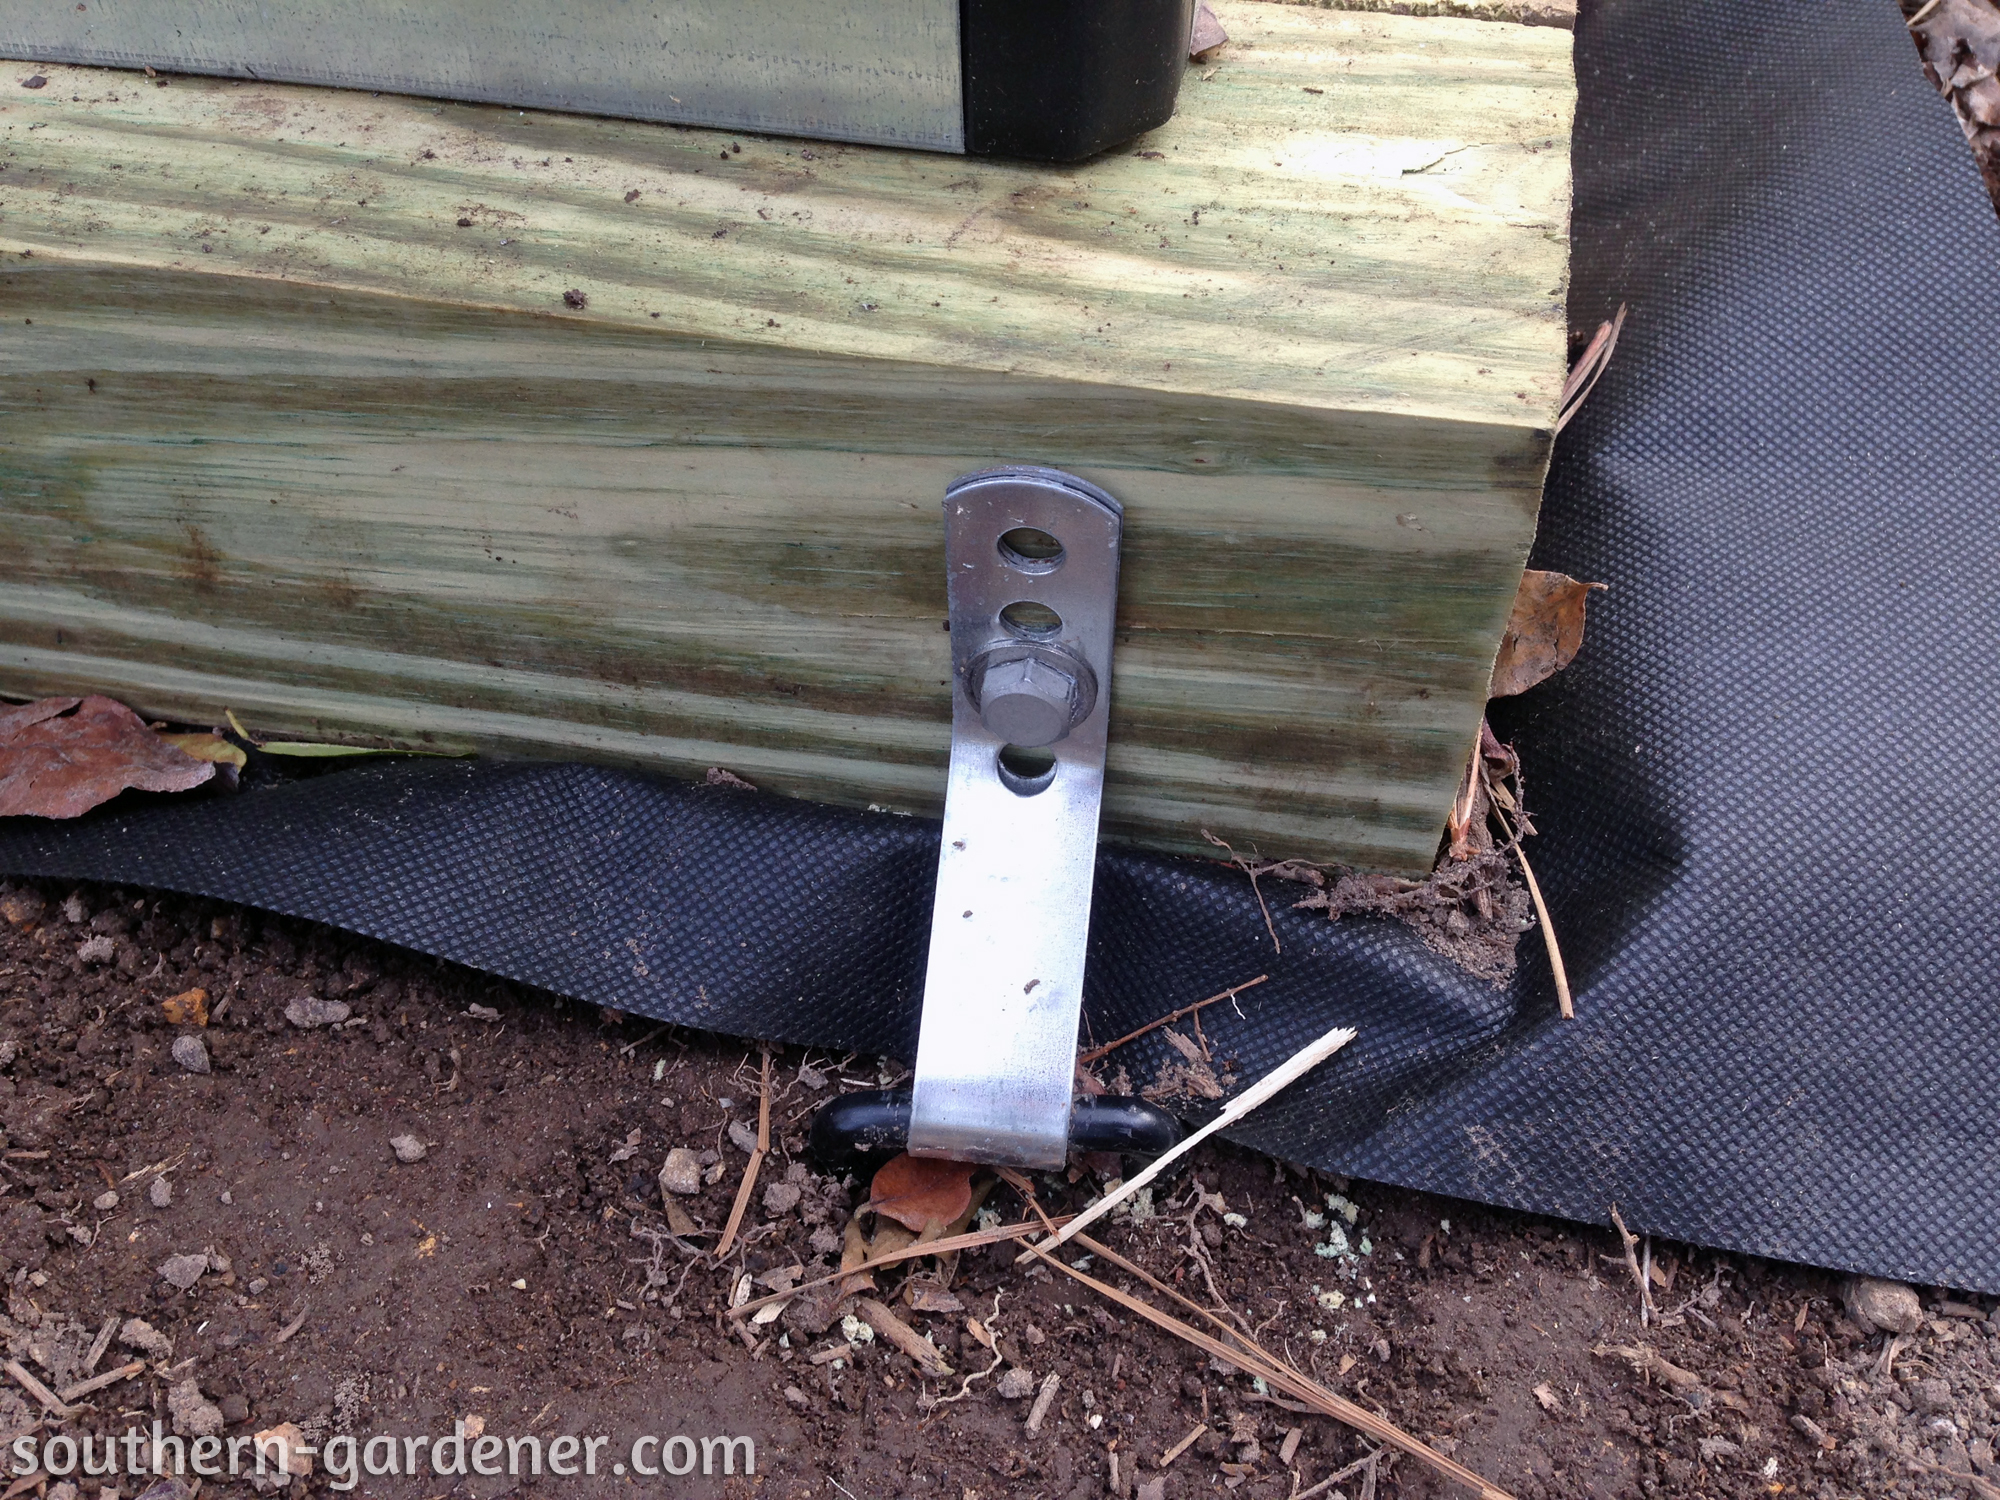
Next (and last), we completed the door assembly which was really confusing with the instructions. We finally got the door together and attached after much trial and error. Then it was time to anchor the 4×4 frame to the ground. We used Swing-N-Slide’s anchor kit from Home Depot.
I have a Ryobi specialty drill bit set I purchased just for this wing nut driver, and it worked great with driving the anchors into the ground!
And then we attached the 4 anchors close to each corner.
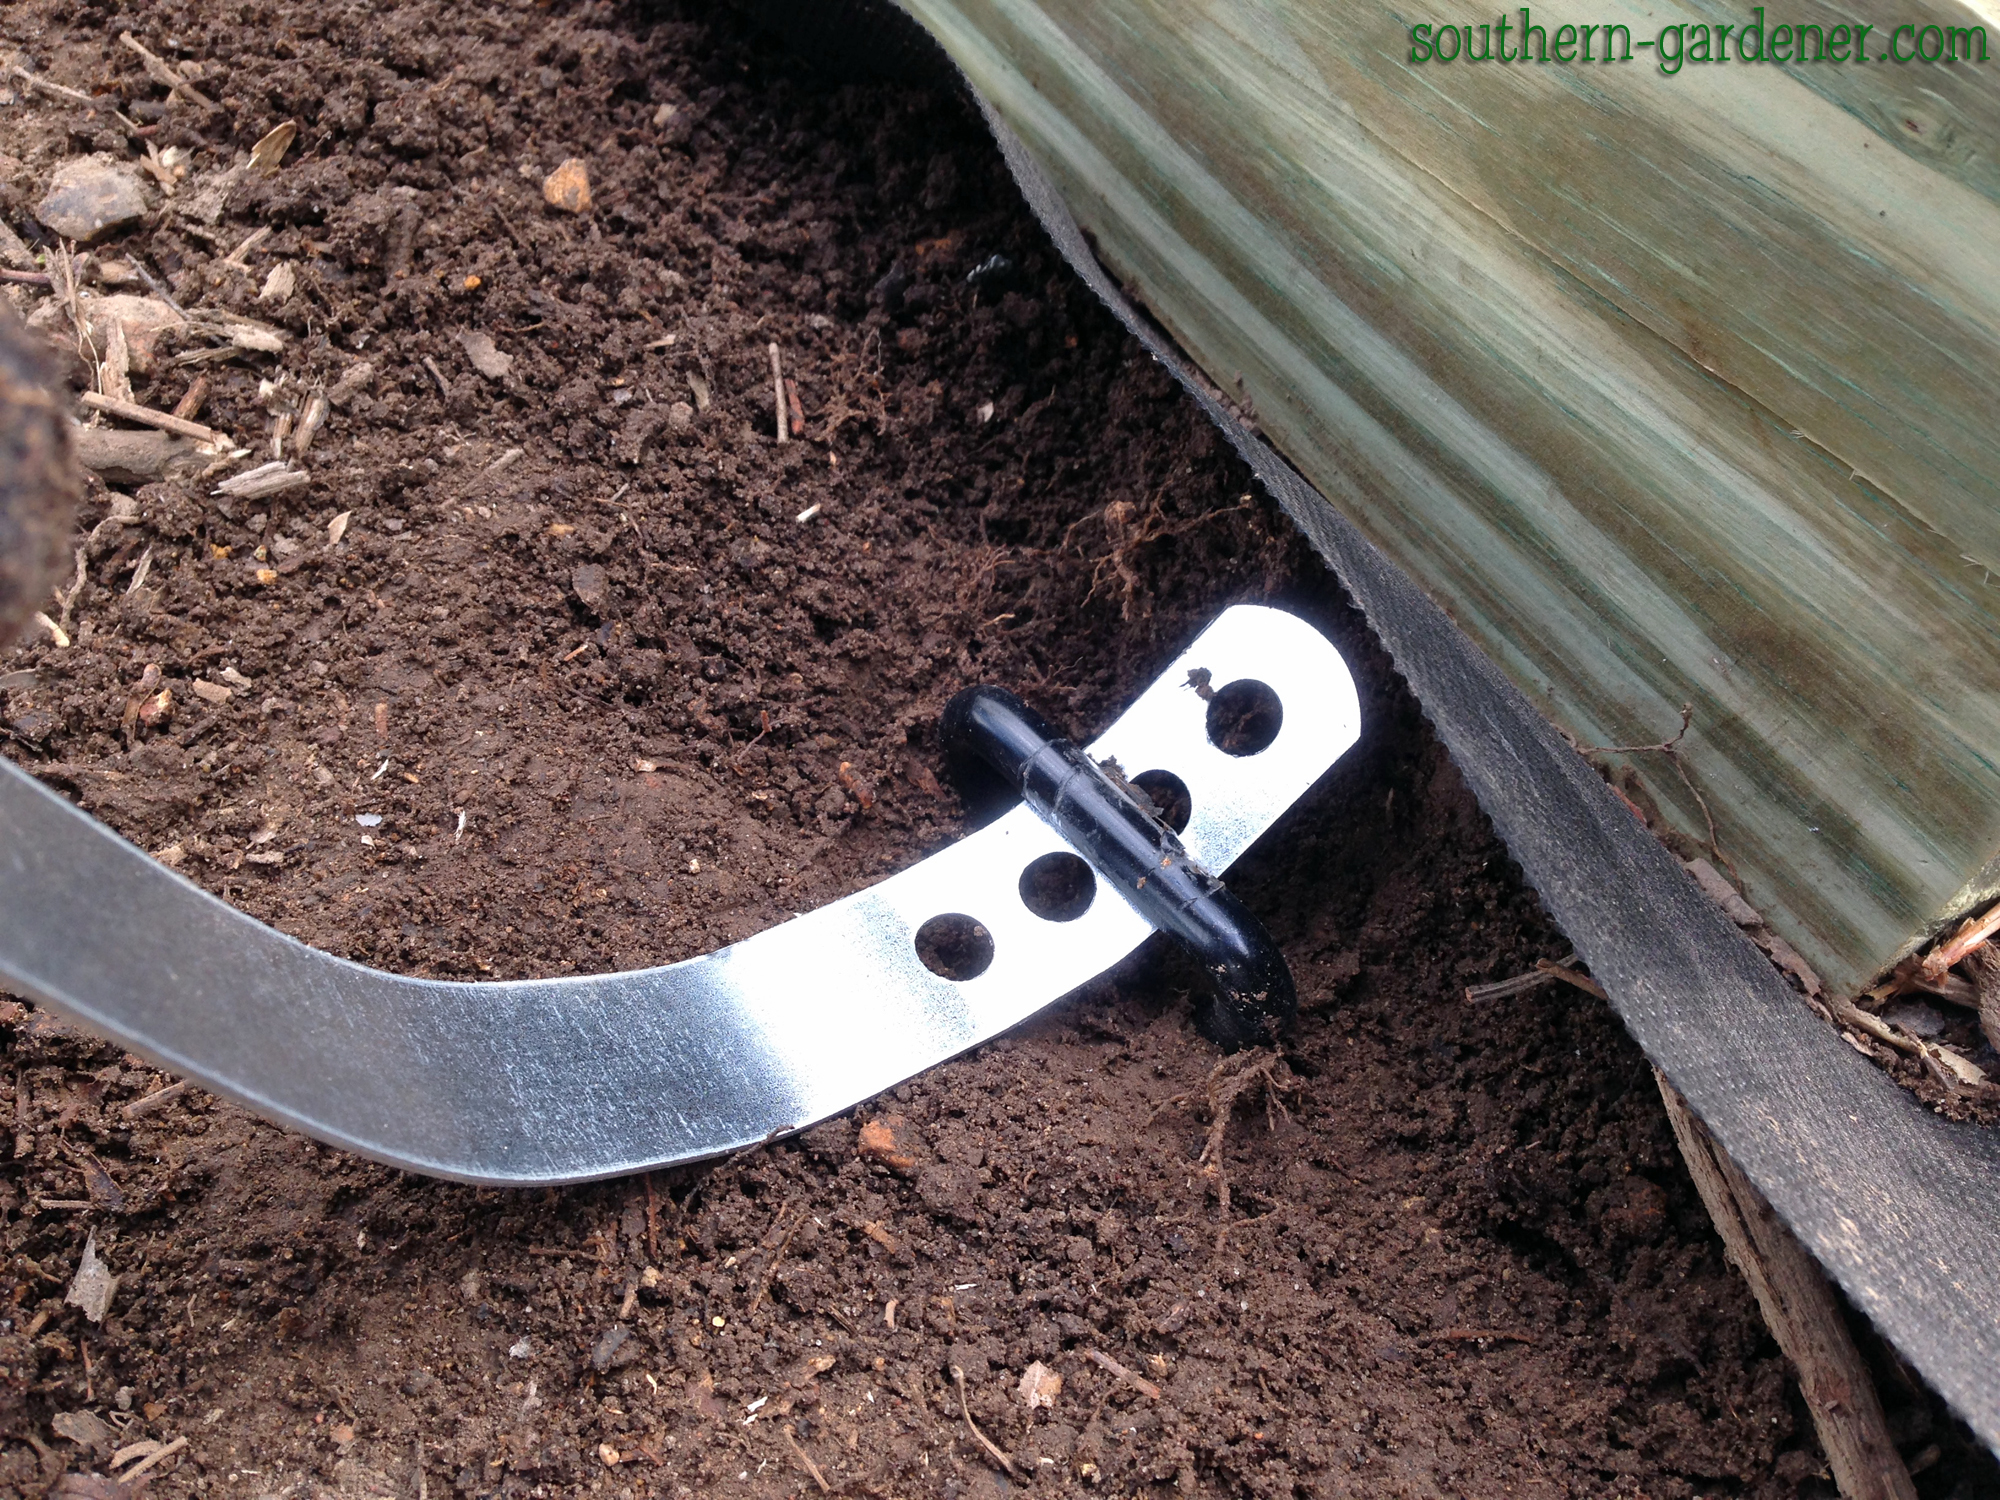
We pre-drilled a hole into the wood with a small 3/32 drill bit so we could get the bolt started.
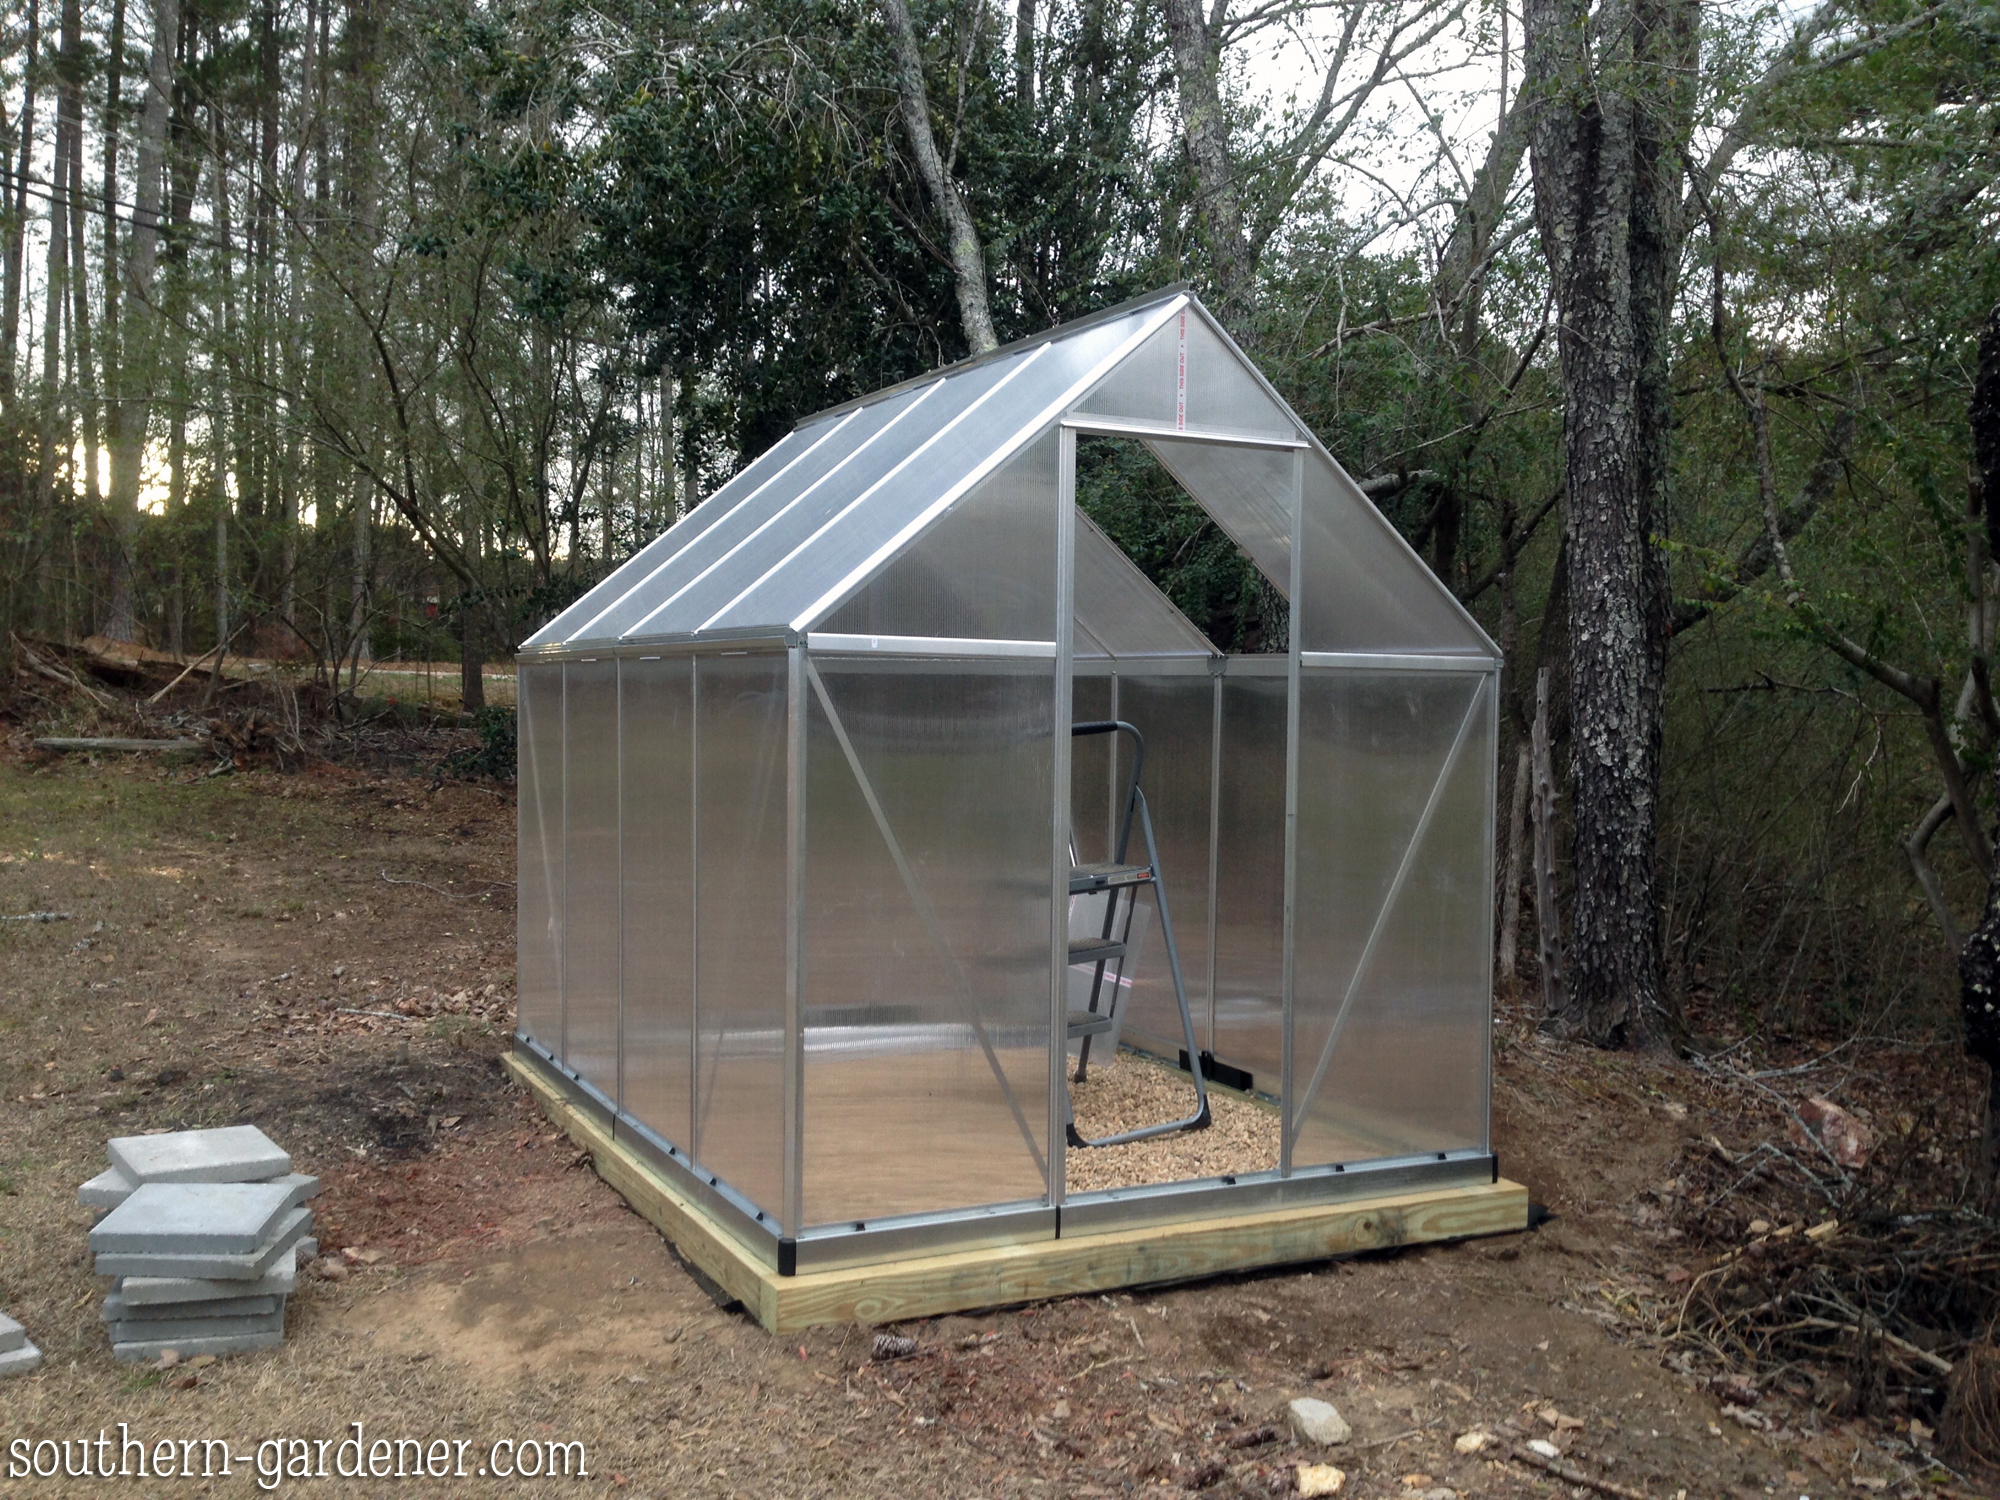
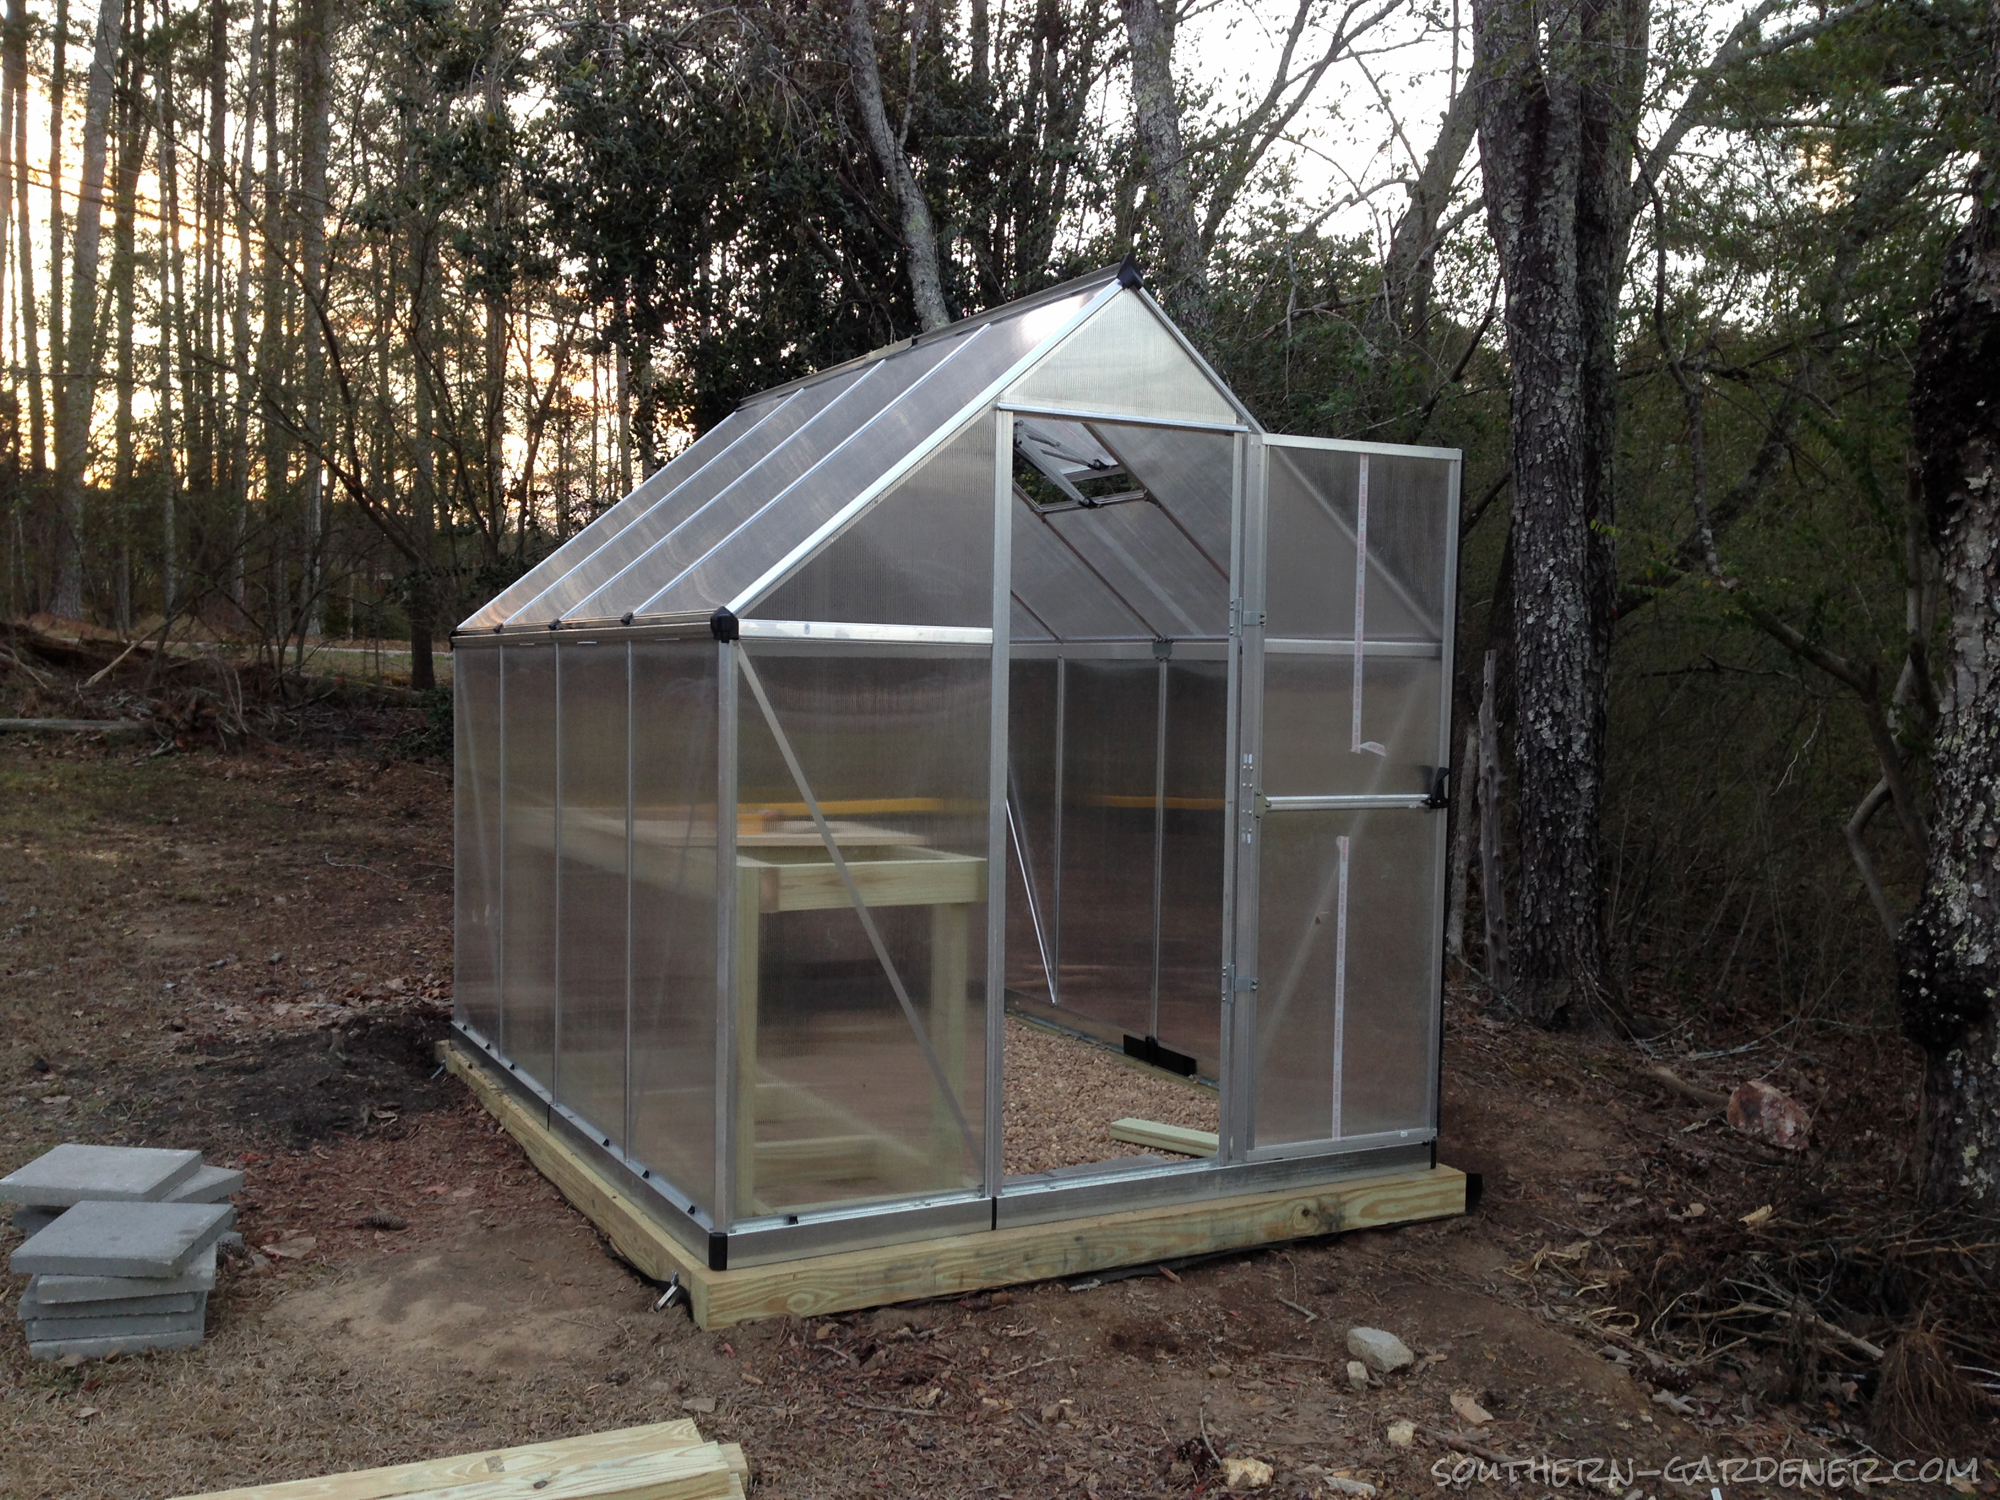
And that completed the actual greenhouse assembly, so it was time to start on the tables inside.
Stay tuned for the next post detailing the DIY greenhouse tables we made.