

Mailbox Landscaping & Makeover
Our mailbox was lackluster for the first 6 years we lived in this house. First of all, previous owners thought terracotta orange was a good color for everything. The house itself, the back deck railing, the hammock posts (when we had one), and the mailbox post.
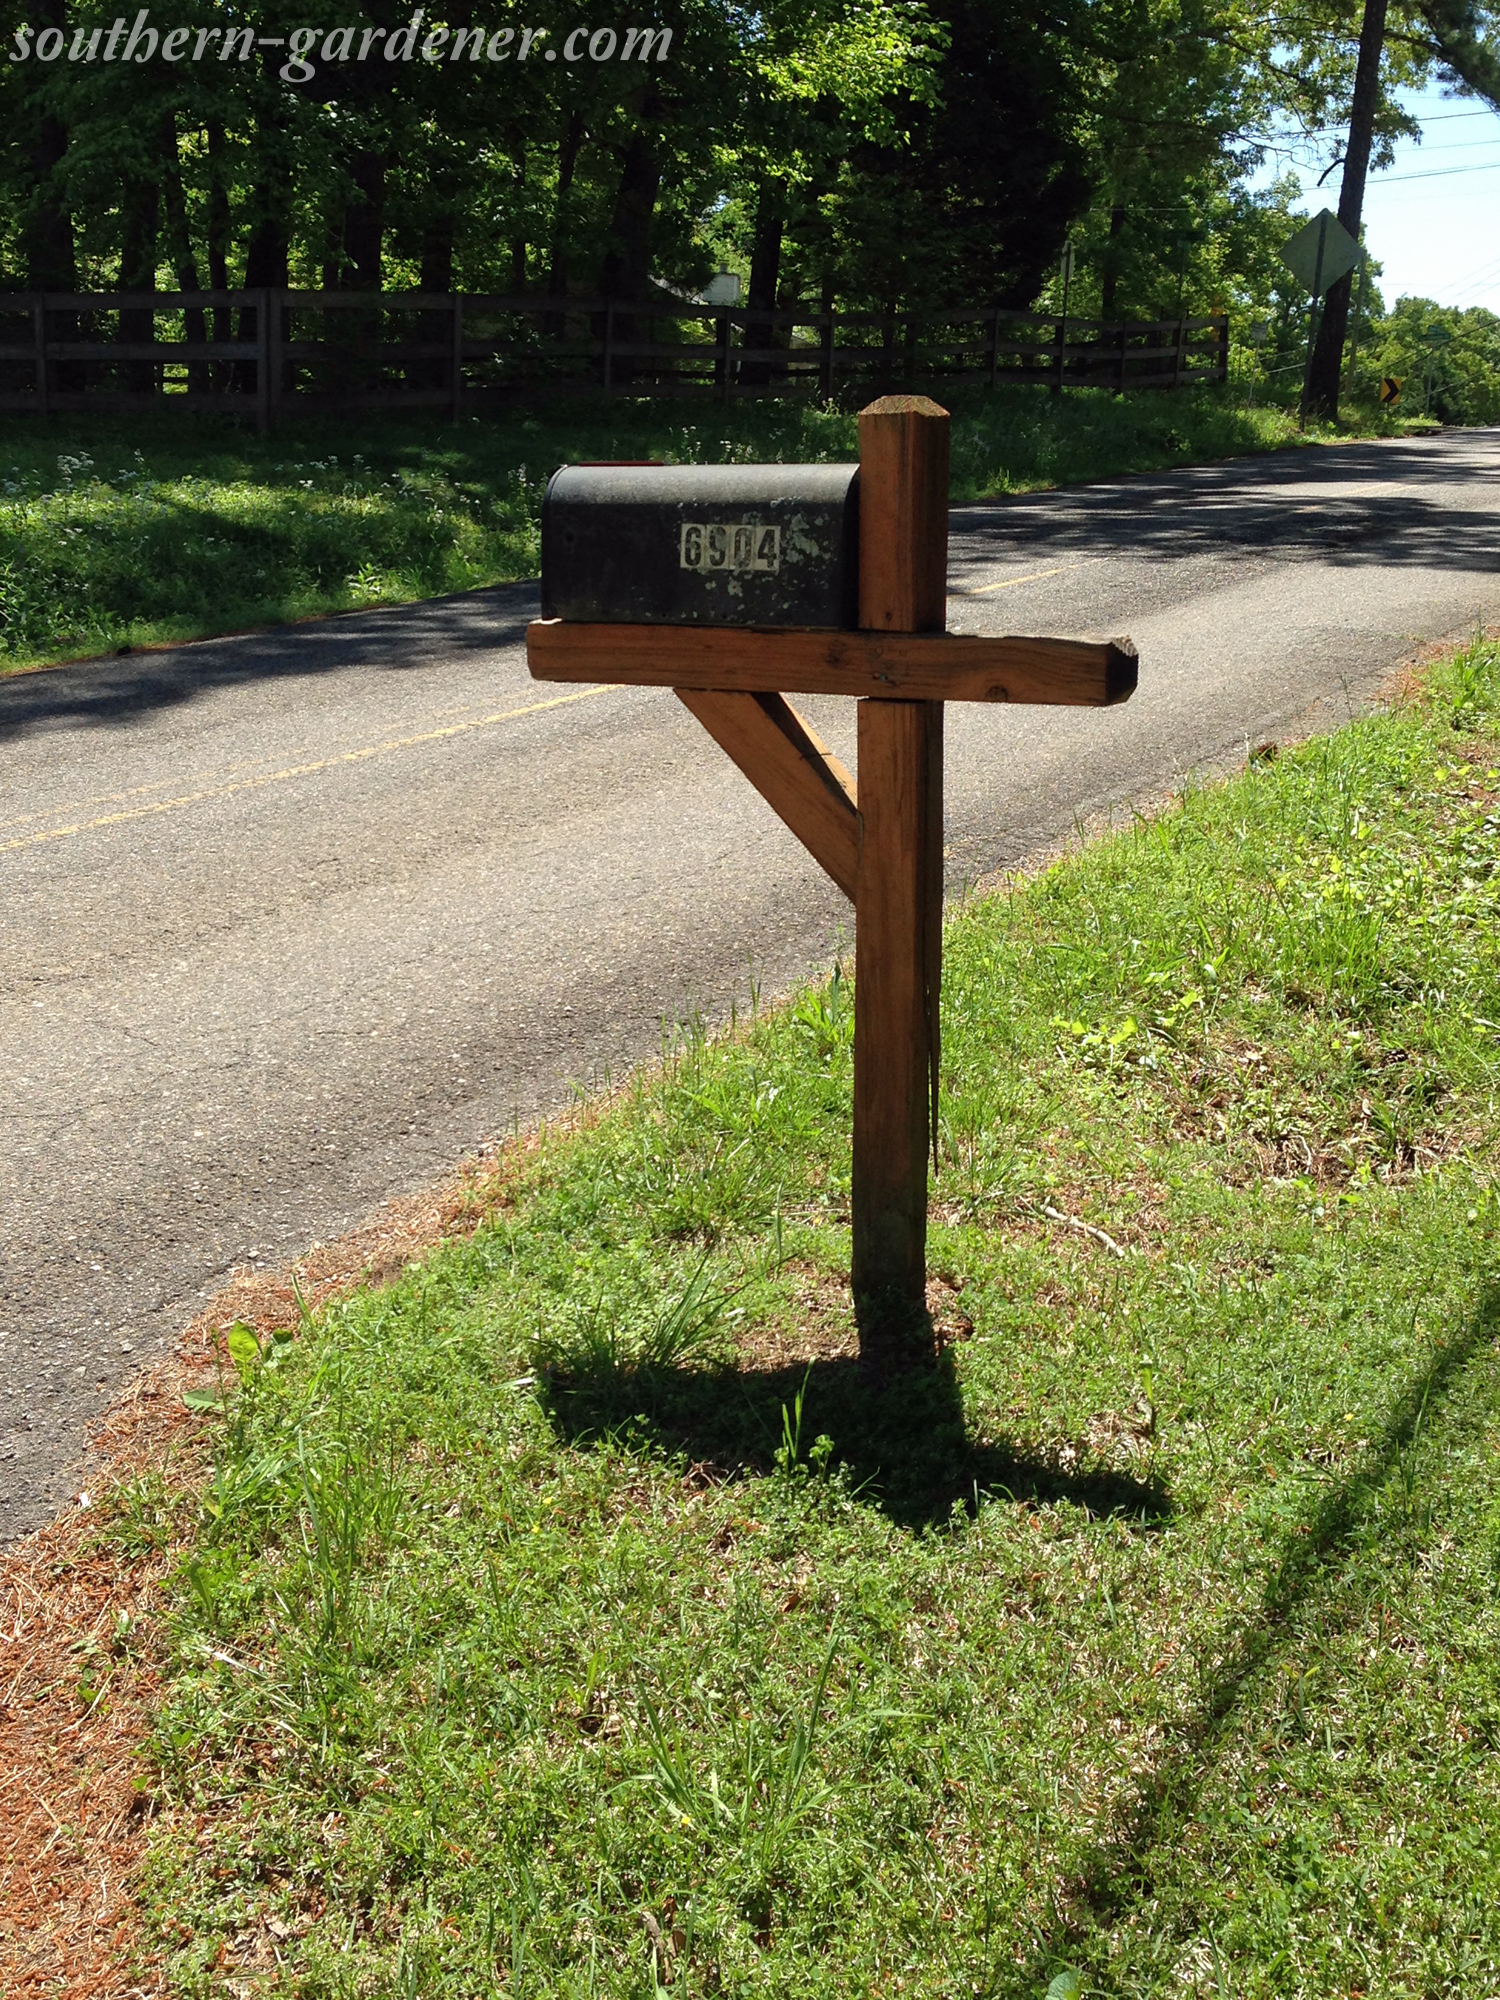
The post isn’t in the best shape, but since it is cemented into the ground, I wasn’t about to take on the task of digging it up. With the ground here, I’m lucky to dig a big enough hole to plant a pint-sized potted flower. The picture above was snapped in May 2015. We’ve been at this house since August 2009. I’m not sure why I never thought to give this area a makeover.
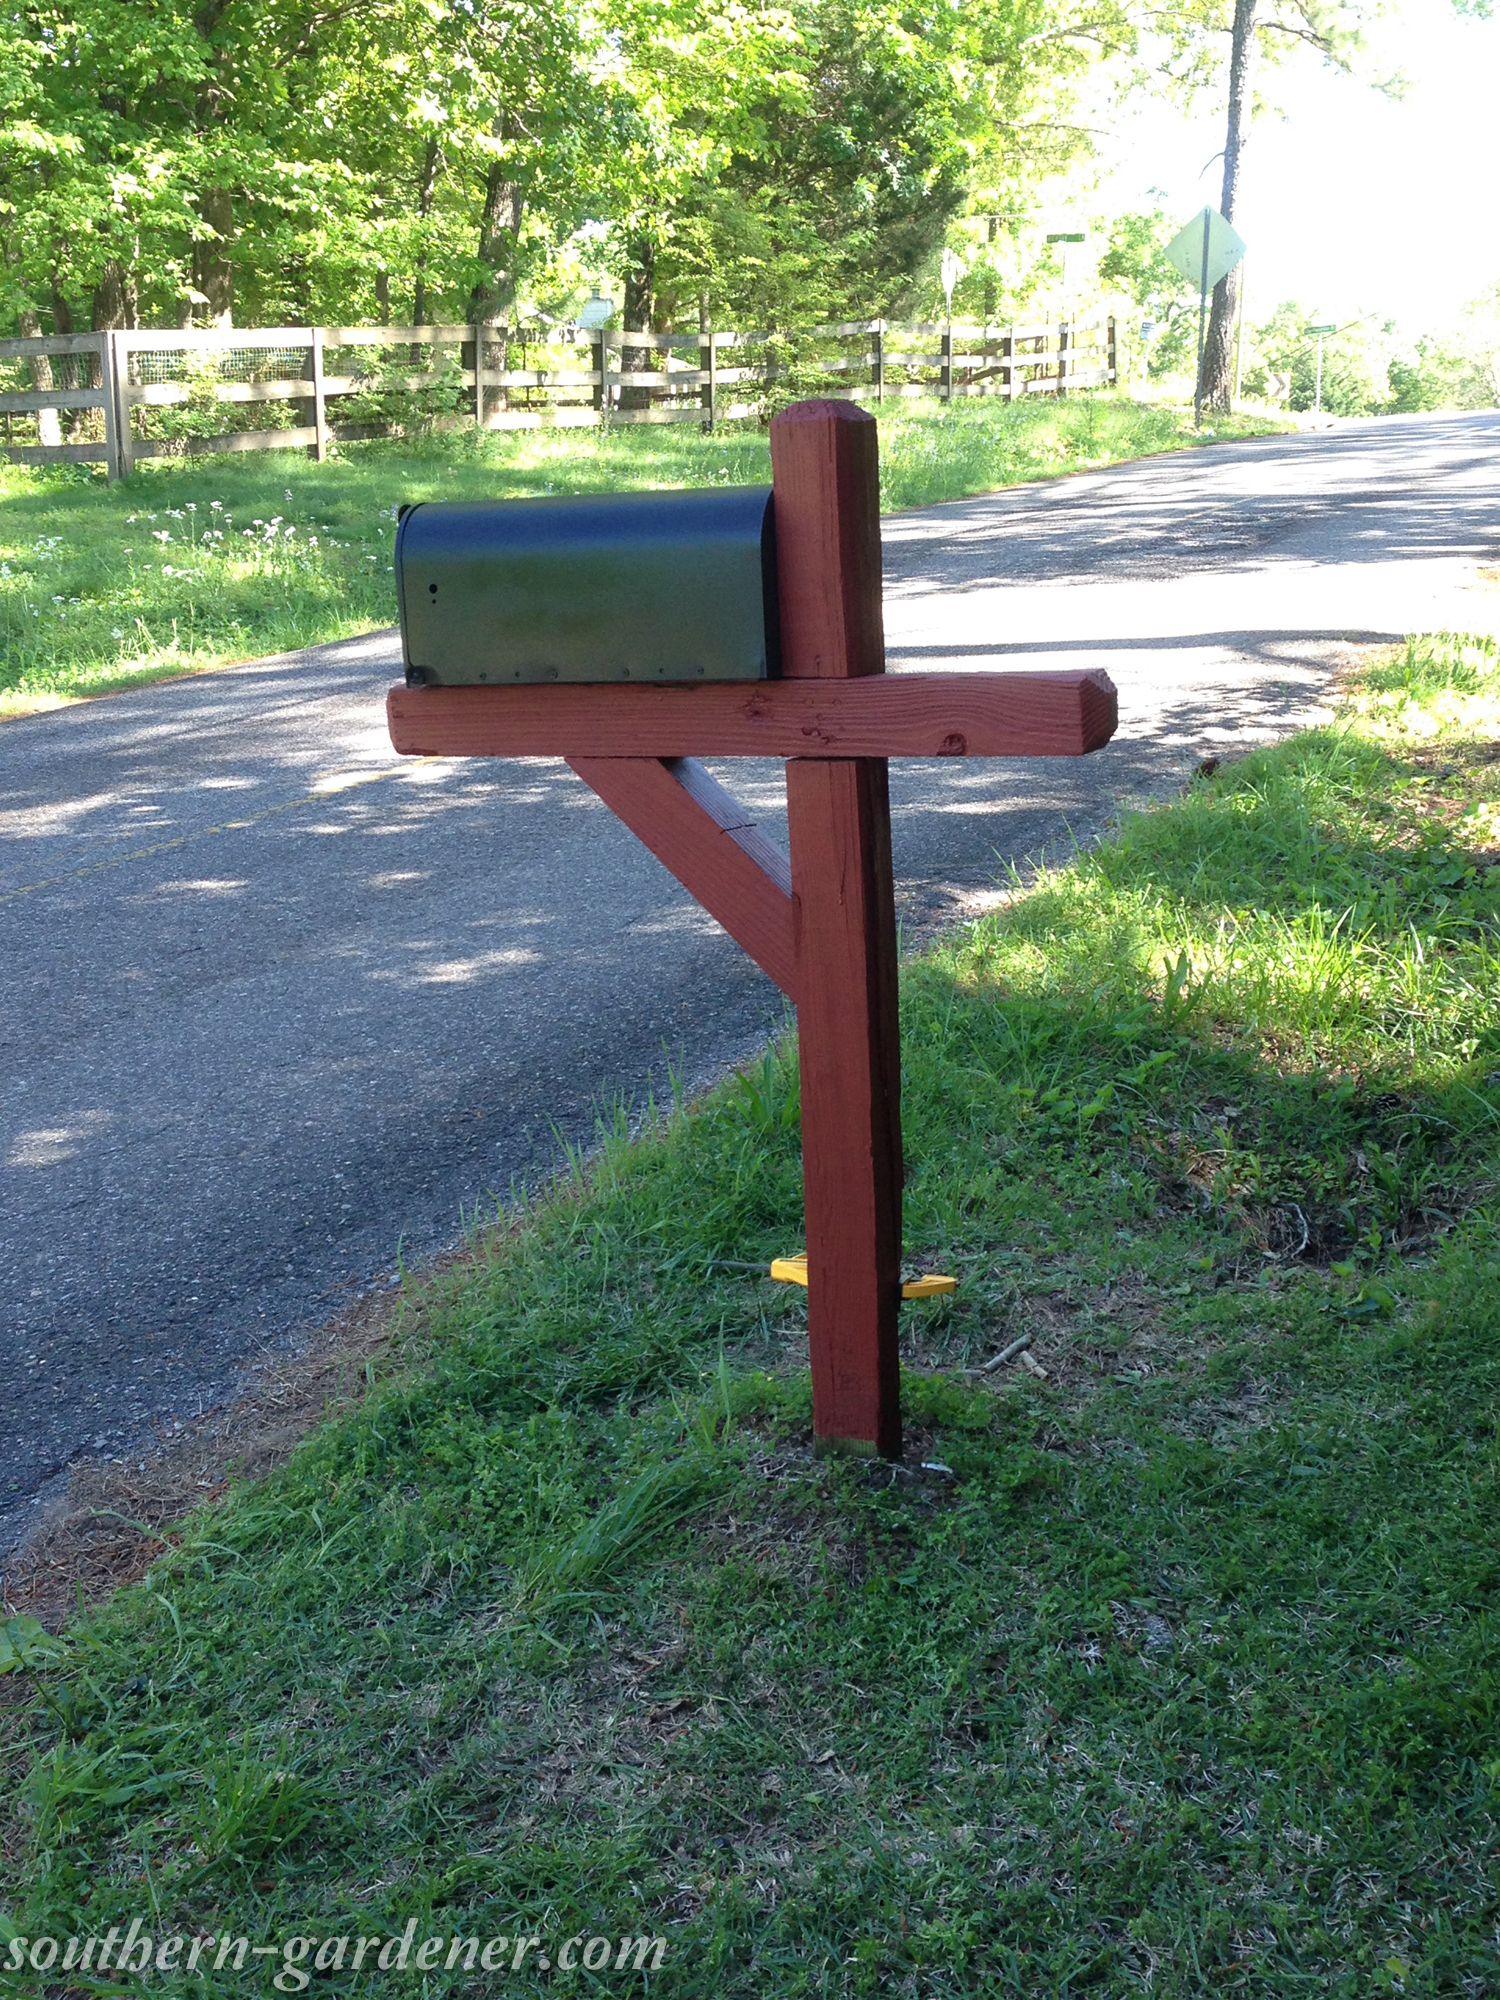
So, to make the current mailbox more appealing, I used an outdoor stain and covered up the ugly orange! Red is much nicer. I used the same stain on the trim pieces for my raised garden beds. And rather than buying a new mailbox, I removed the stickers on this one (thanks to the help of Goo Gone and a heat gun!), cleaned this one, and spray-painted it black to make it look fresh. I also tried using some wood glue and a clamp to fix the cracked wood on the backside of the post. You can see the clamp in the picture below. It didn’t hold very well though.
It’s amazing how just a fresh coat of paint can bring life back into something old! The flag was also broken on the mailbox, which might be what initially prompted this mailbox makeover to begin with. I got a new mailbox flag and added it to the mailbox, and I used really big, silver numbers on each side of the post for our street numbers, rather than putting stickers back on the mailbox. I also added a little circular flowerbed around the post. For the first summer, it had a tropical hibiscus, white angelonias, coleus, and calibrachoa.
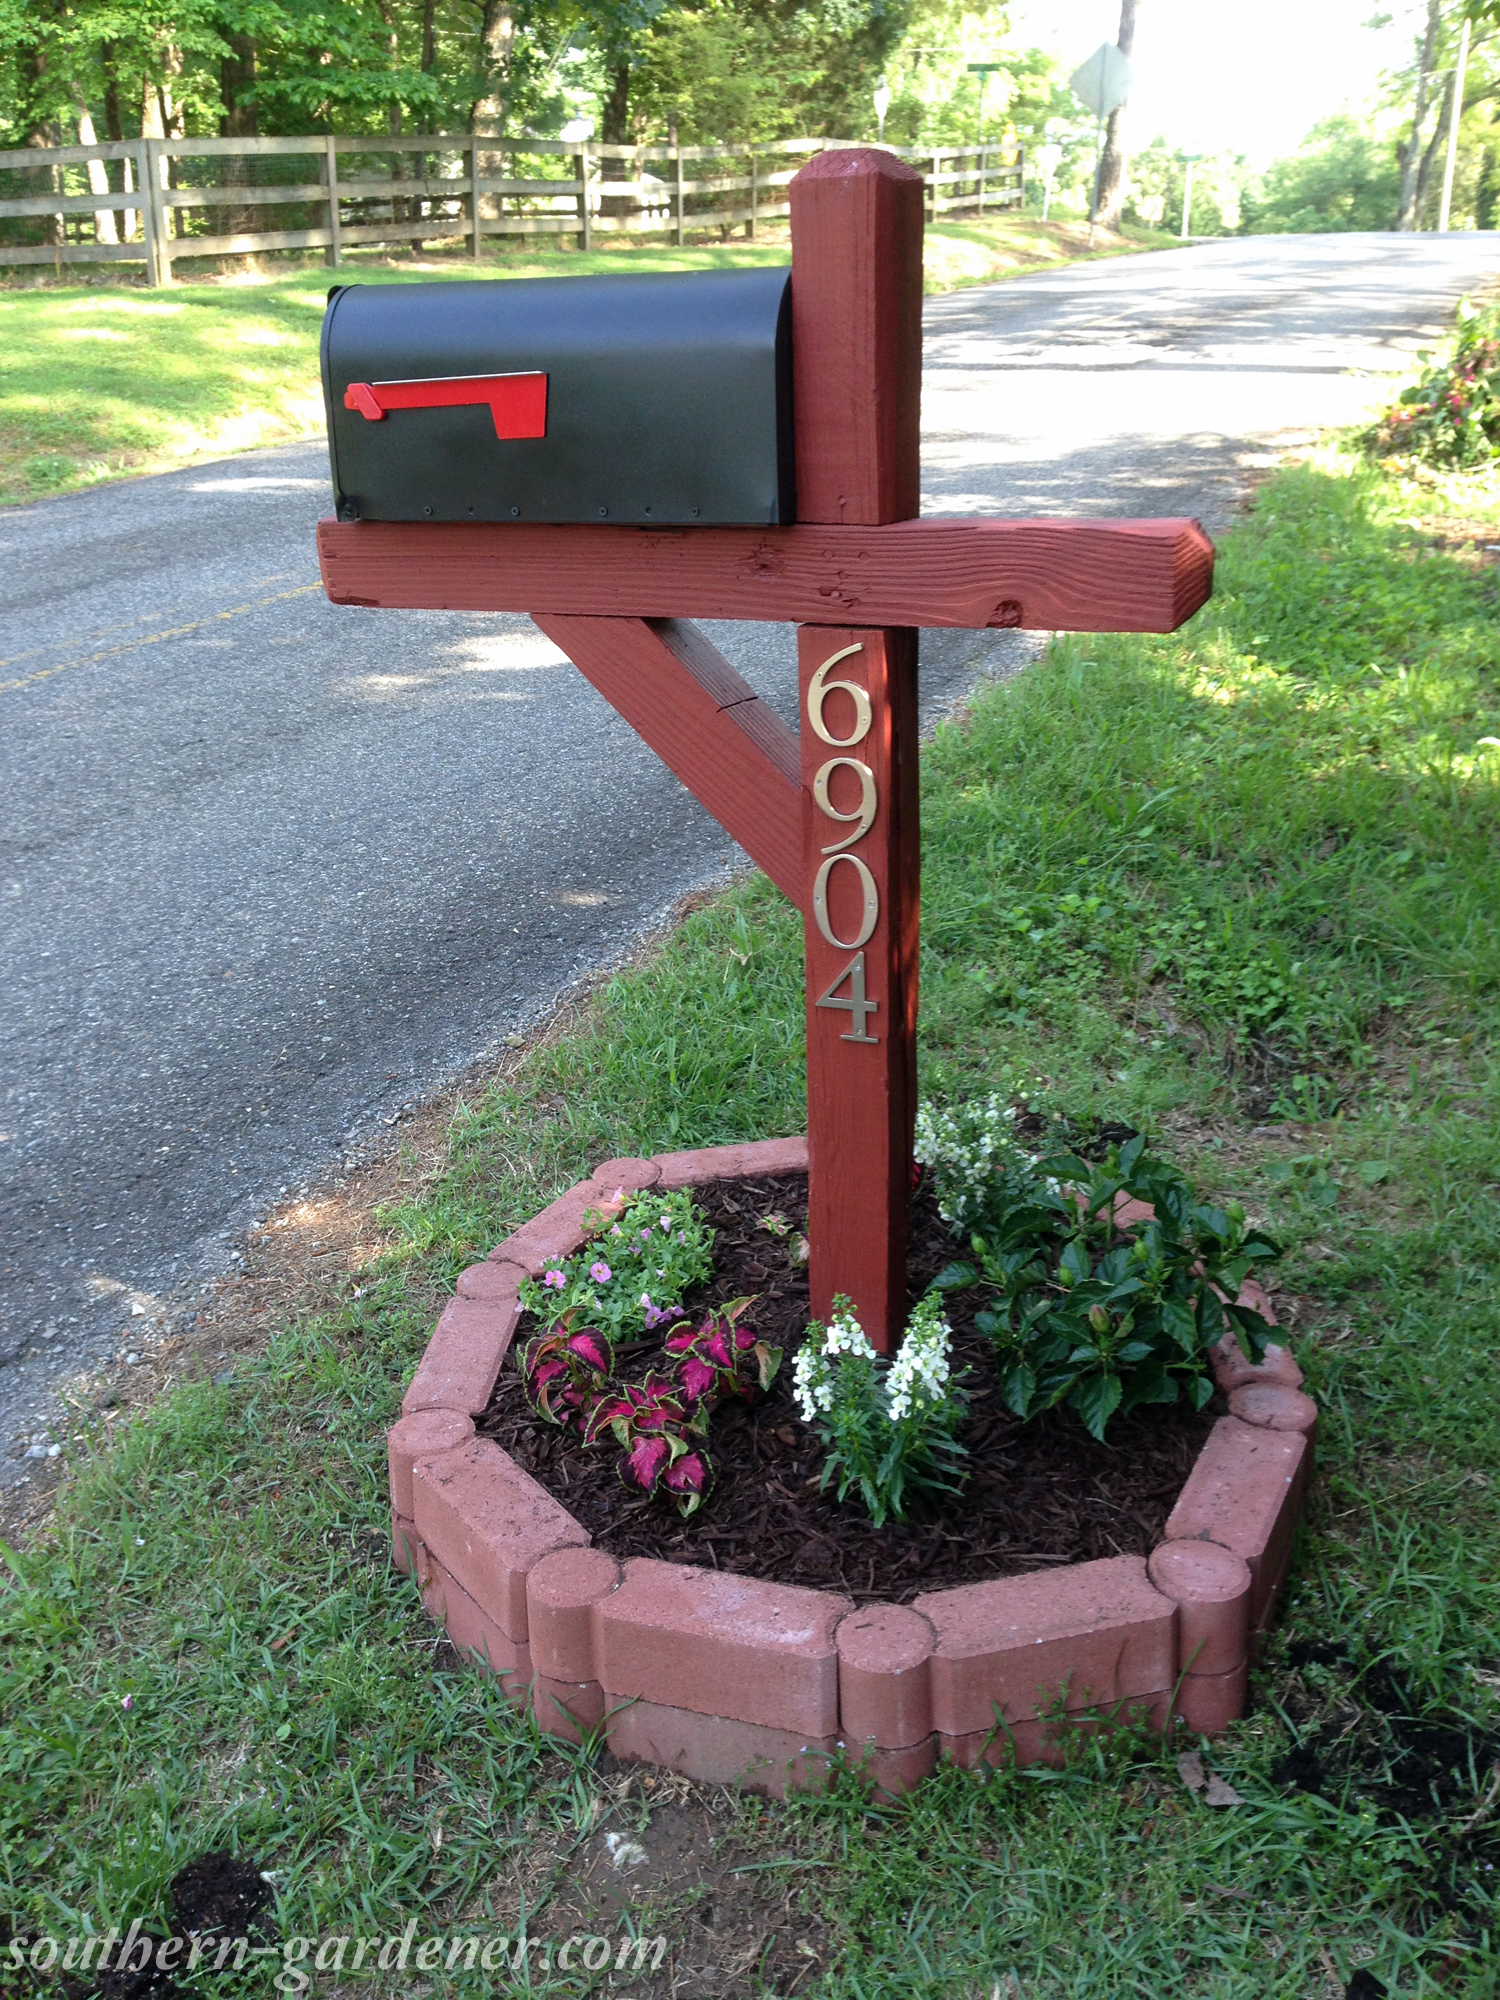
And when I cinched down the mailbox, it wasn’t straight. 🙄 I’ll fix it one day. Maybe. I planted a tropical hibiscus in the back, white angelonias and coleus on the sides, and calibrachoa in the front. Please forgive the quality of the picture. The camera on my then-iPhone 5 sucked.
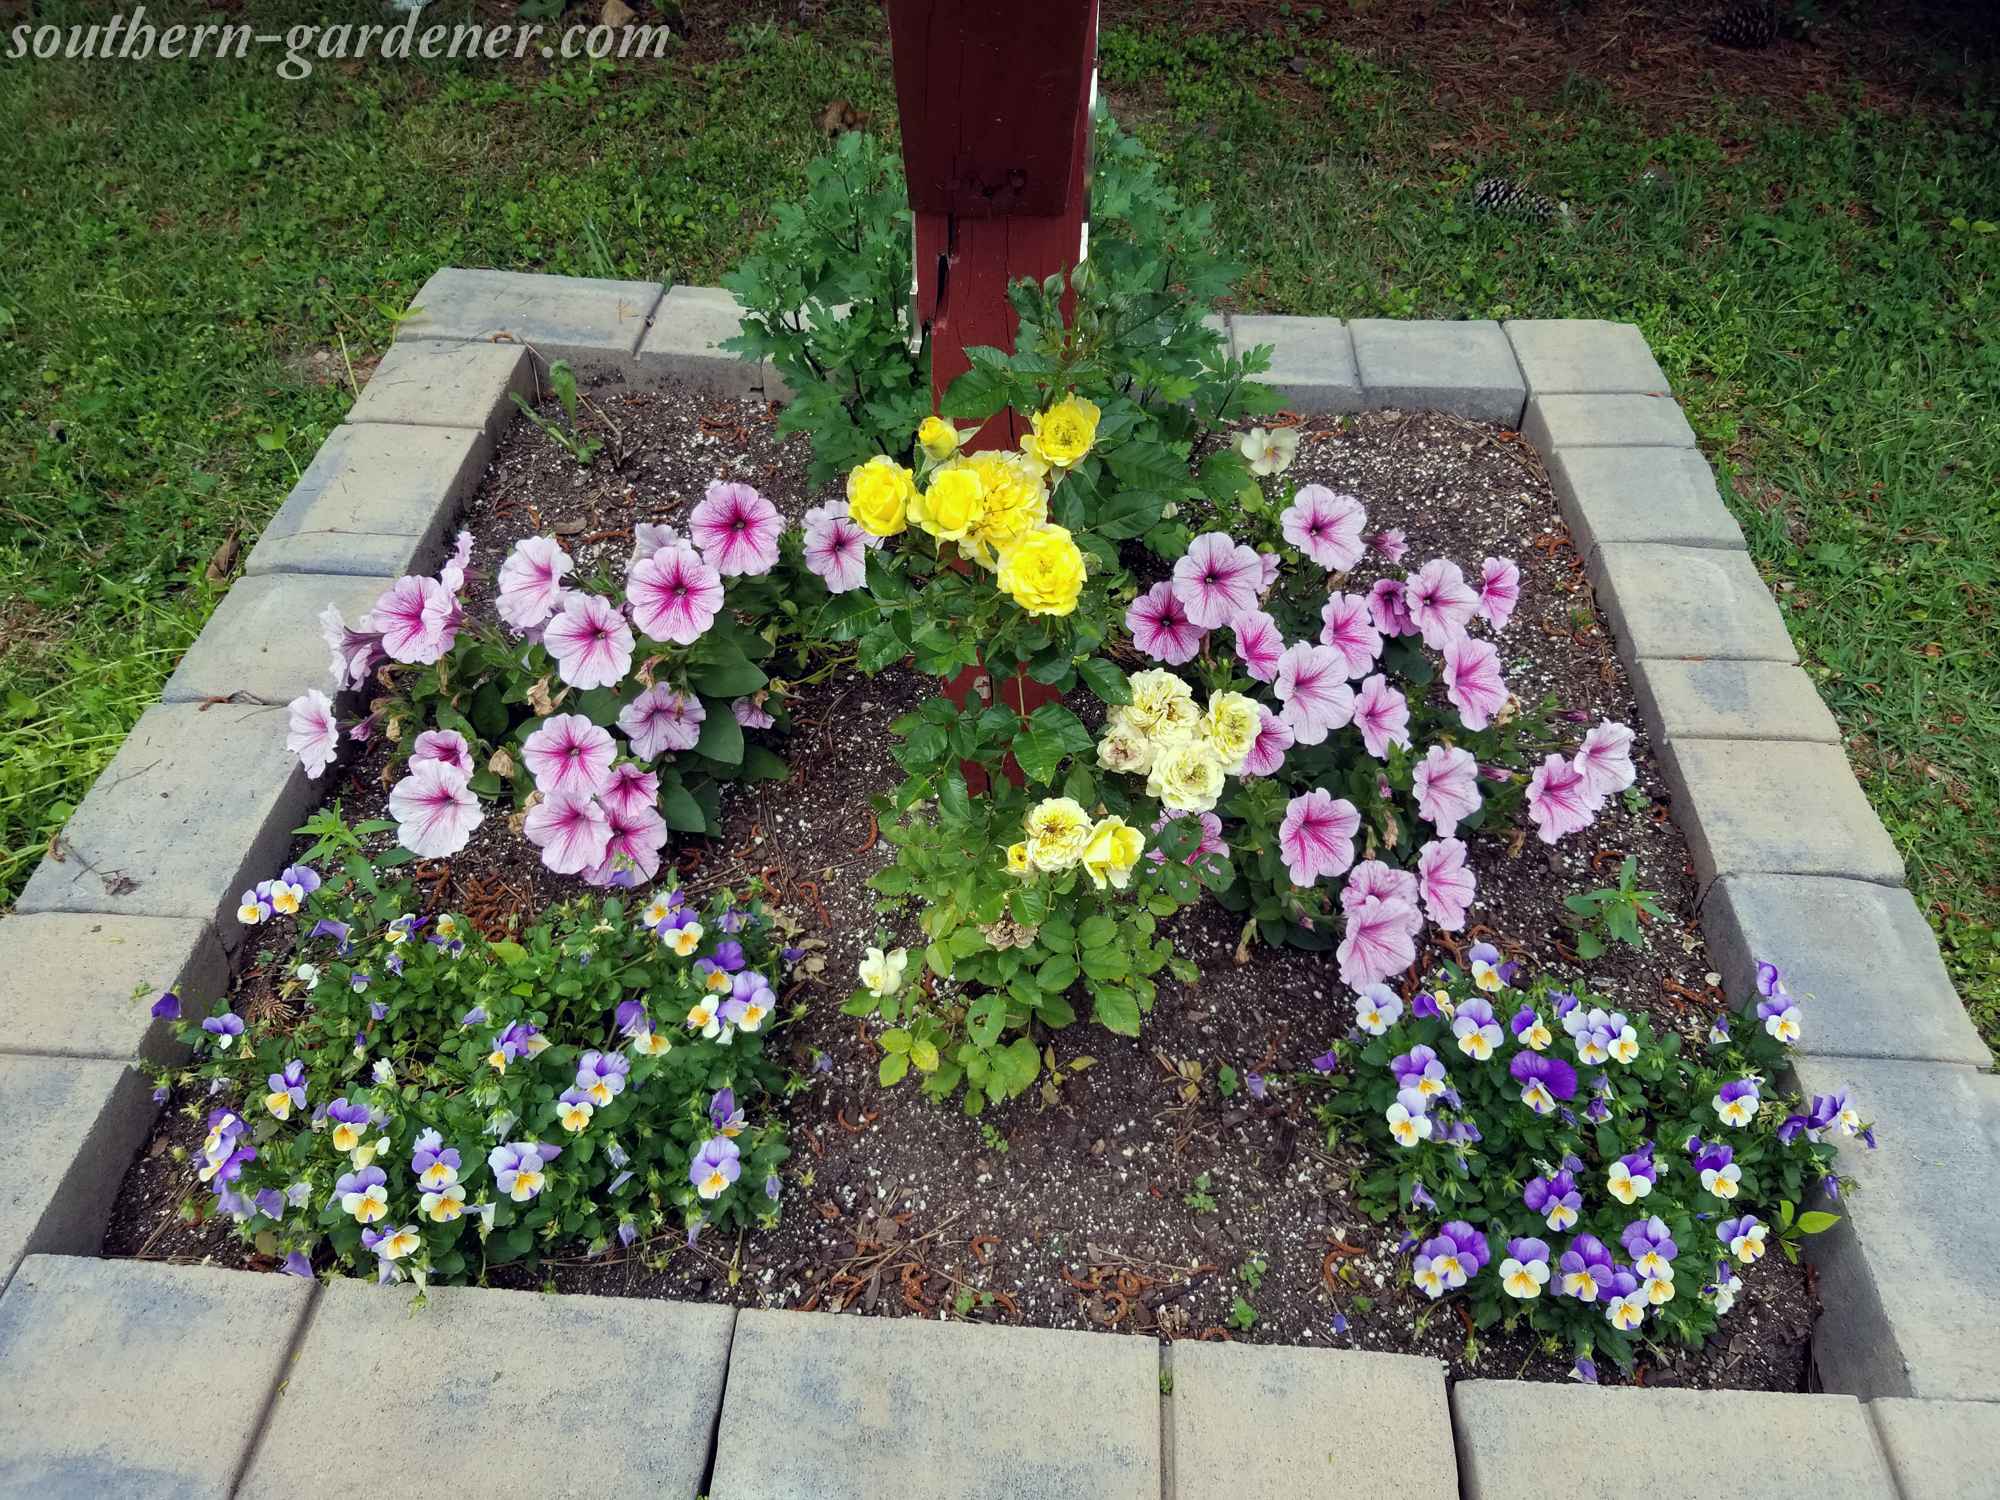
The following summer (2016), I only took one picture. I hadn’t really hit my plant addict “let me take pictures of everything” phase yet. I planted a yellow miniature rose bush in the back, coleus and celosia flowers on the sides, and violas in the front. I wasn’t impressed with the celosias performance. They didn’t do well here, so that might be why there’s just one picture, shortly after planting them.

In early spring of last year, I replaced the front and side flowers with these pansies & violas I’d started from seed.
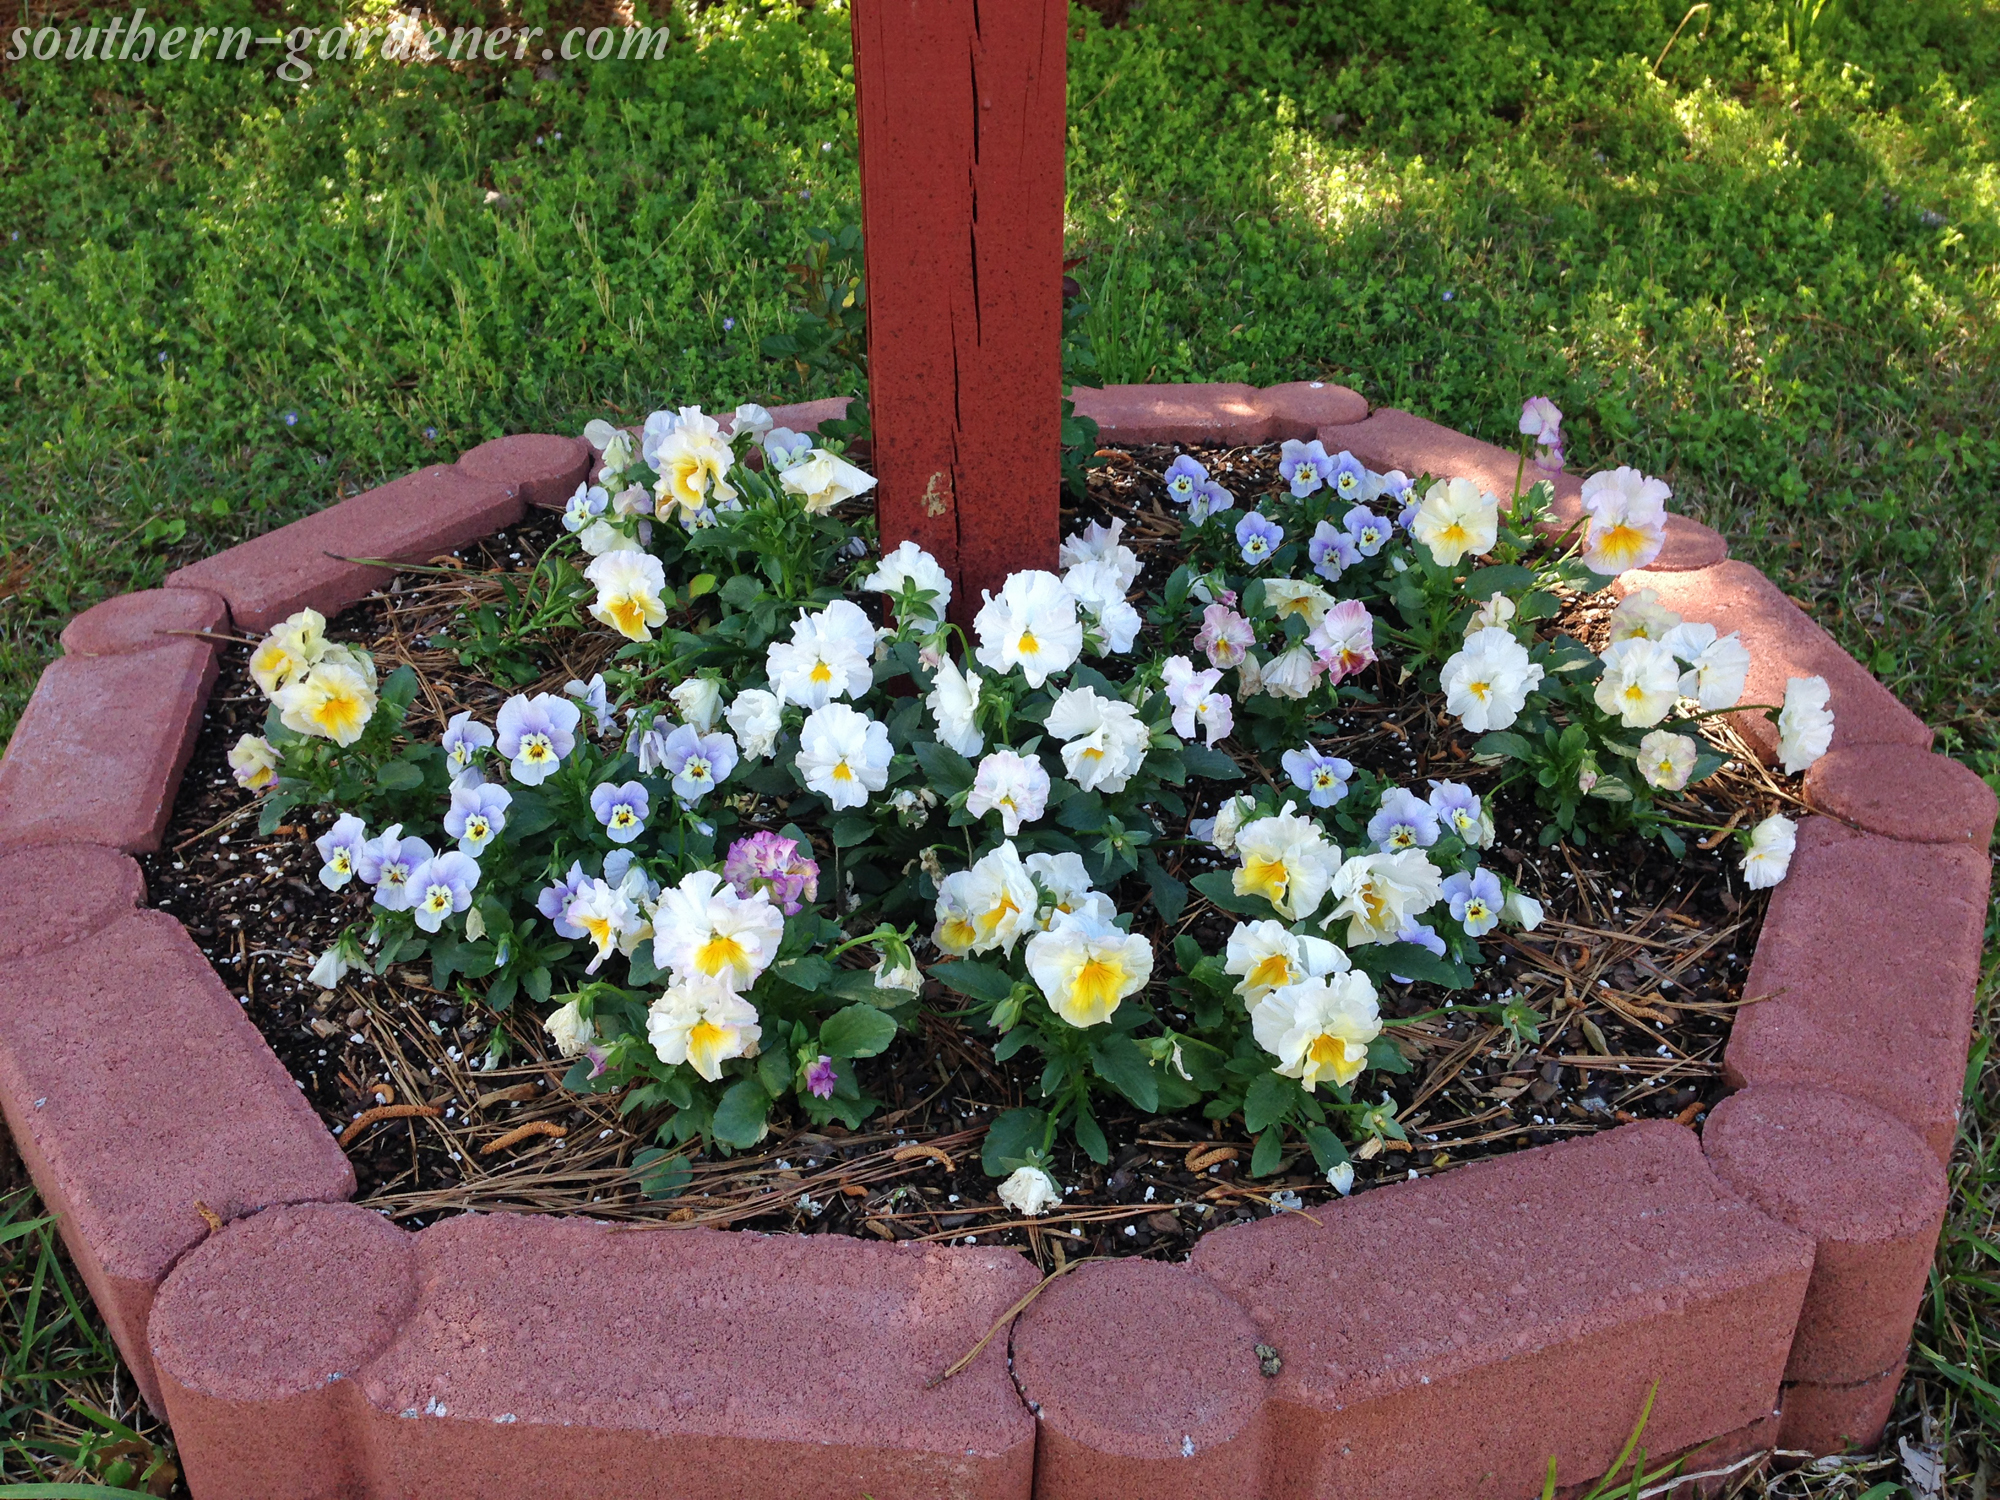
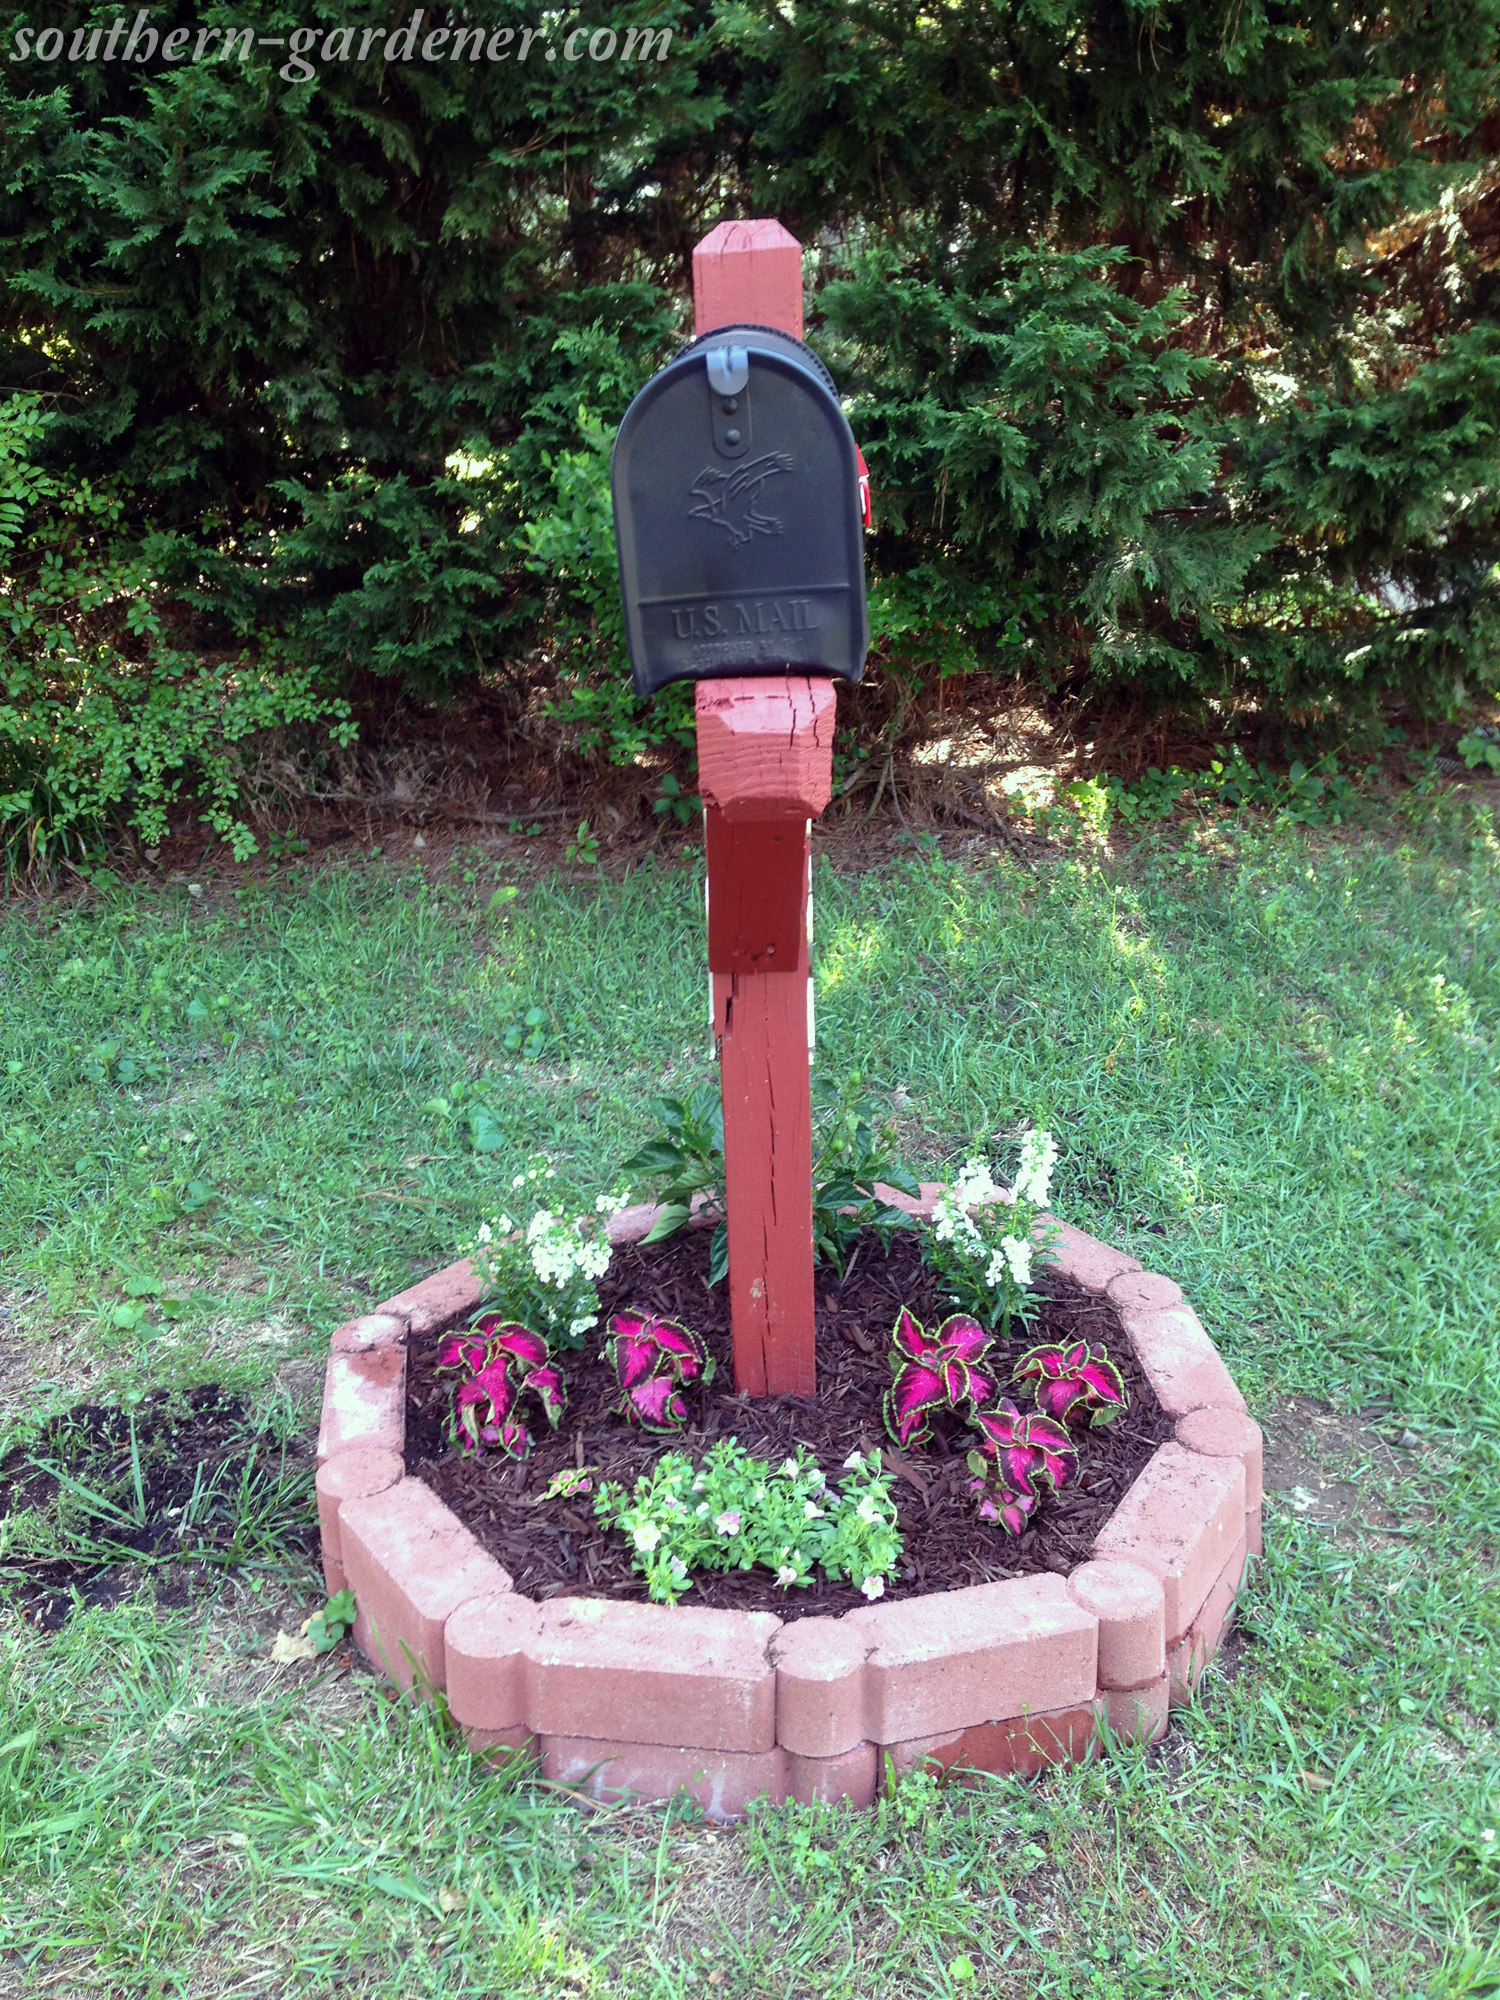
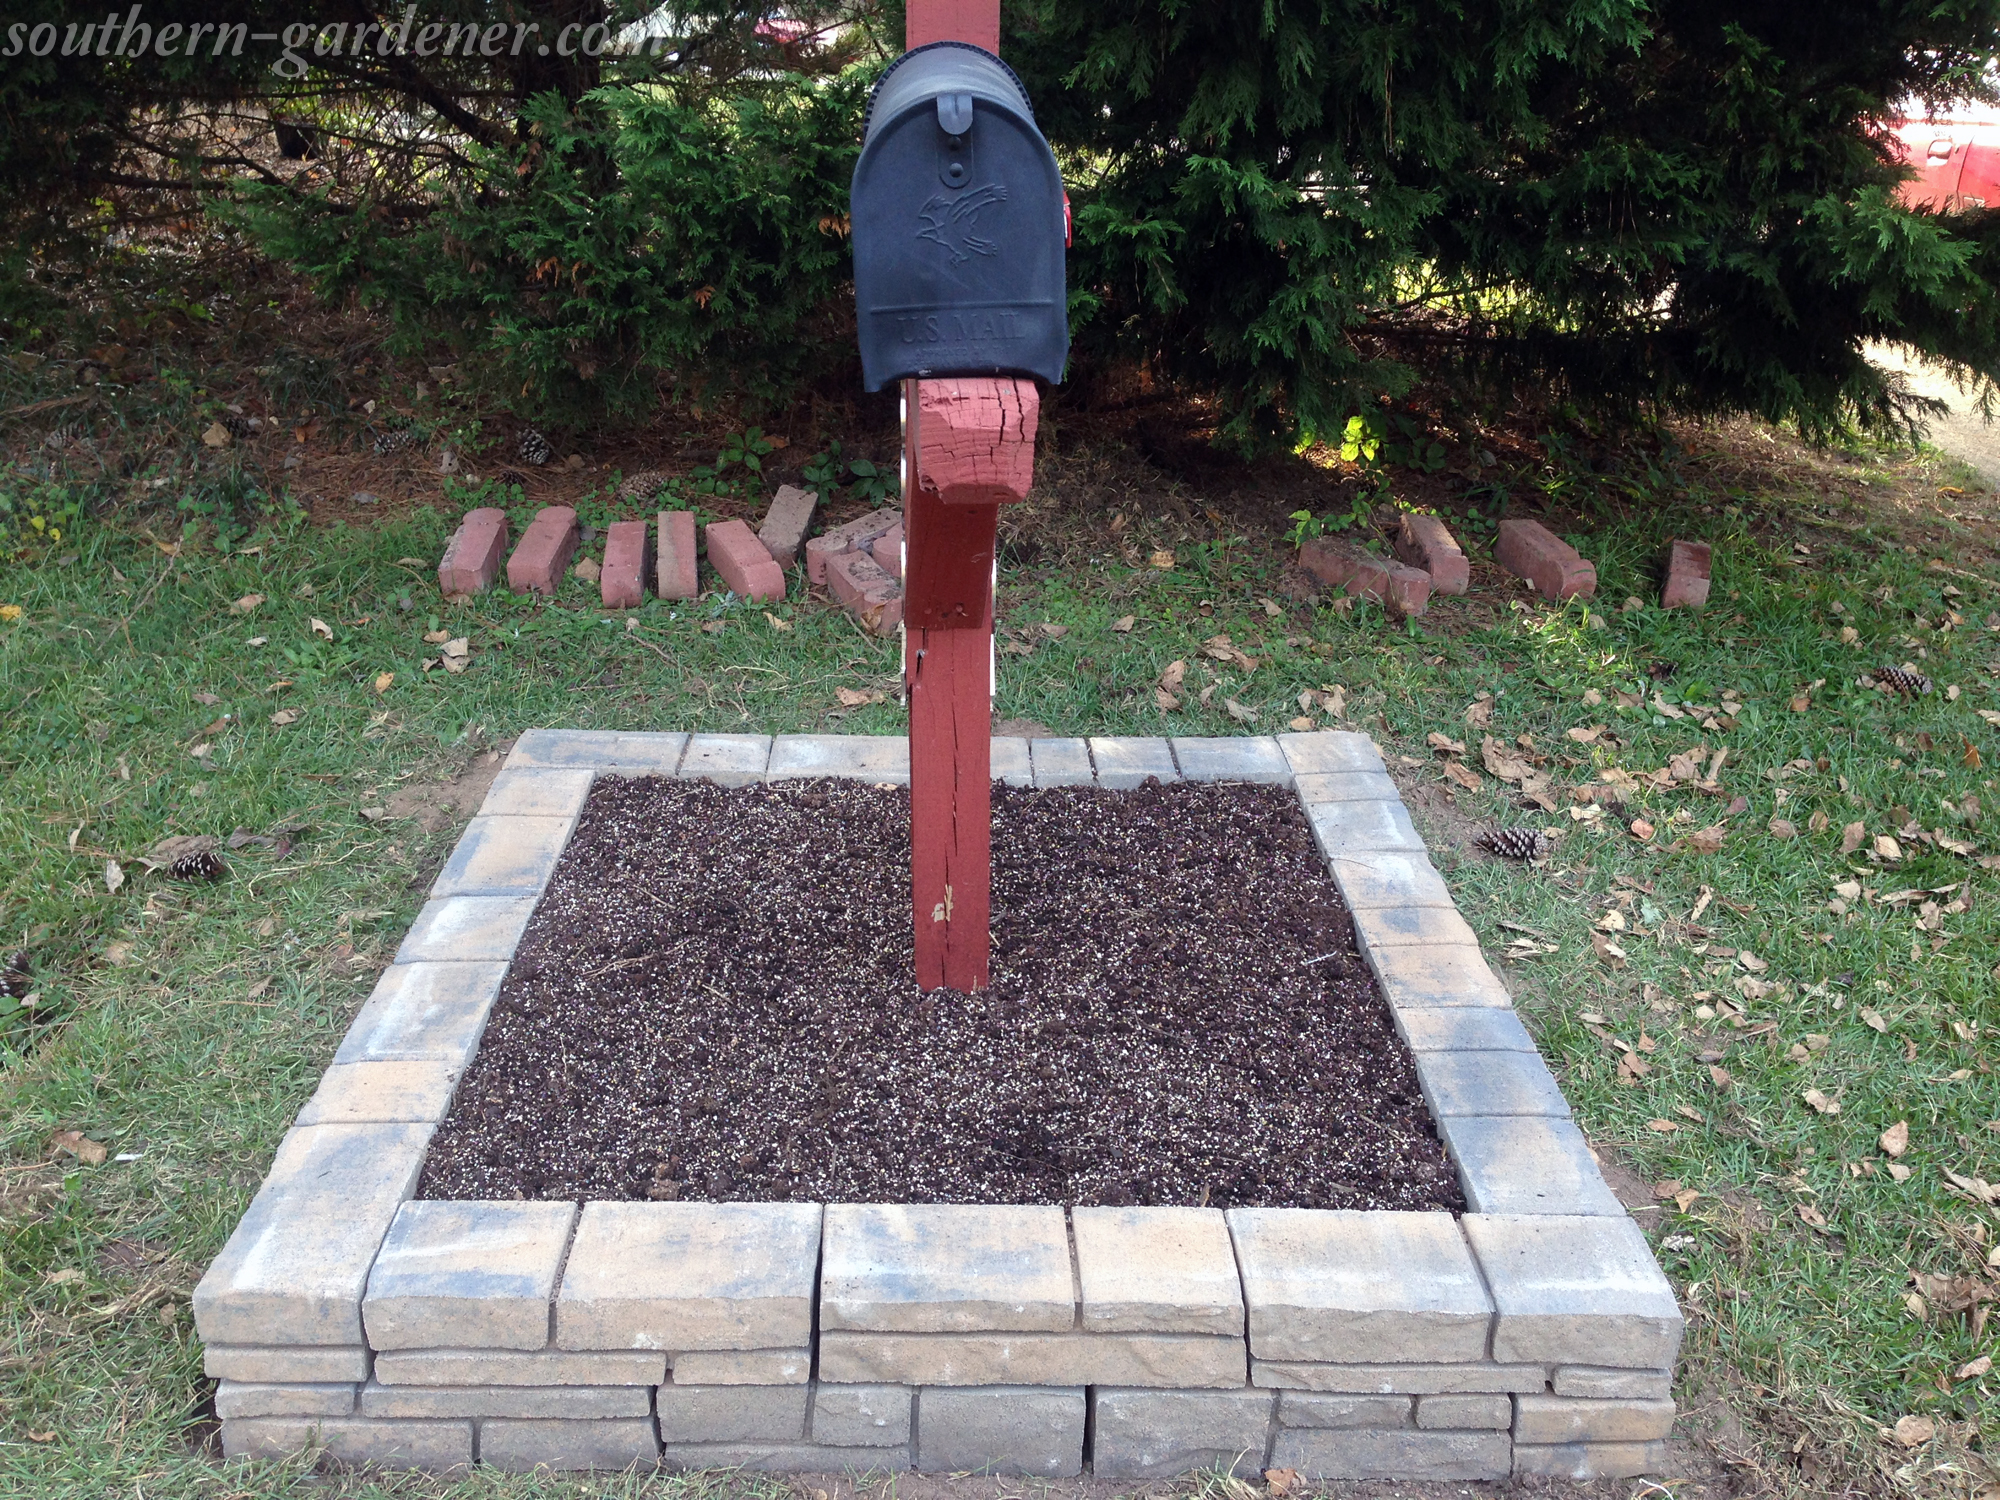
Honestly, I just wasn’t digging the small flowerbed outlined with red bricks. Since pansies & violas are not hot-weather plants (at least not here in Alabama), by September, the mailbox flowerbed was pretty bare. I don’t know why I didn’t plant anything else.

So I decided it was time for another mailbox makeover! It’s not really gardening unless you re-do an area 2-3 times, right?! 😆 I decided to make the flowerbed bigger so I could plant more! I really like these retaining wall bricks I got from Lowe’s. I did 2 layers so it would be a little deeper as well.
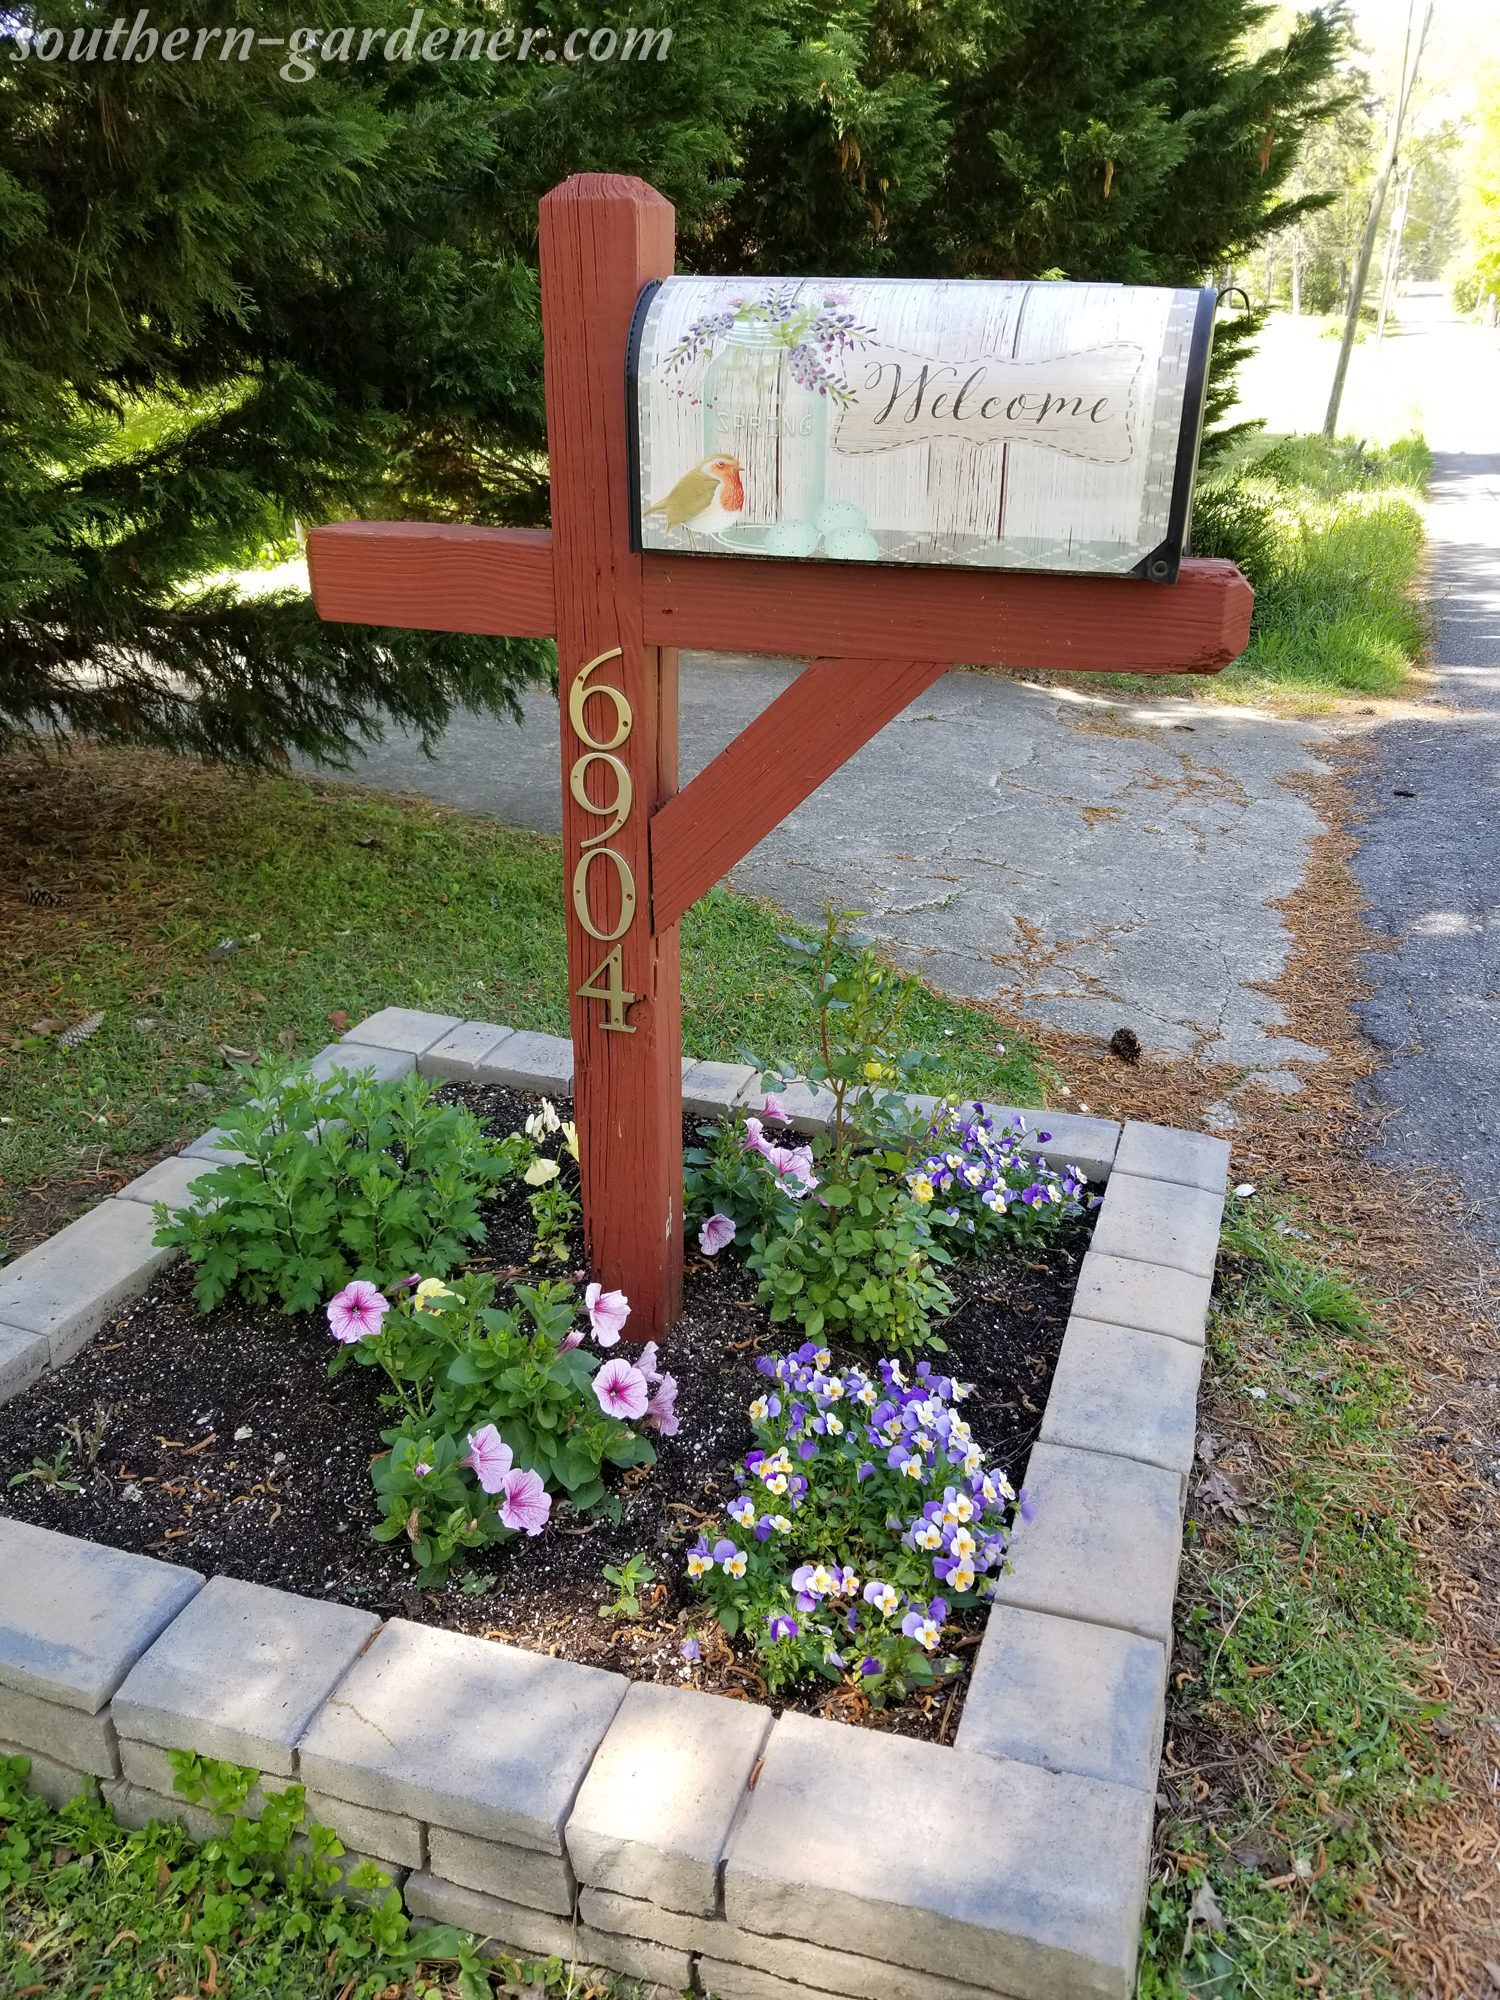
Yes… the mailbox is still not straight. Maybe one day I’ll get to that. One day. For fall last year, I started doing mailbox covers. I only have a few I use throughout the year. Some are general seasonal covers. This fall one below is just adorable! I got it from Amazon.
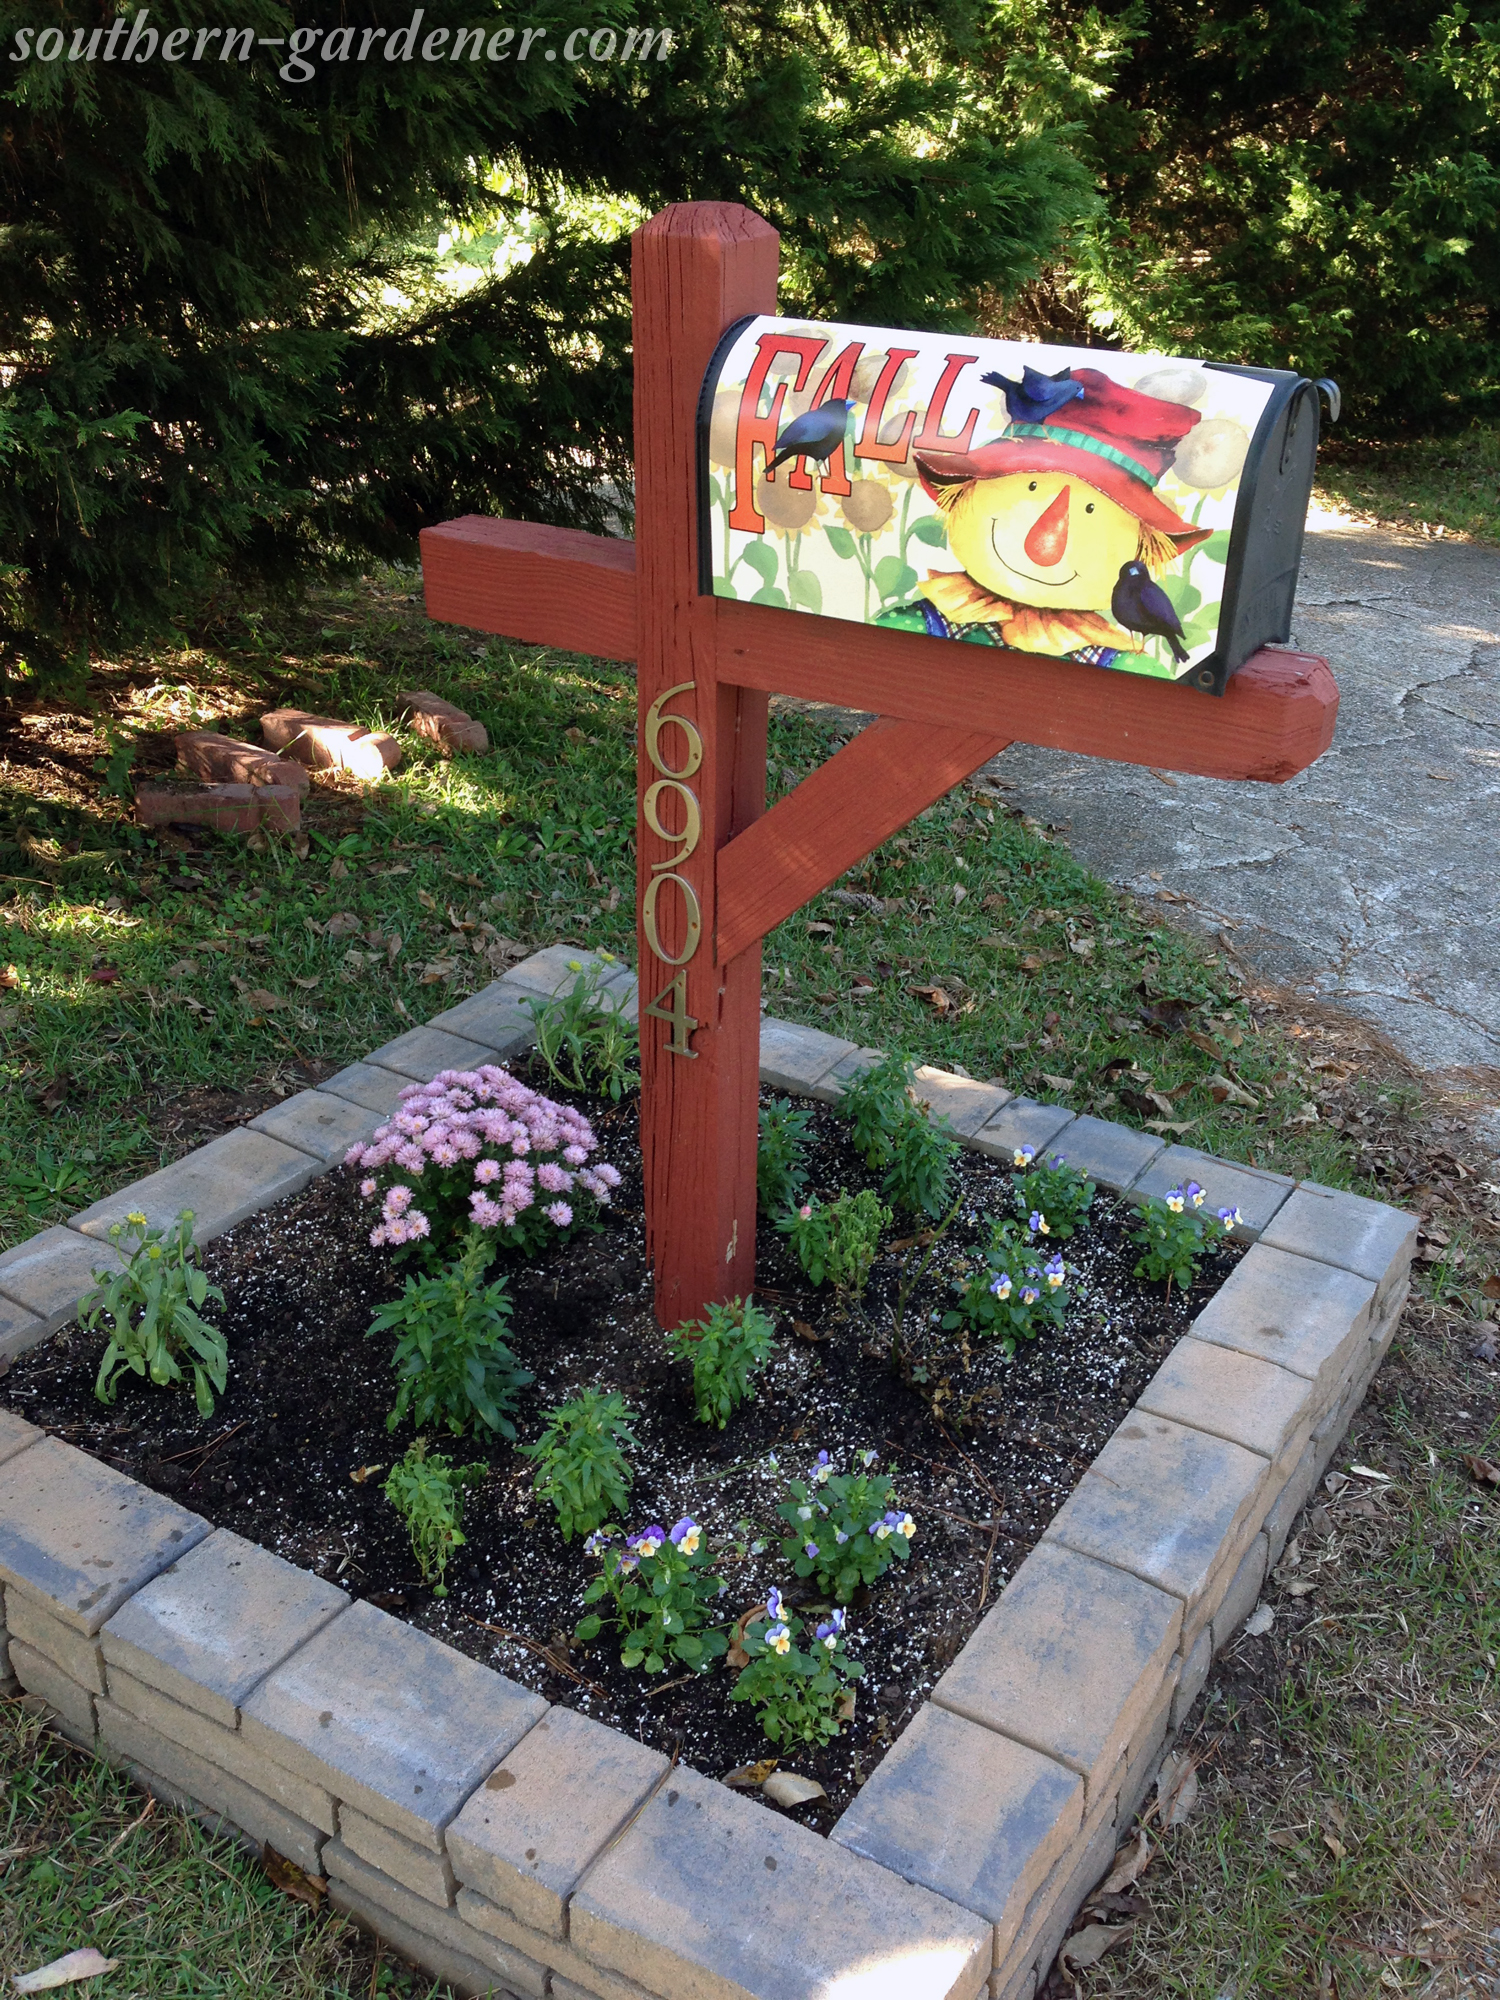
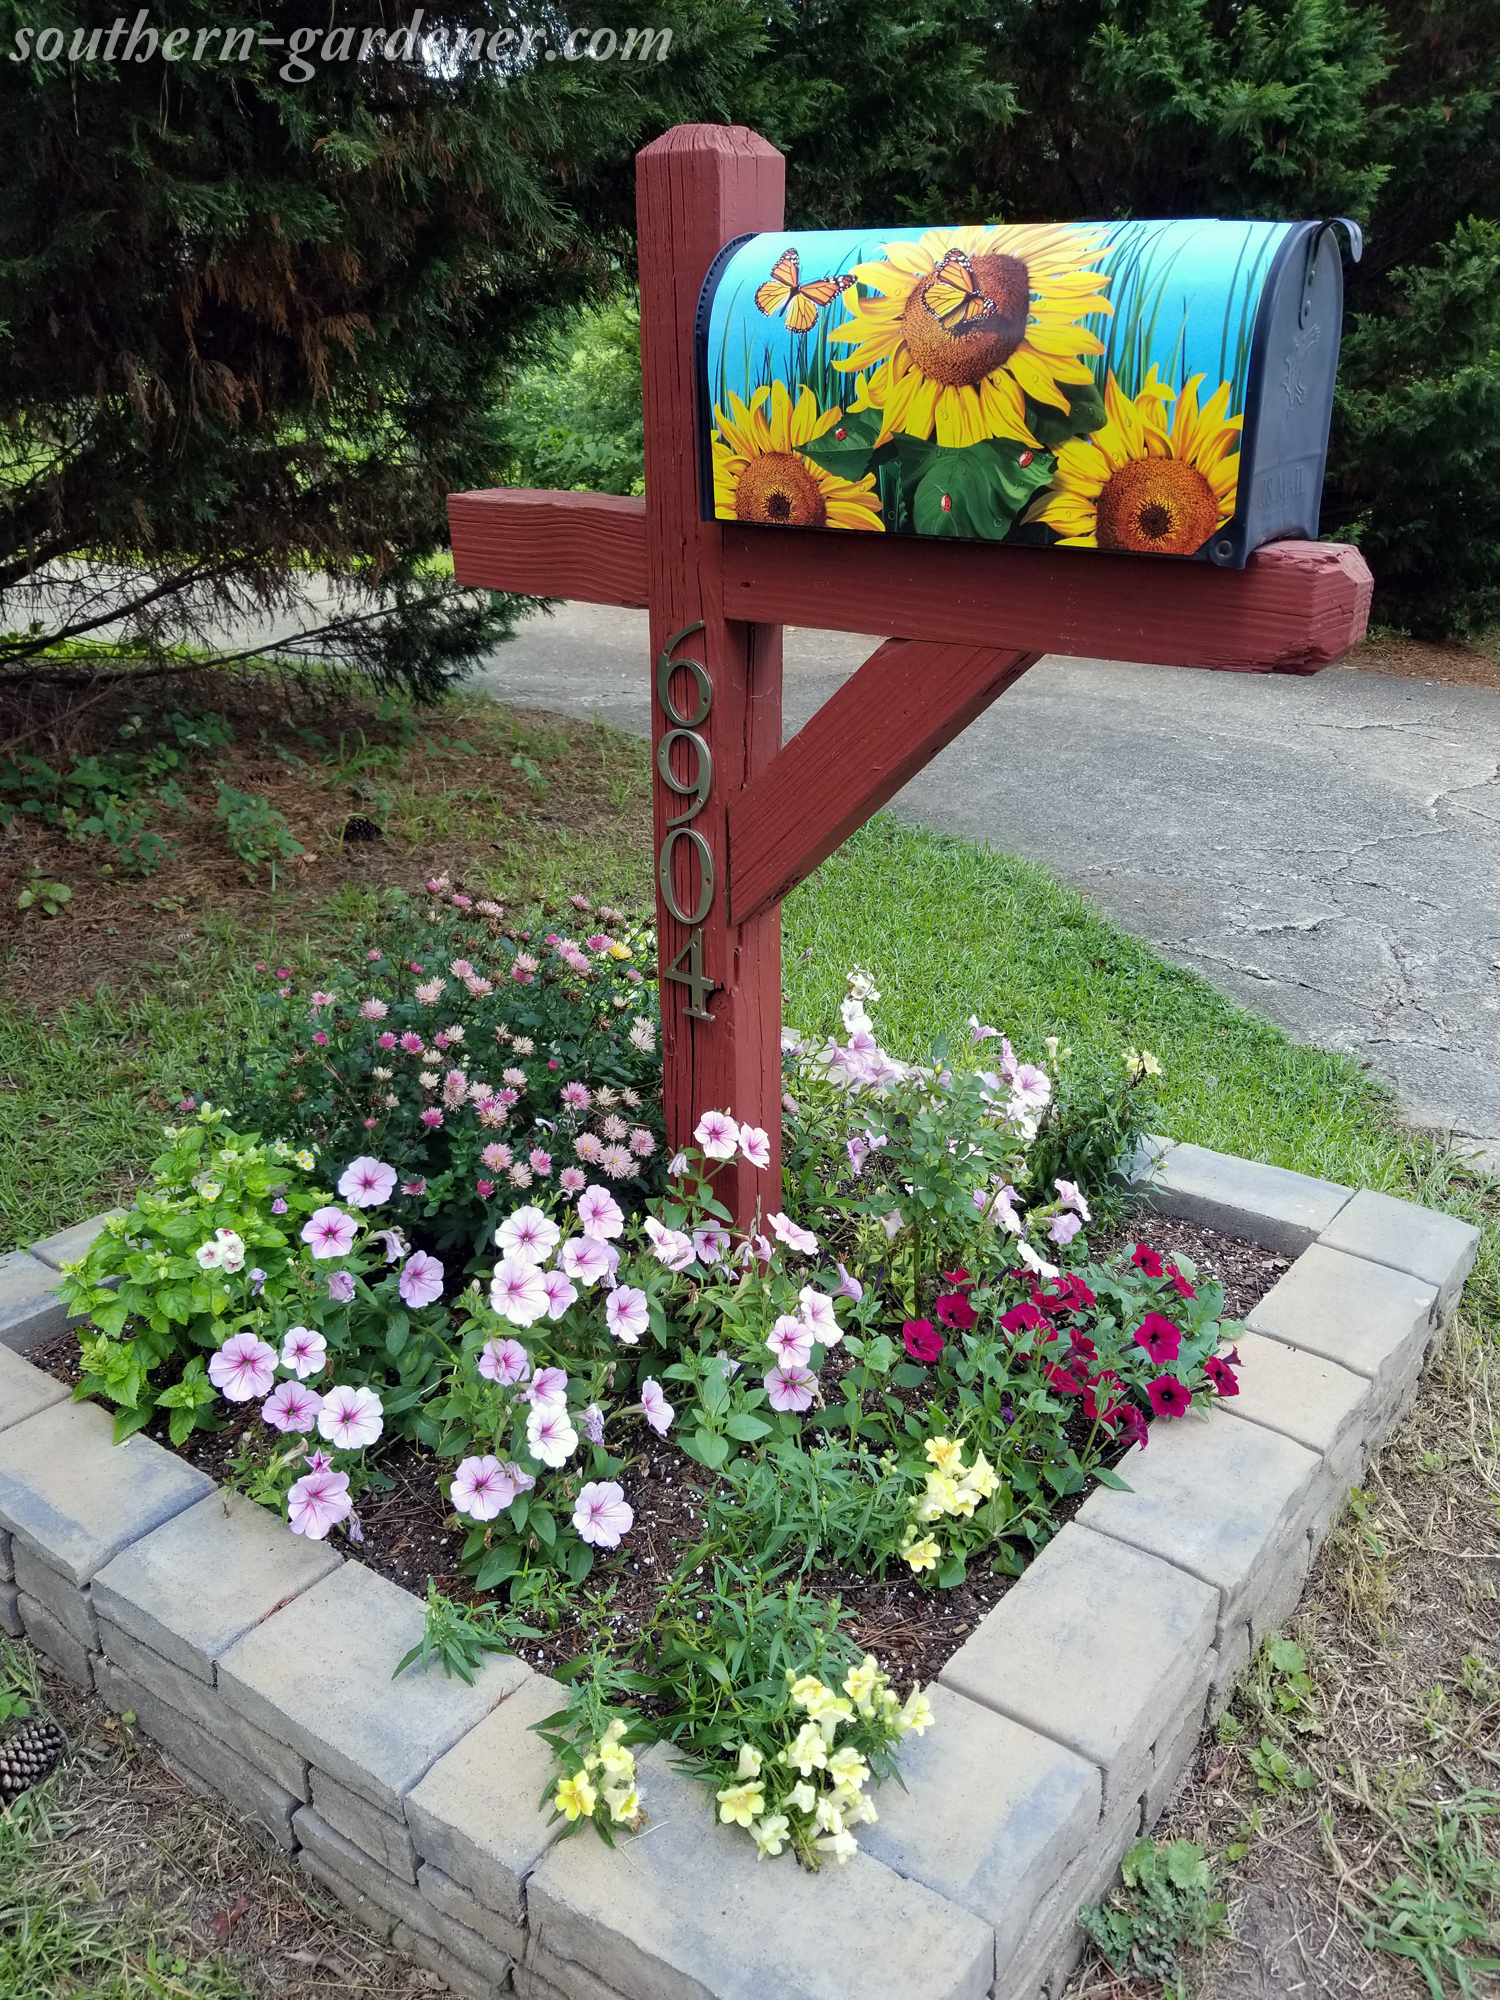
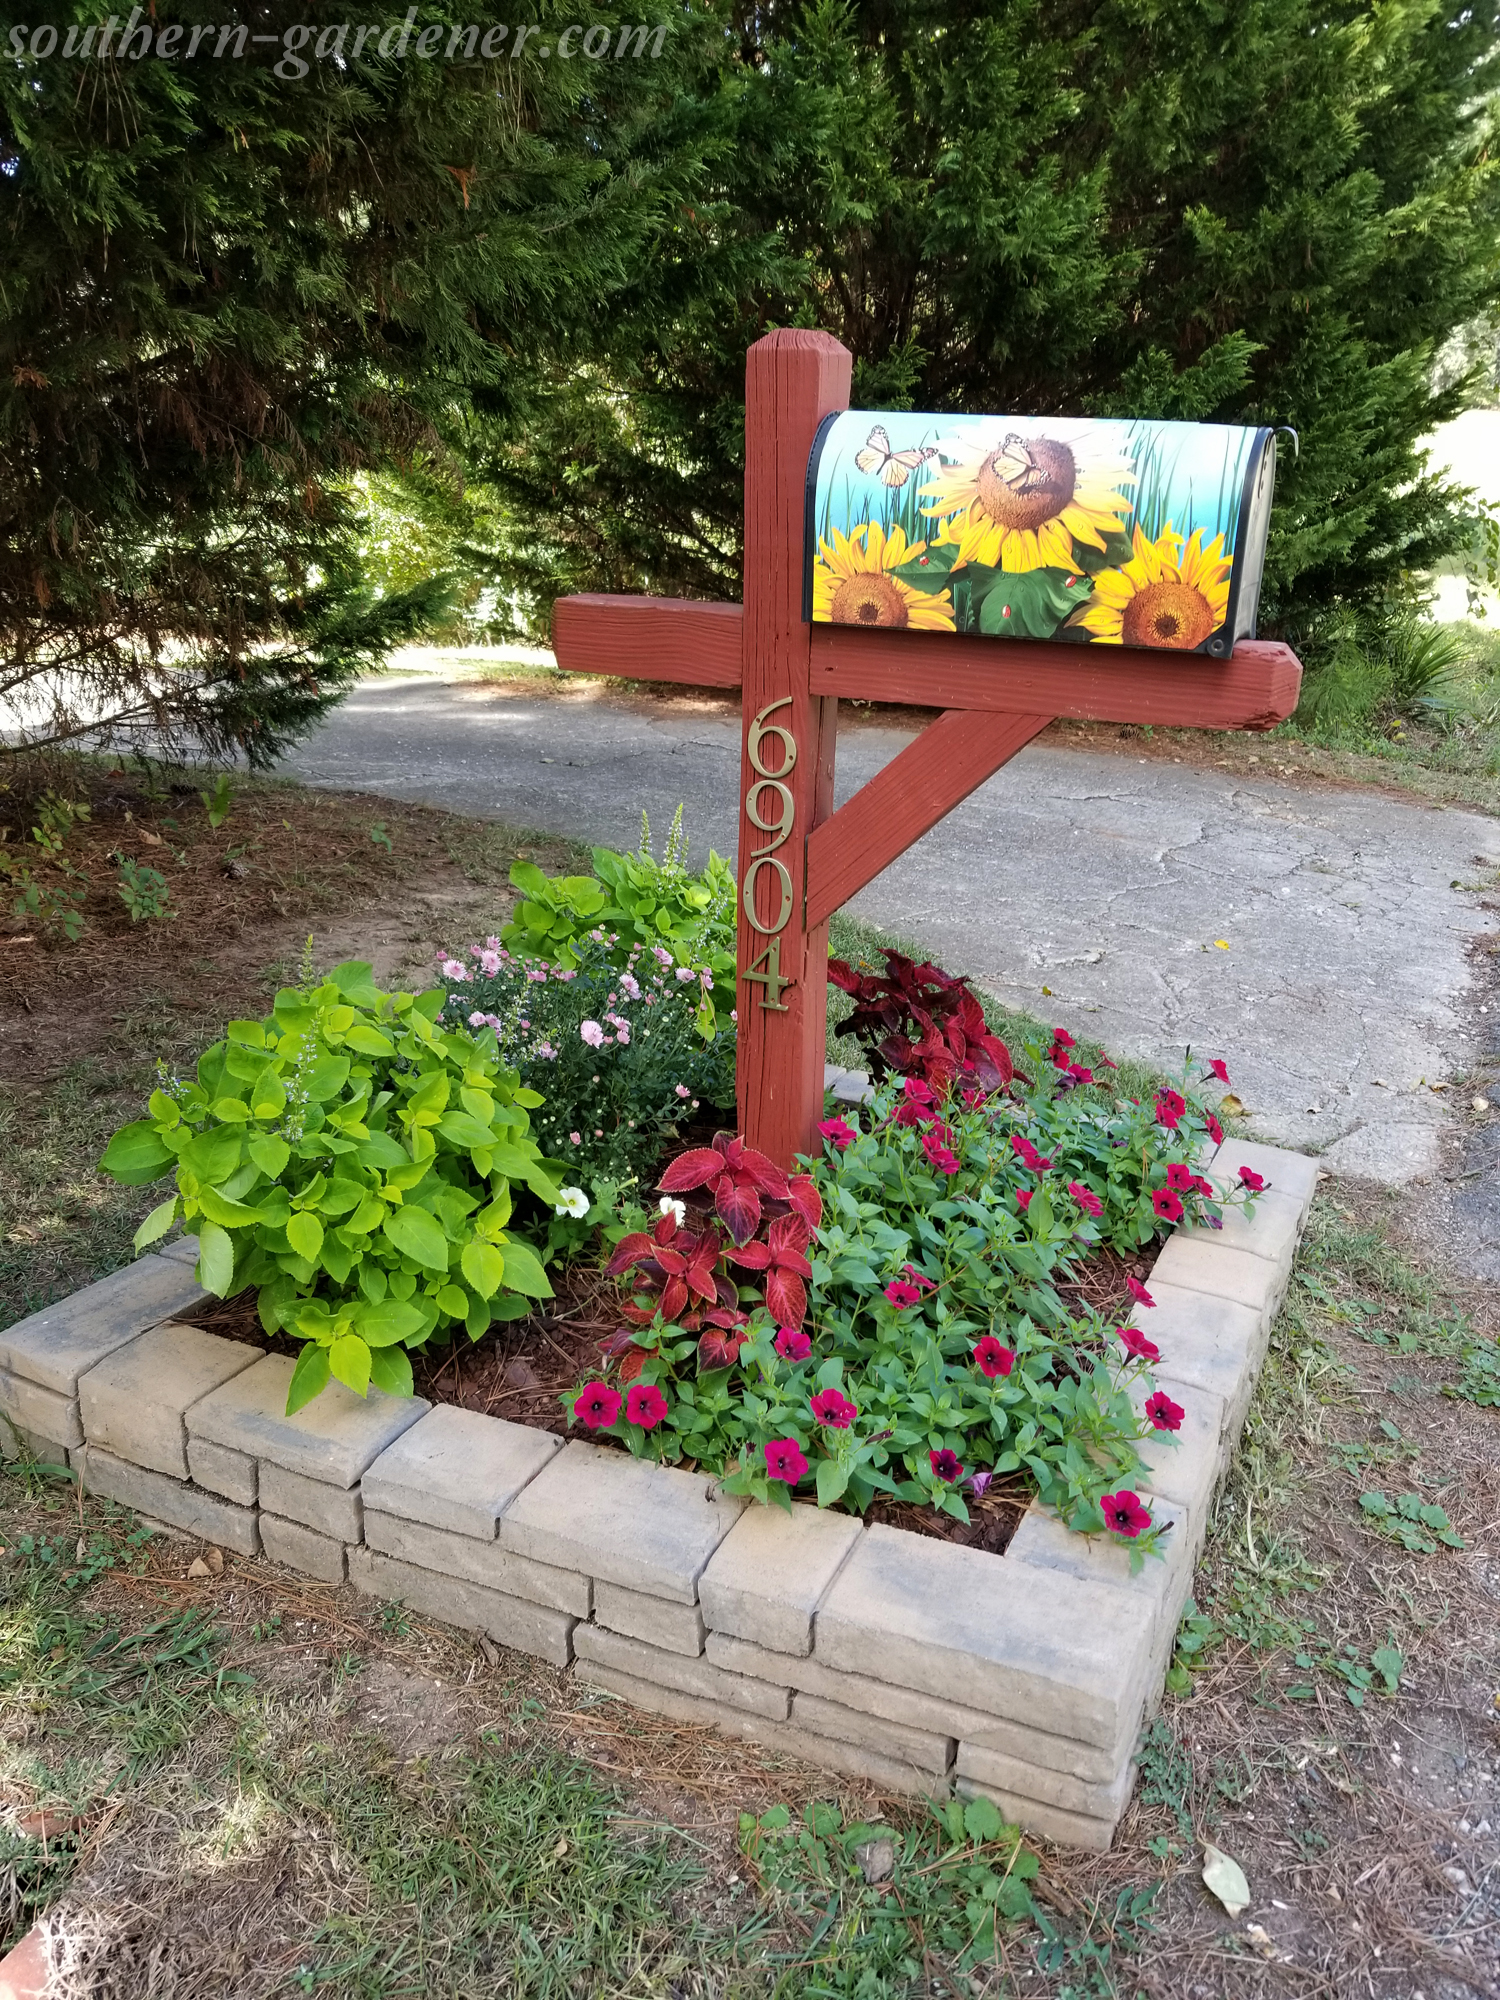
Above you’ll see in the back a pinkish purple dendranthema, variety is “Fireworks Igloo.” That’s basically a cold-hardy chrysanthemum. I just recently found the plant tag that came with it. I have been thinking this whole time is was a perennial osteospermum. On each side of the dendranthema in the corners are blanket flowers (Gaillardia). I wanted the back to be perennials that I wouldn’t have to replant each year. I bought those 3 plants at a local nursery. On the sides are snapdragons and in the front corners are some violas. Those were all purchased at the same nursery. I moved the miniature rose bush to the front center since it didn’t get super tall the previous year. By the way, I purchased that yellow miniature rose bush from Wal-Mart in 2016 with the tag saying it was a house plant. It has survived 2 winters outside now, and our last winter was pretty brutal.
The picture below is from March of this year. The dendranthema (mum) died back after the first frost, as well as the blanket flowers. But you can see there is already growth emerging from the mum. And I have my Easter-looking mailbox cover on, also from Amazon.
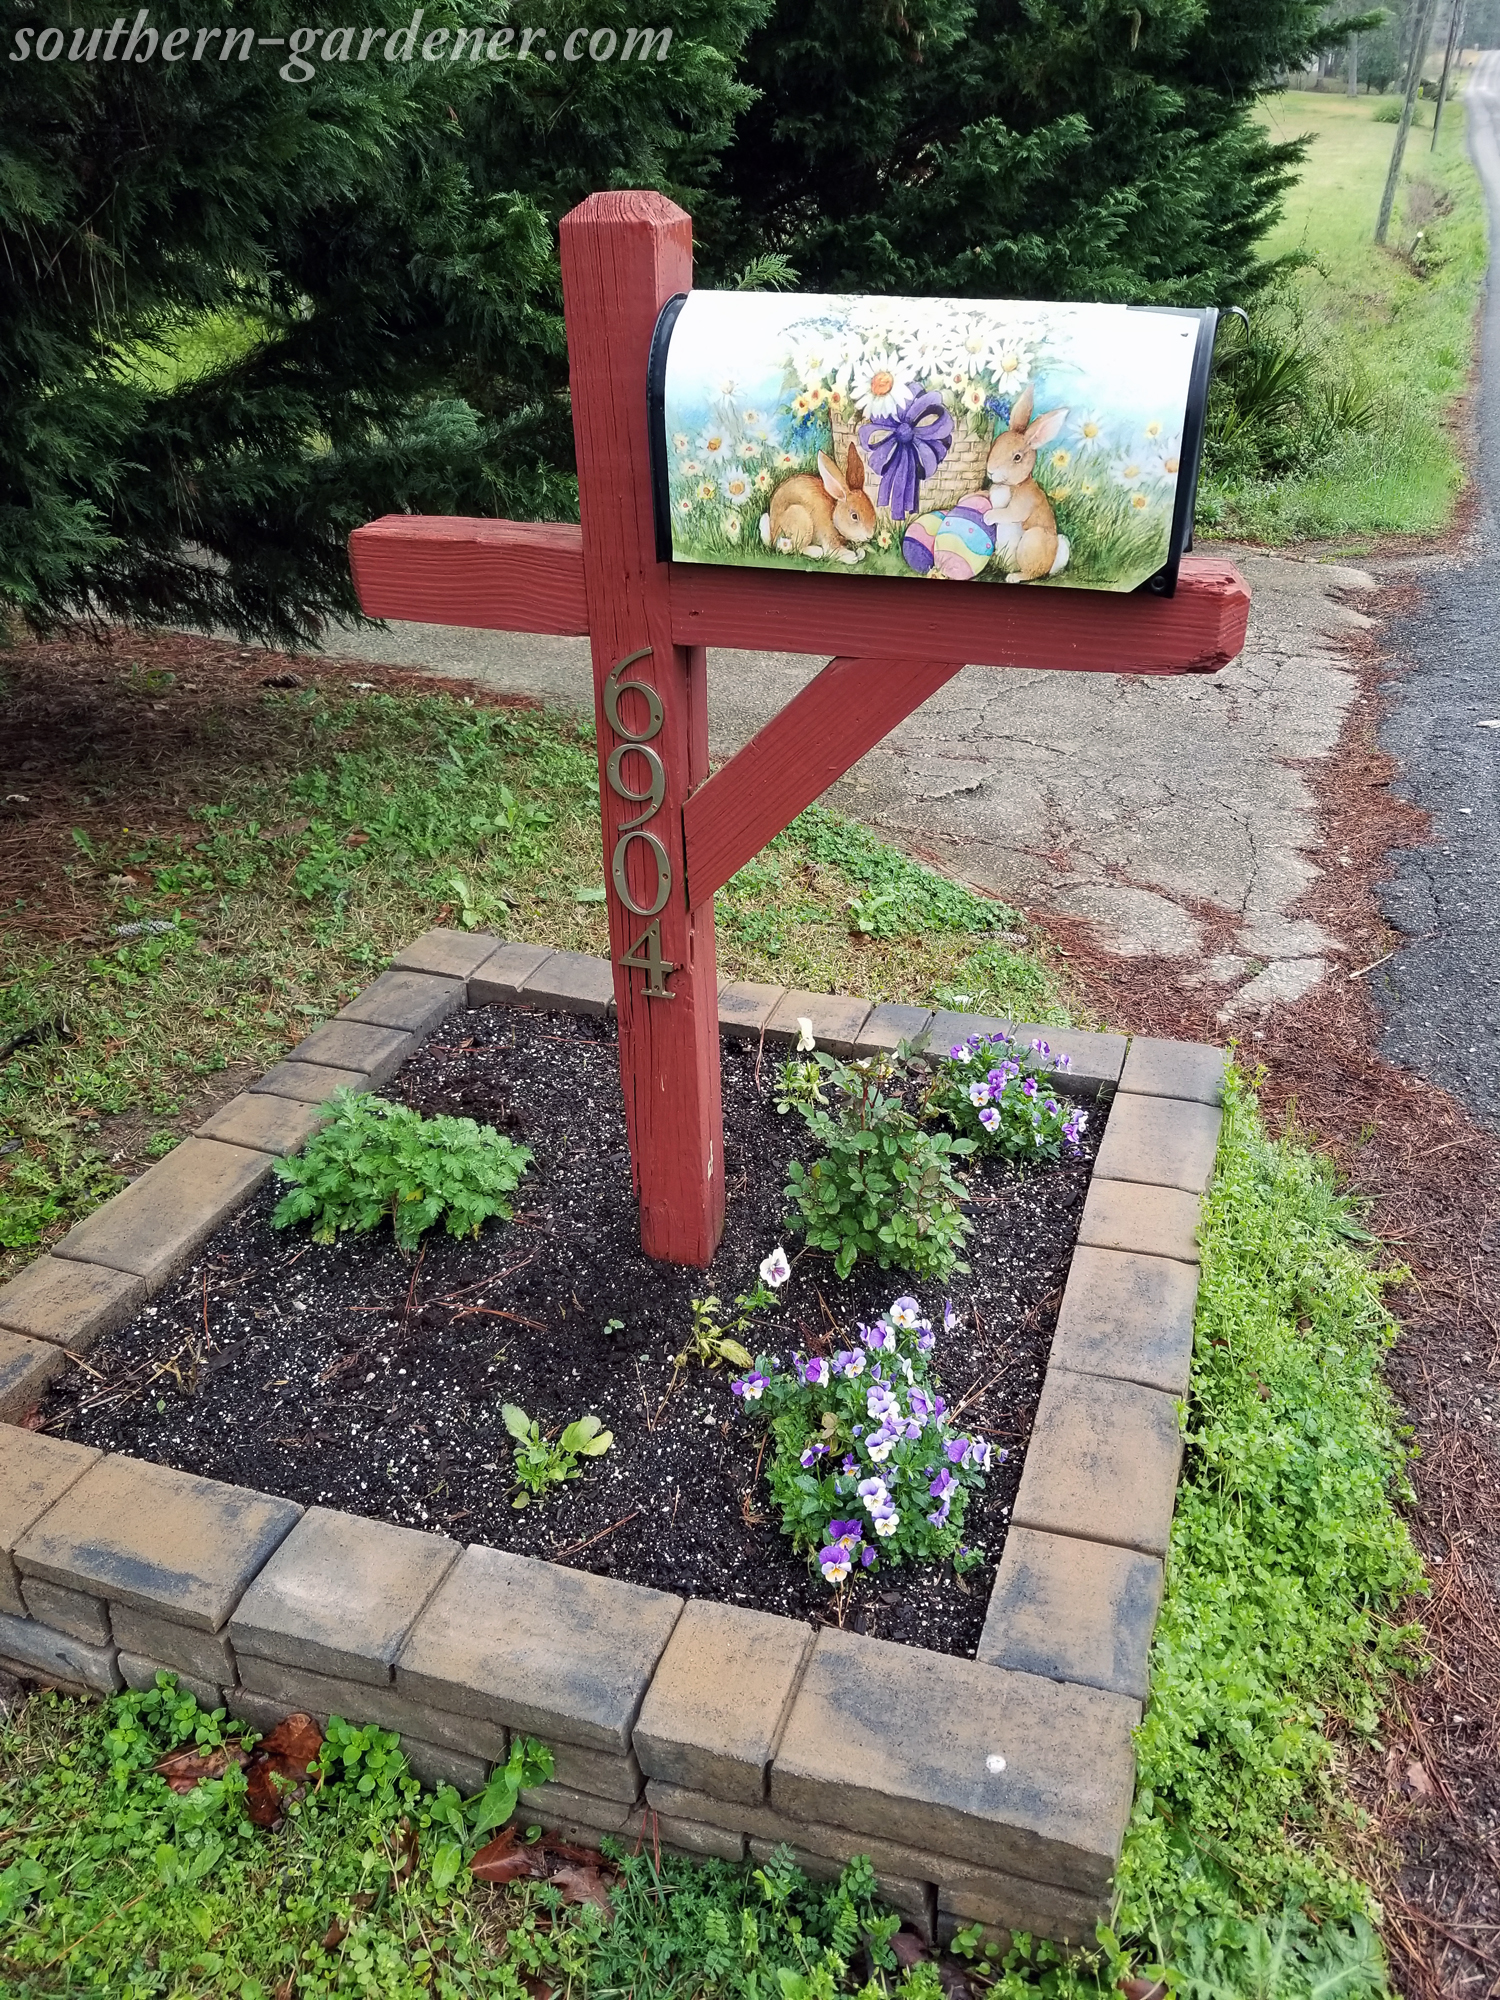
Why can’t my flowers do as well as the weeds surrounding the flowerbed? 😐 I do love these violas I planted! The colors are just gorgeous! I wish I had noted what variety they were. They survived a rather harsh winter here in Alabama while most of my other violas and pansies died.

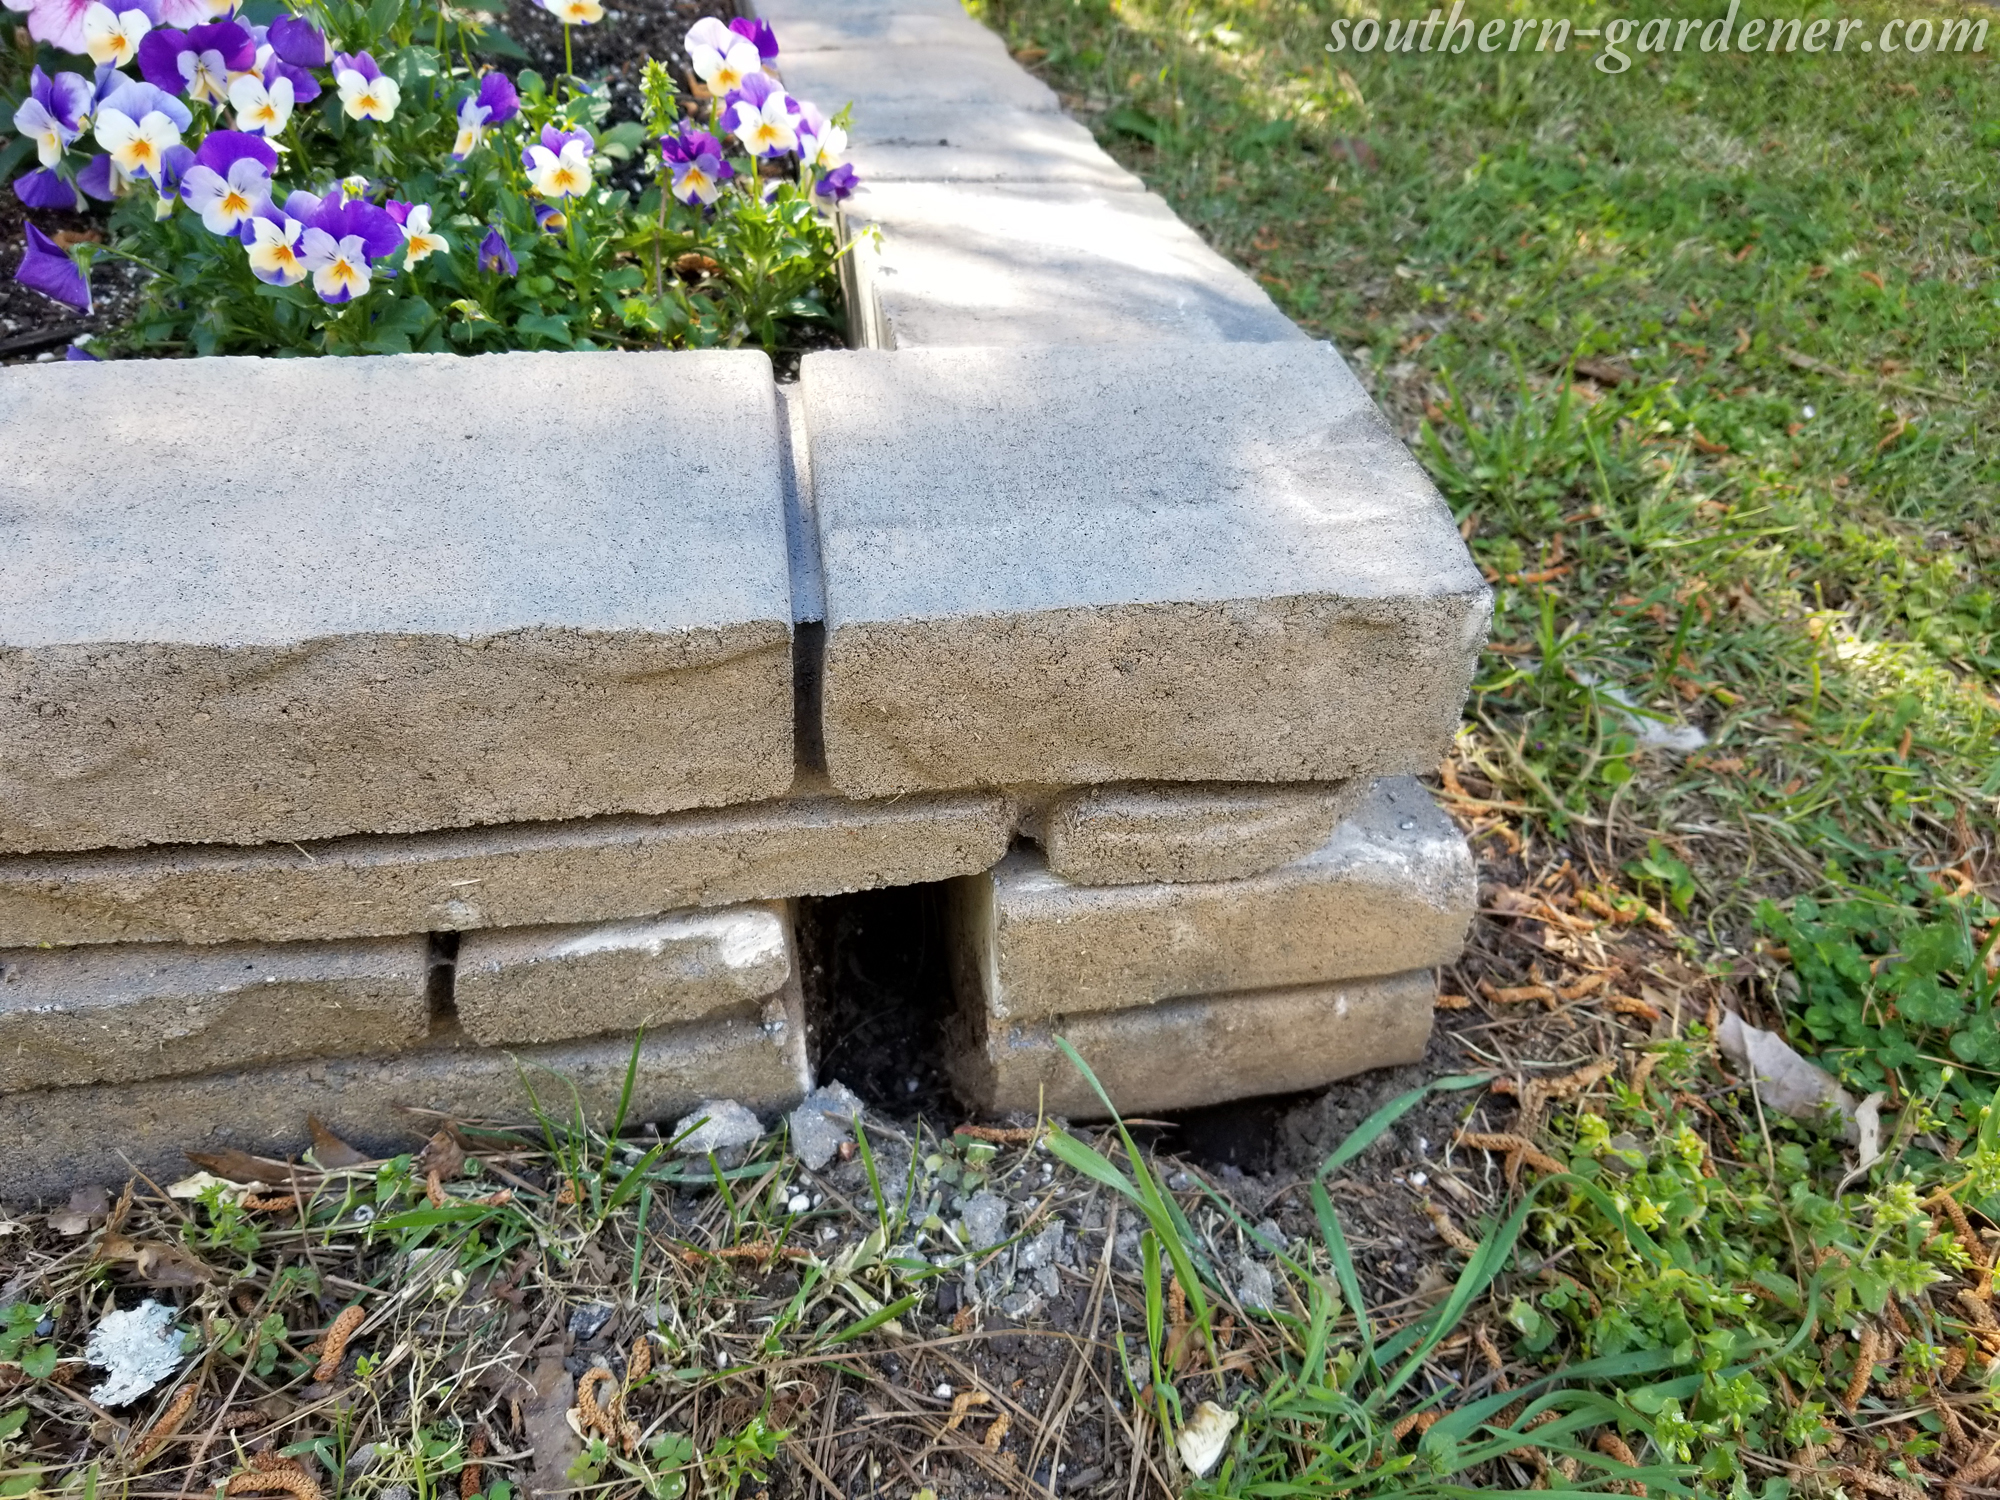
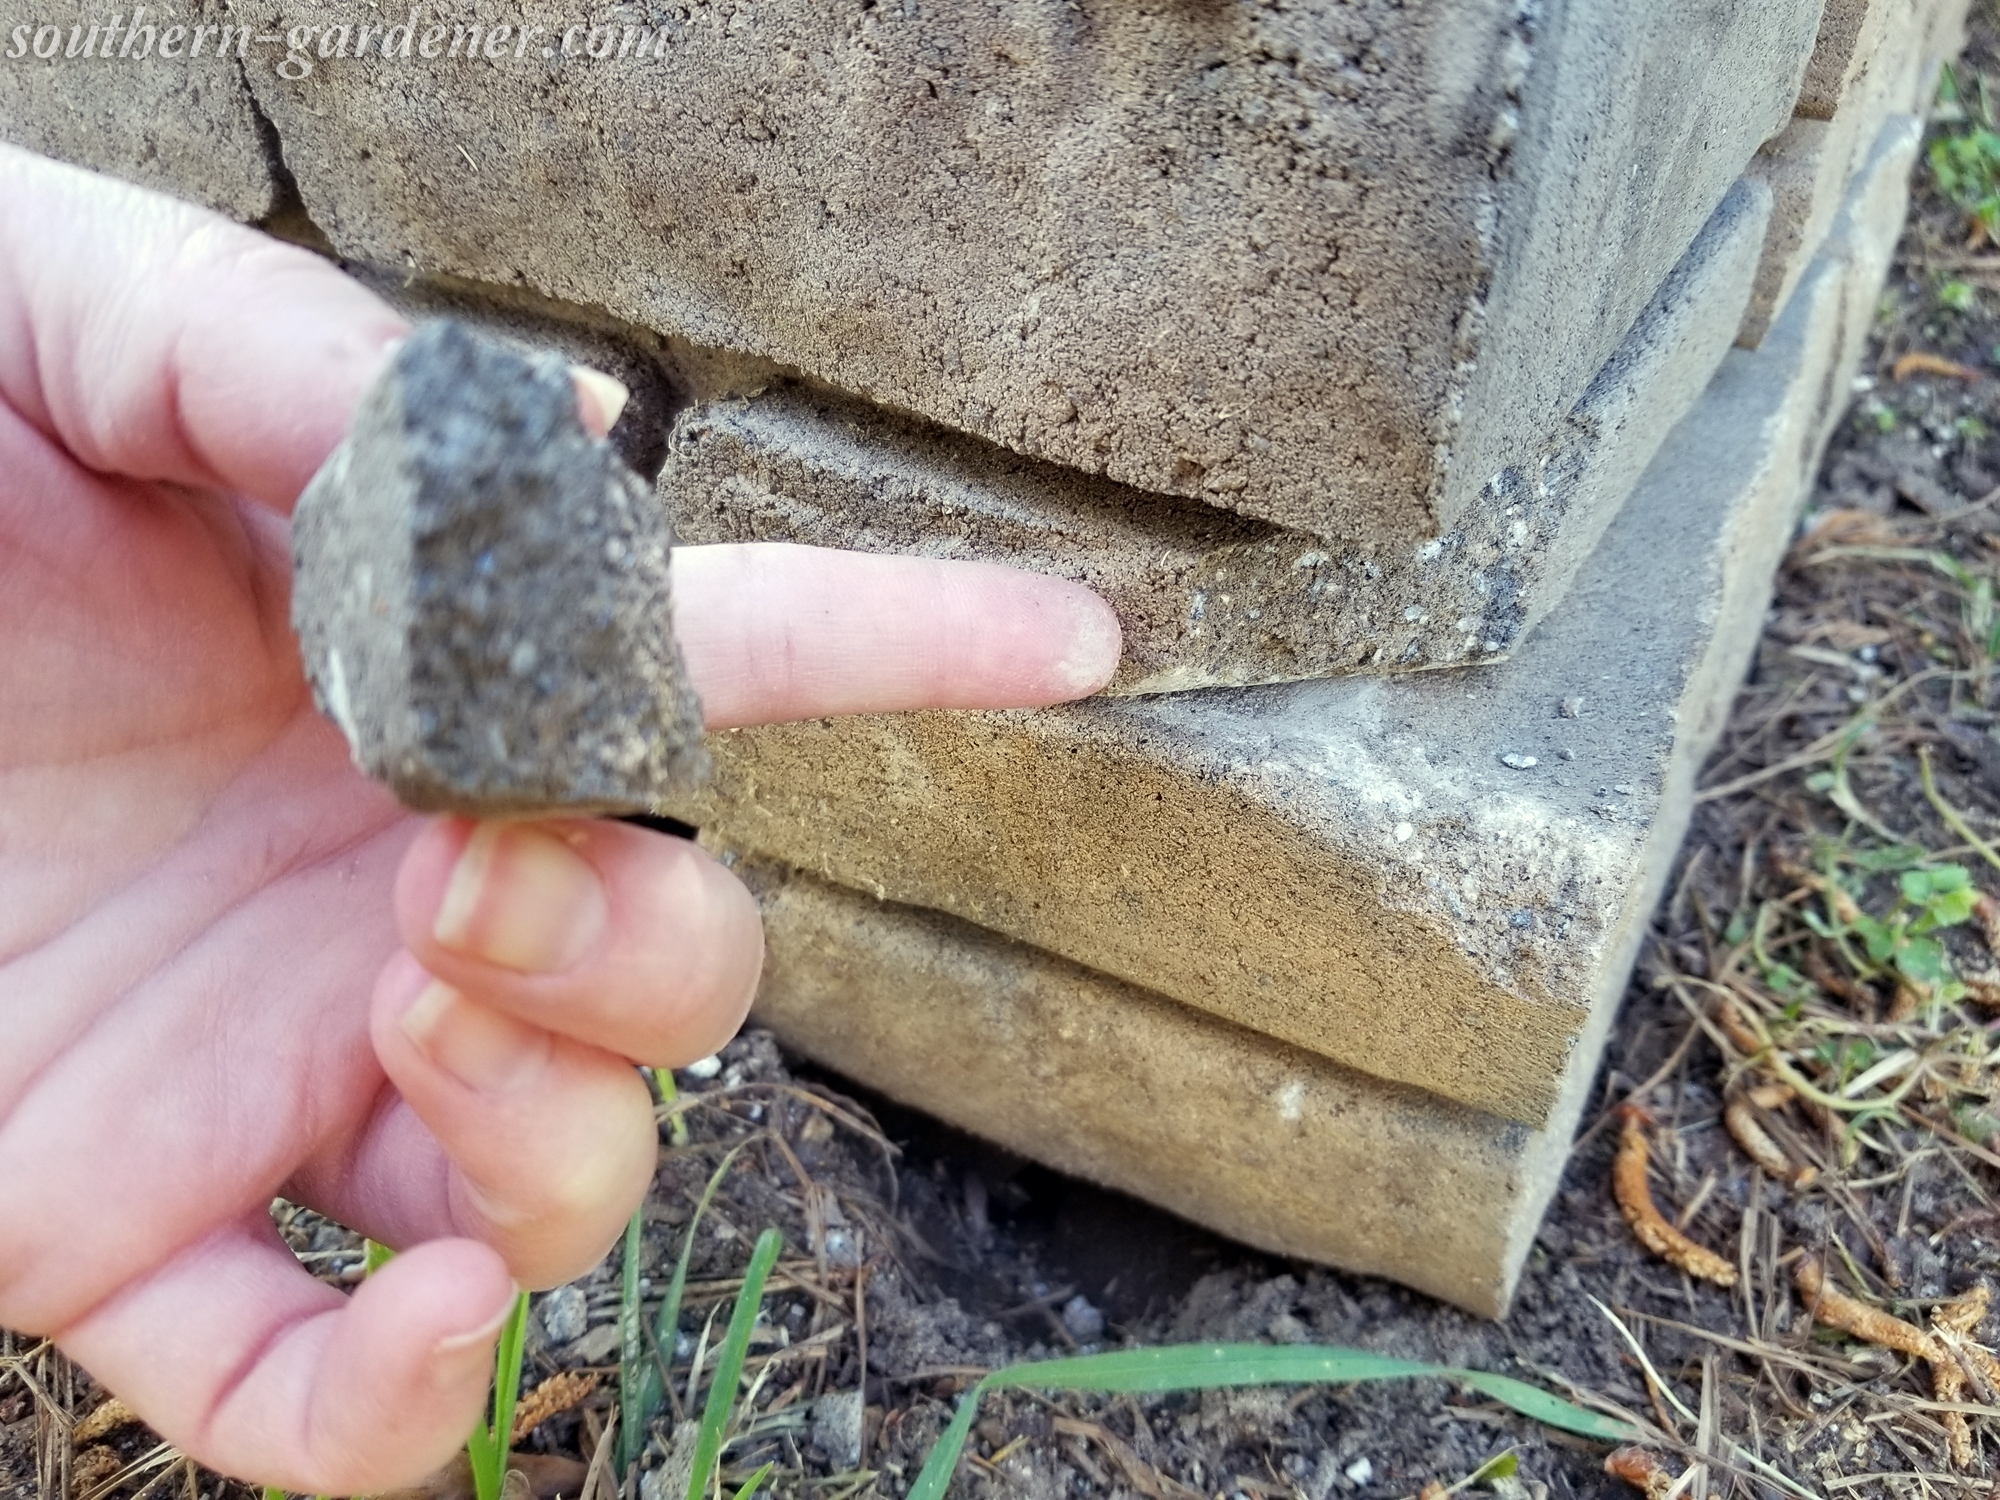
I had only had the new flowerbed makeover done for about 4 months when someone decided to hit it with their car while backing out of my driveway. 😡 I was purging and getting rid of some stuff on the Facebook marketplace, and I guess the lady didn’t feel the need to apologize. I was so mad when I saw the bricks knocked out of place, I didn’t take an initial picture of the damage. After trying to somewhat get the bricks back into place, I snapped the pictures below to show the gap I would have to fix (by moving dirt in the flowerbed) eventually, as well as the chunk of brick that was hit off the corner. Some people…
I added some lovely ‘Headliner White Rose Vein’ petunias I purchased at a local nursery later this spring, and the yellow rose bush was thriving!
The mum is getting bigger! I’ve also stuck some pansies I started from seeds in between the mum and the pink petunias. And one of my blanket flowers has started to emerge (bottom left of the picture). This picture was taken Apr 17, 2018 and features my general spring mailbox cover, available on Amazon.
May 5, 2018 just to show how well the pink petunias have done! I love this variety.
And the miniature rose bush is doing well! I do wish I could get it in a bushier shape though. I’ve also had to spray it because of aphids, and I’ve picked off a few worms who thought it was lunch, but the flowers are beautiful!

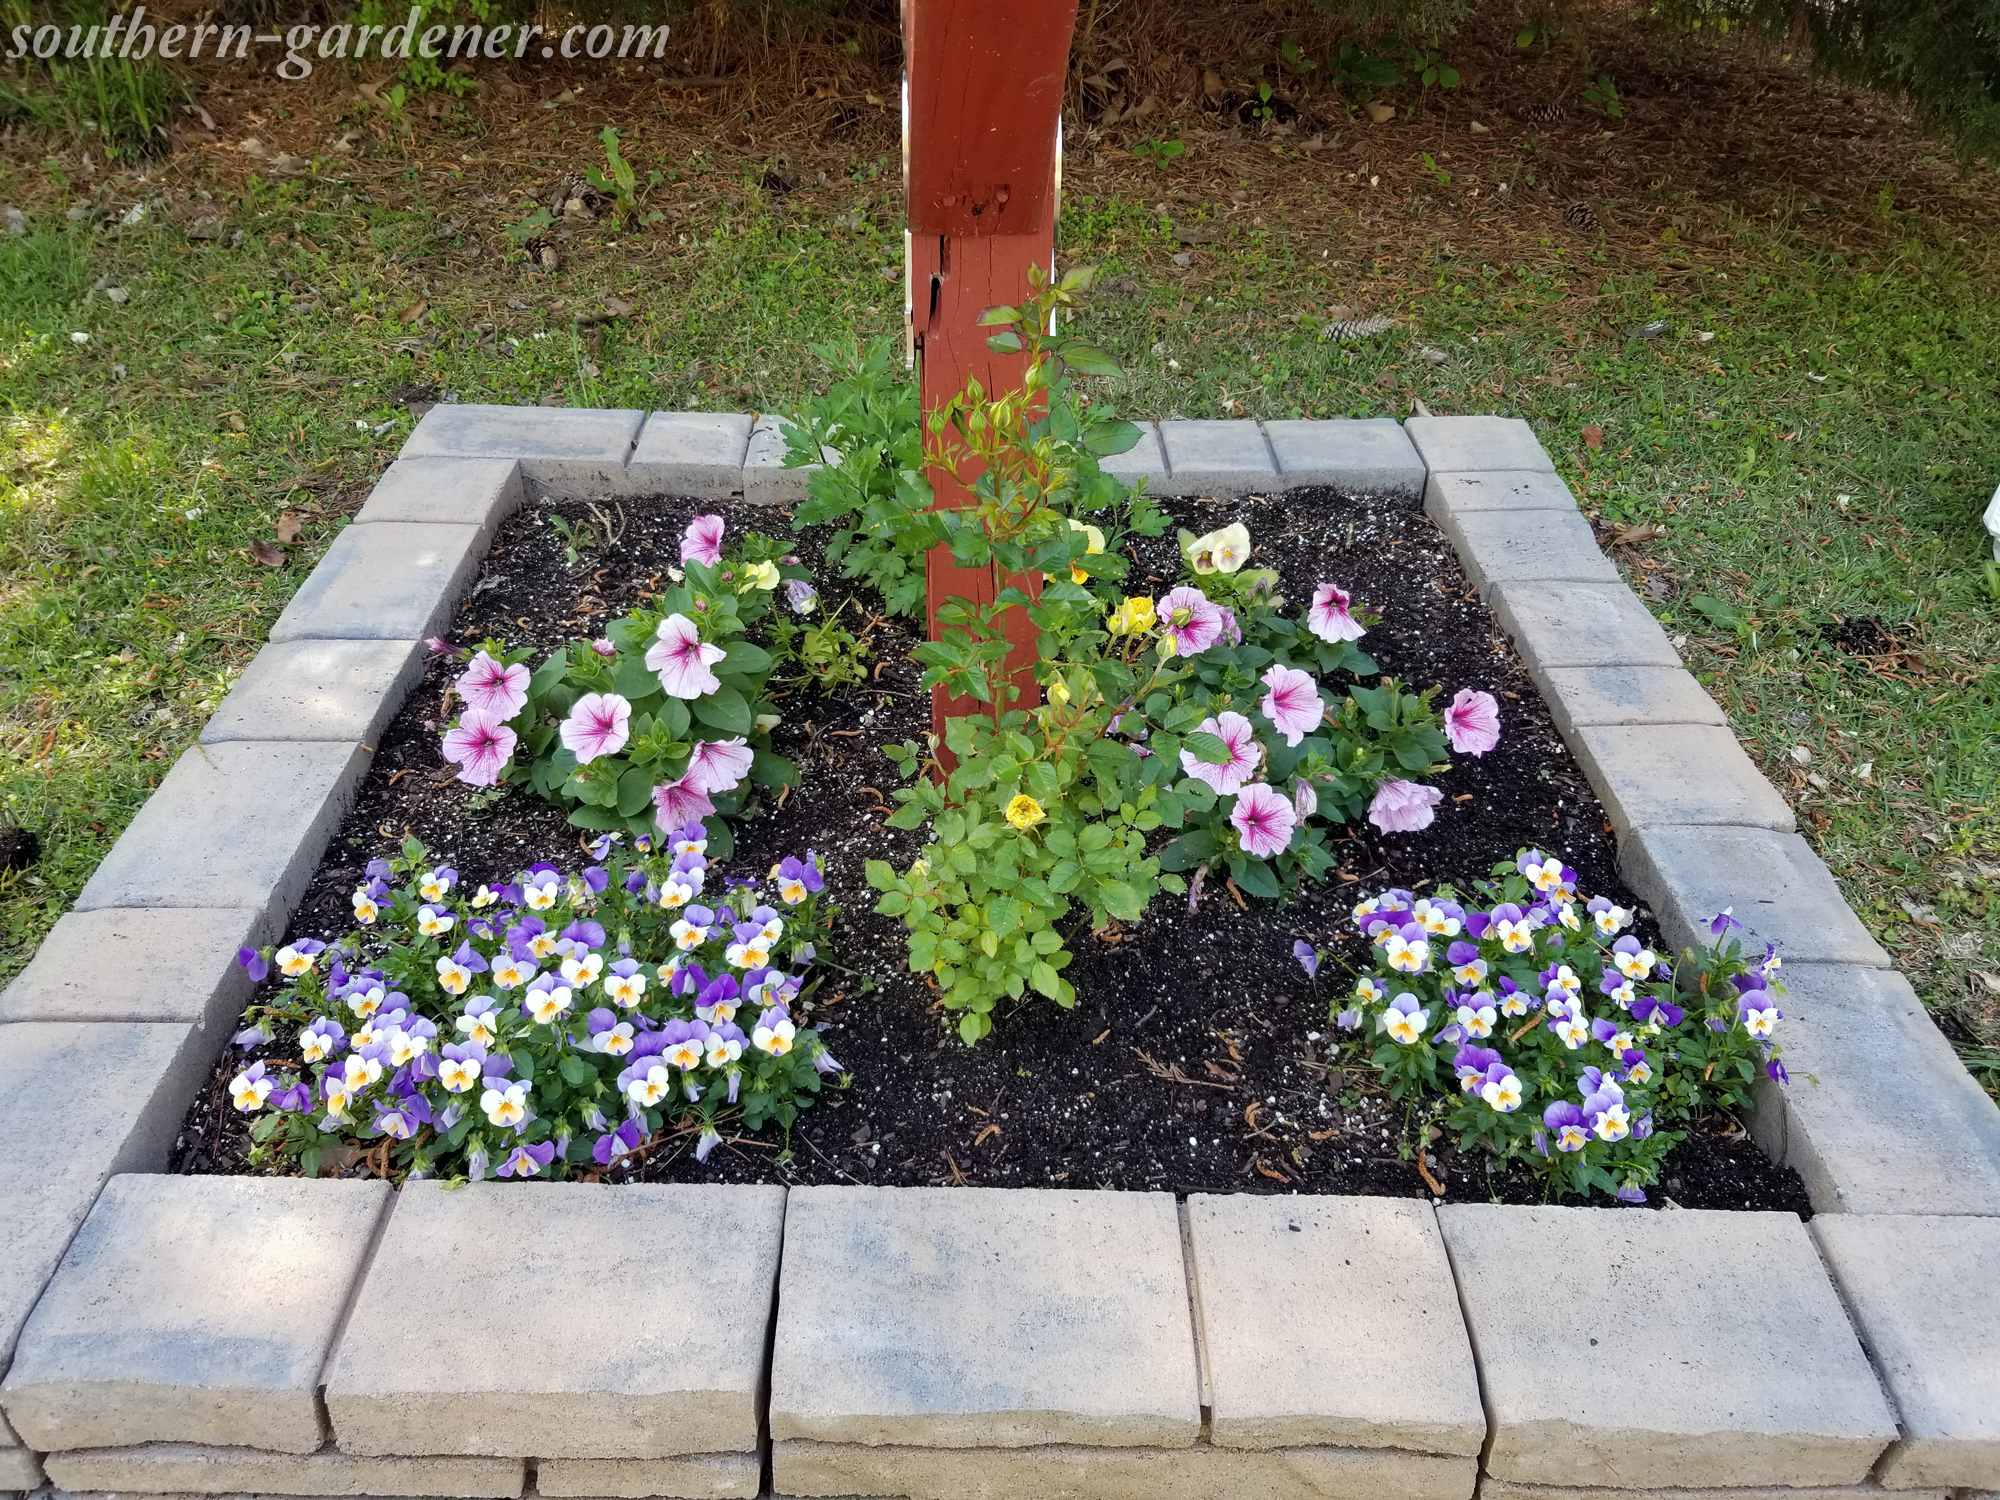
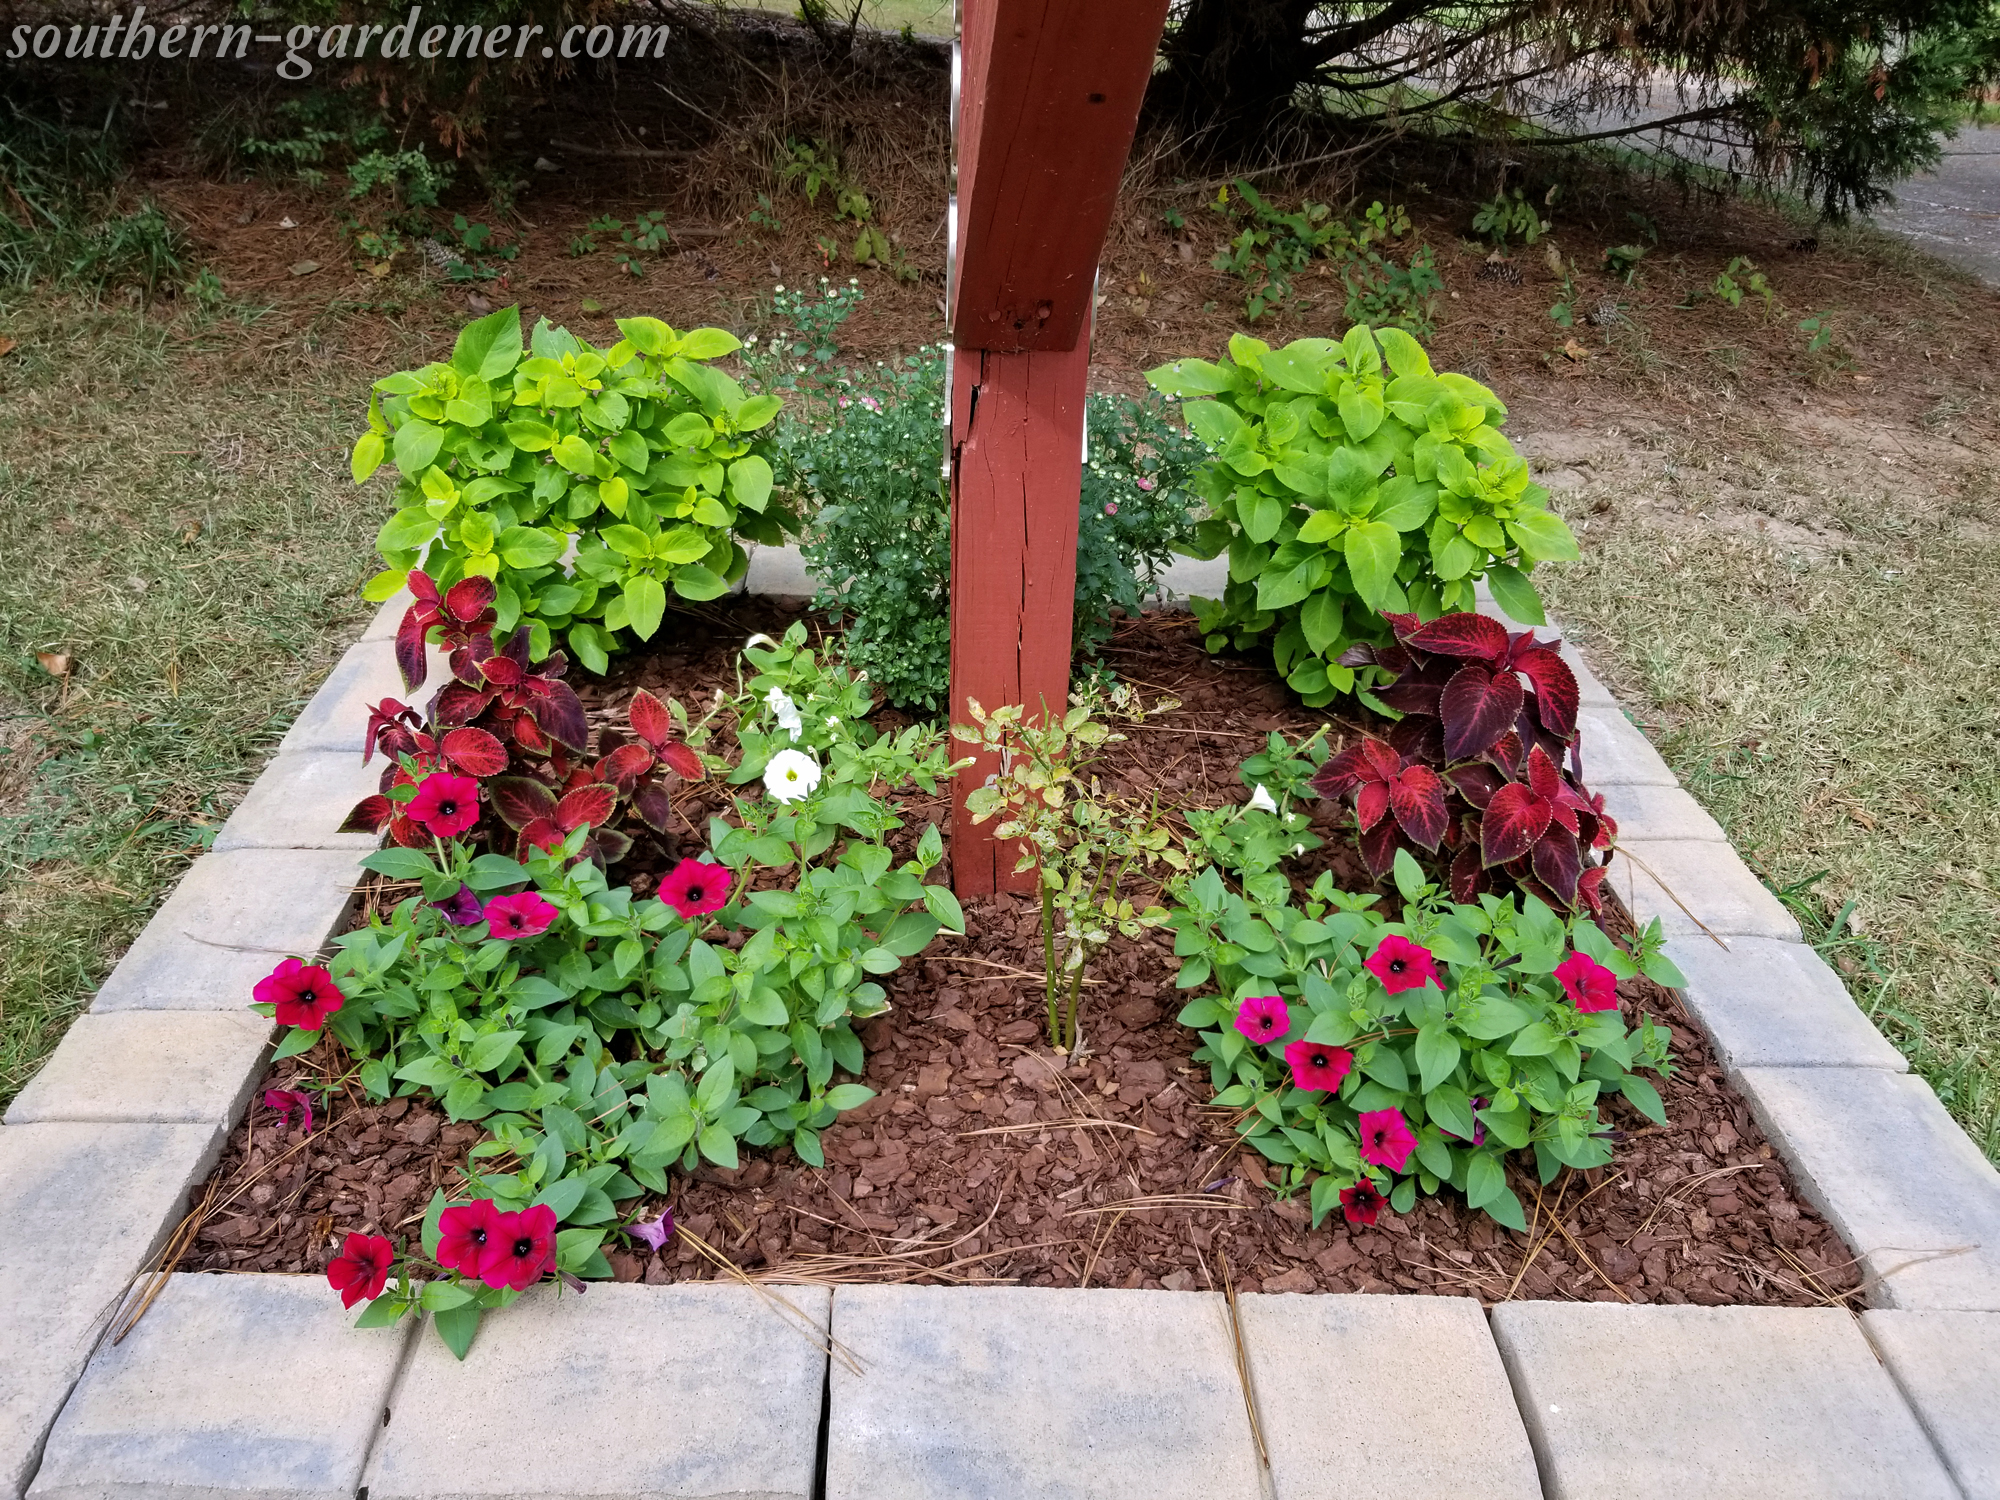
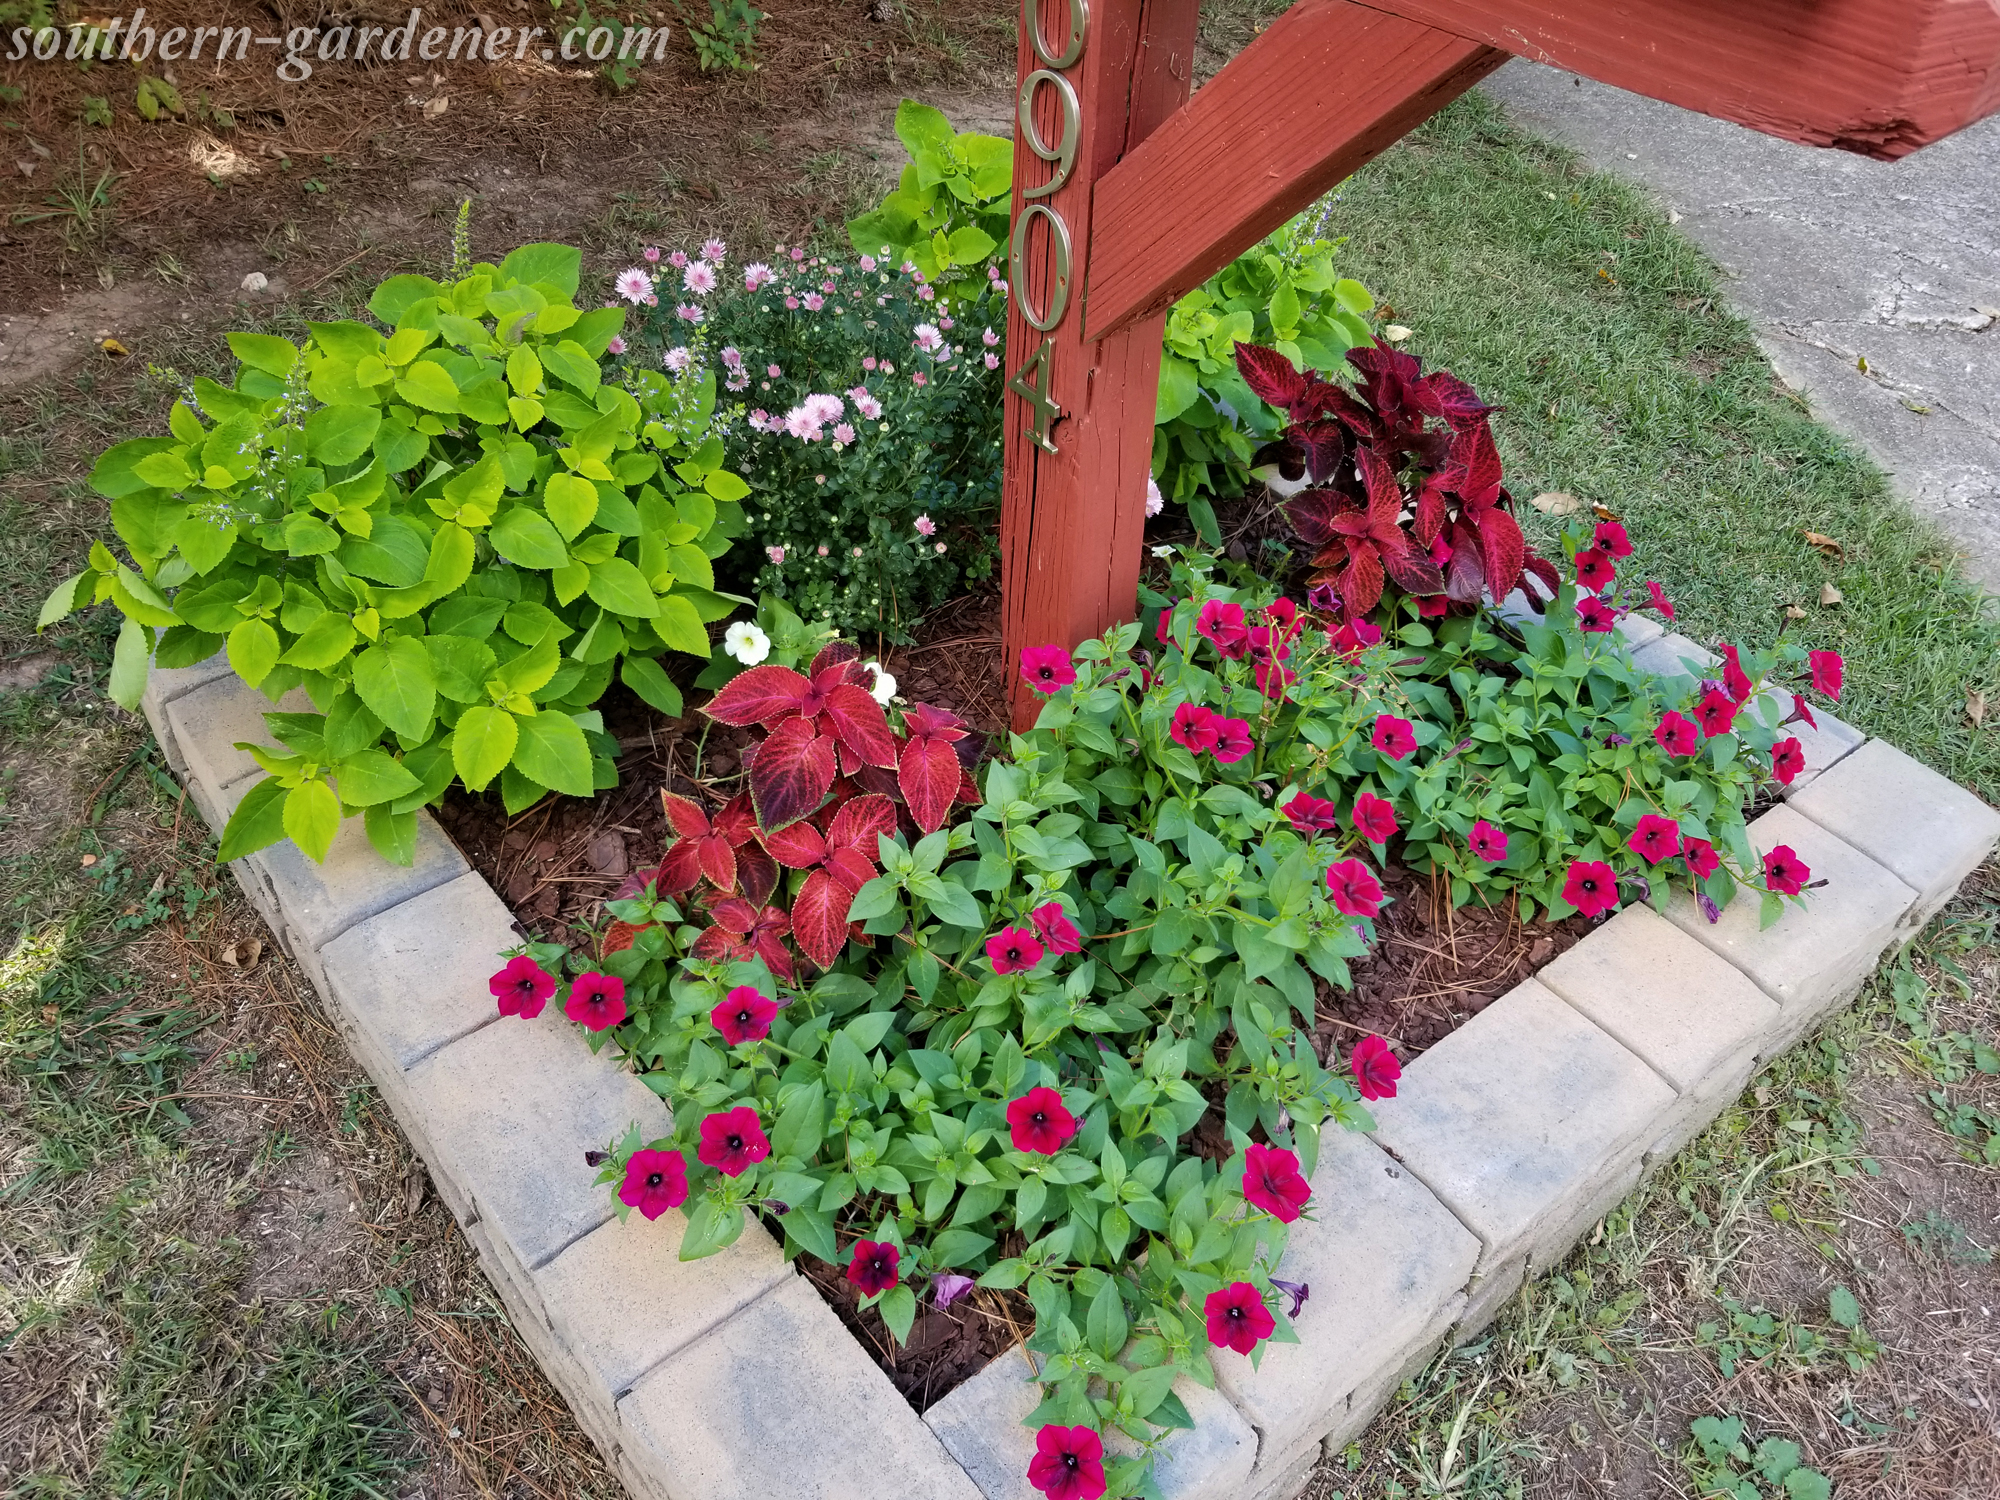
This summer was the best the mailbox flowerbed has looked! Only one of my blanket flowers came back up, so I dug it up to relocated it. I’m glad I did because the mum has gotten so huge! This picture below is from Jul 10, 2018 and features my general summer mailbox cover (from Amazon). In the back: dendranthema with ‘Lemon Drop’ wishbone flowers (Torenia) on each side. In front of those are the ‘Headliner White Rose Vein’ petunias. The yellow flowers in the front corners are snapdragons I started from seeds, which I am not a fan of them falling over. In the very front are ‘Tidal Wave Red Velour’ petunias I started from seeds, and they are quickly taking over where the miniature rose bush is located!
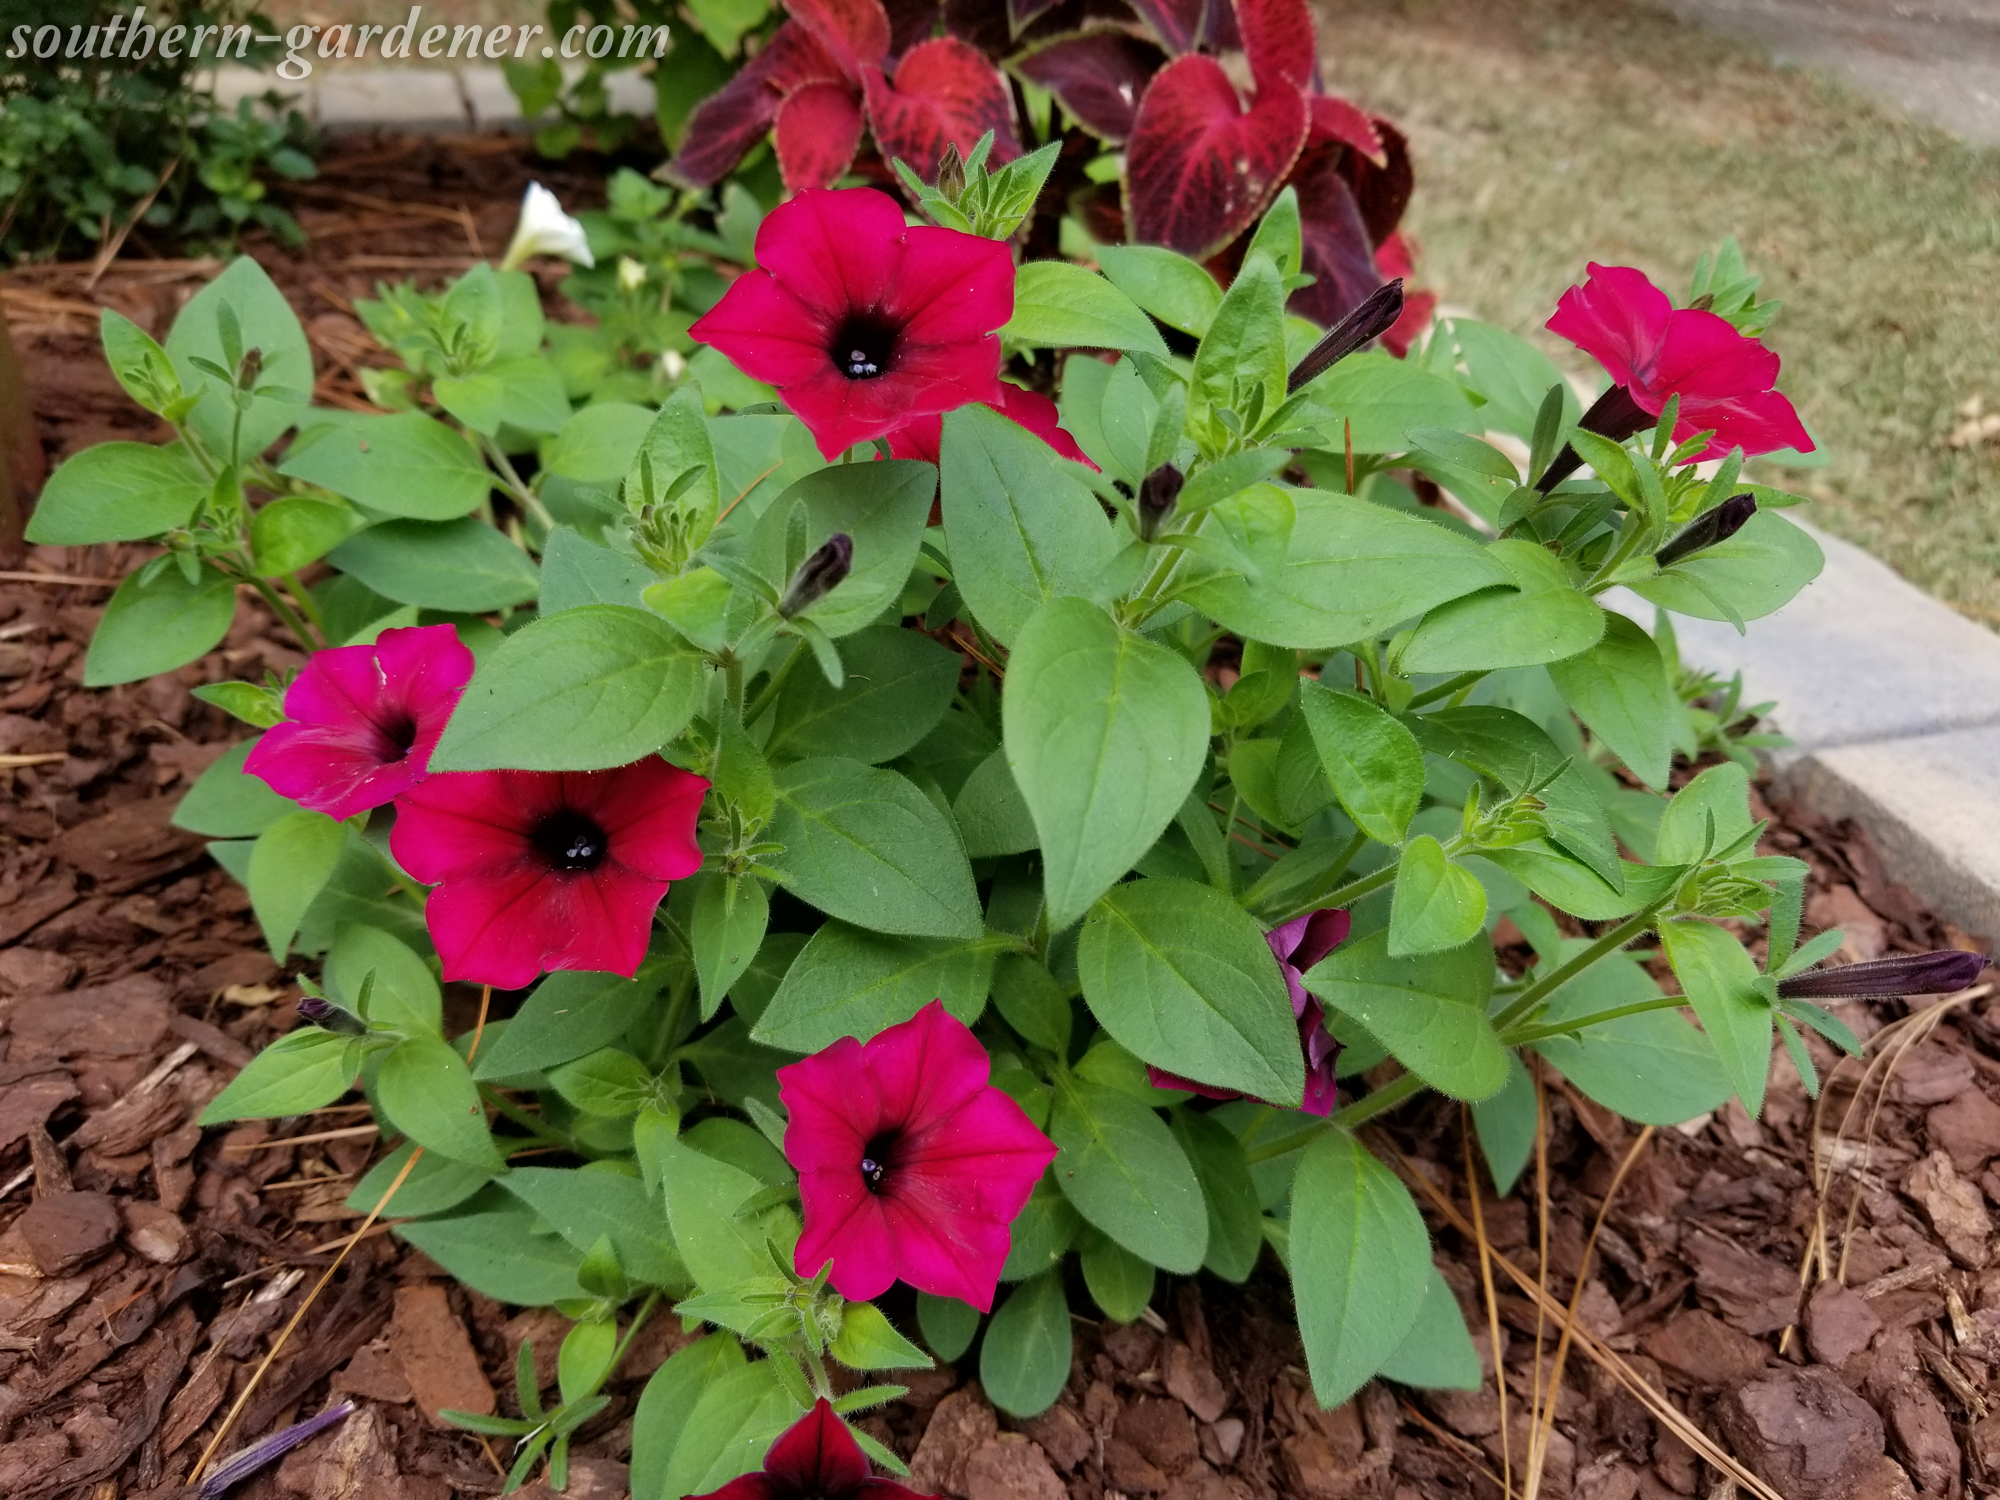
These ‘Tidal Wave Red Velour’ petunias are one of my favorites from this year! I started them from seeds, and the red petunias you see below are from TWO flowers I had planted on each side of the rose bush.
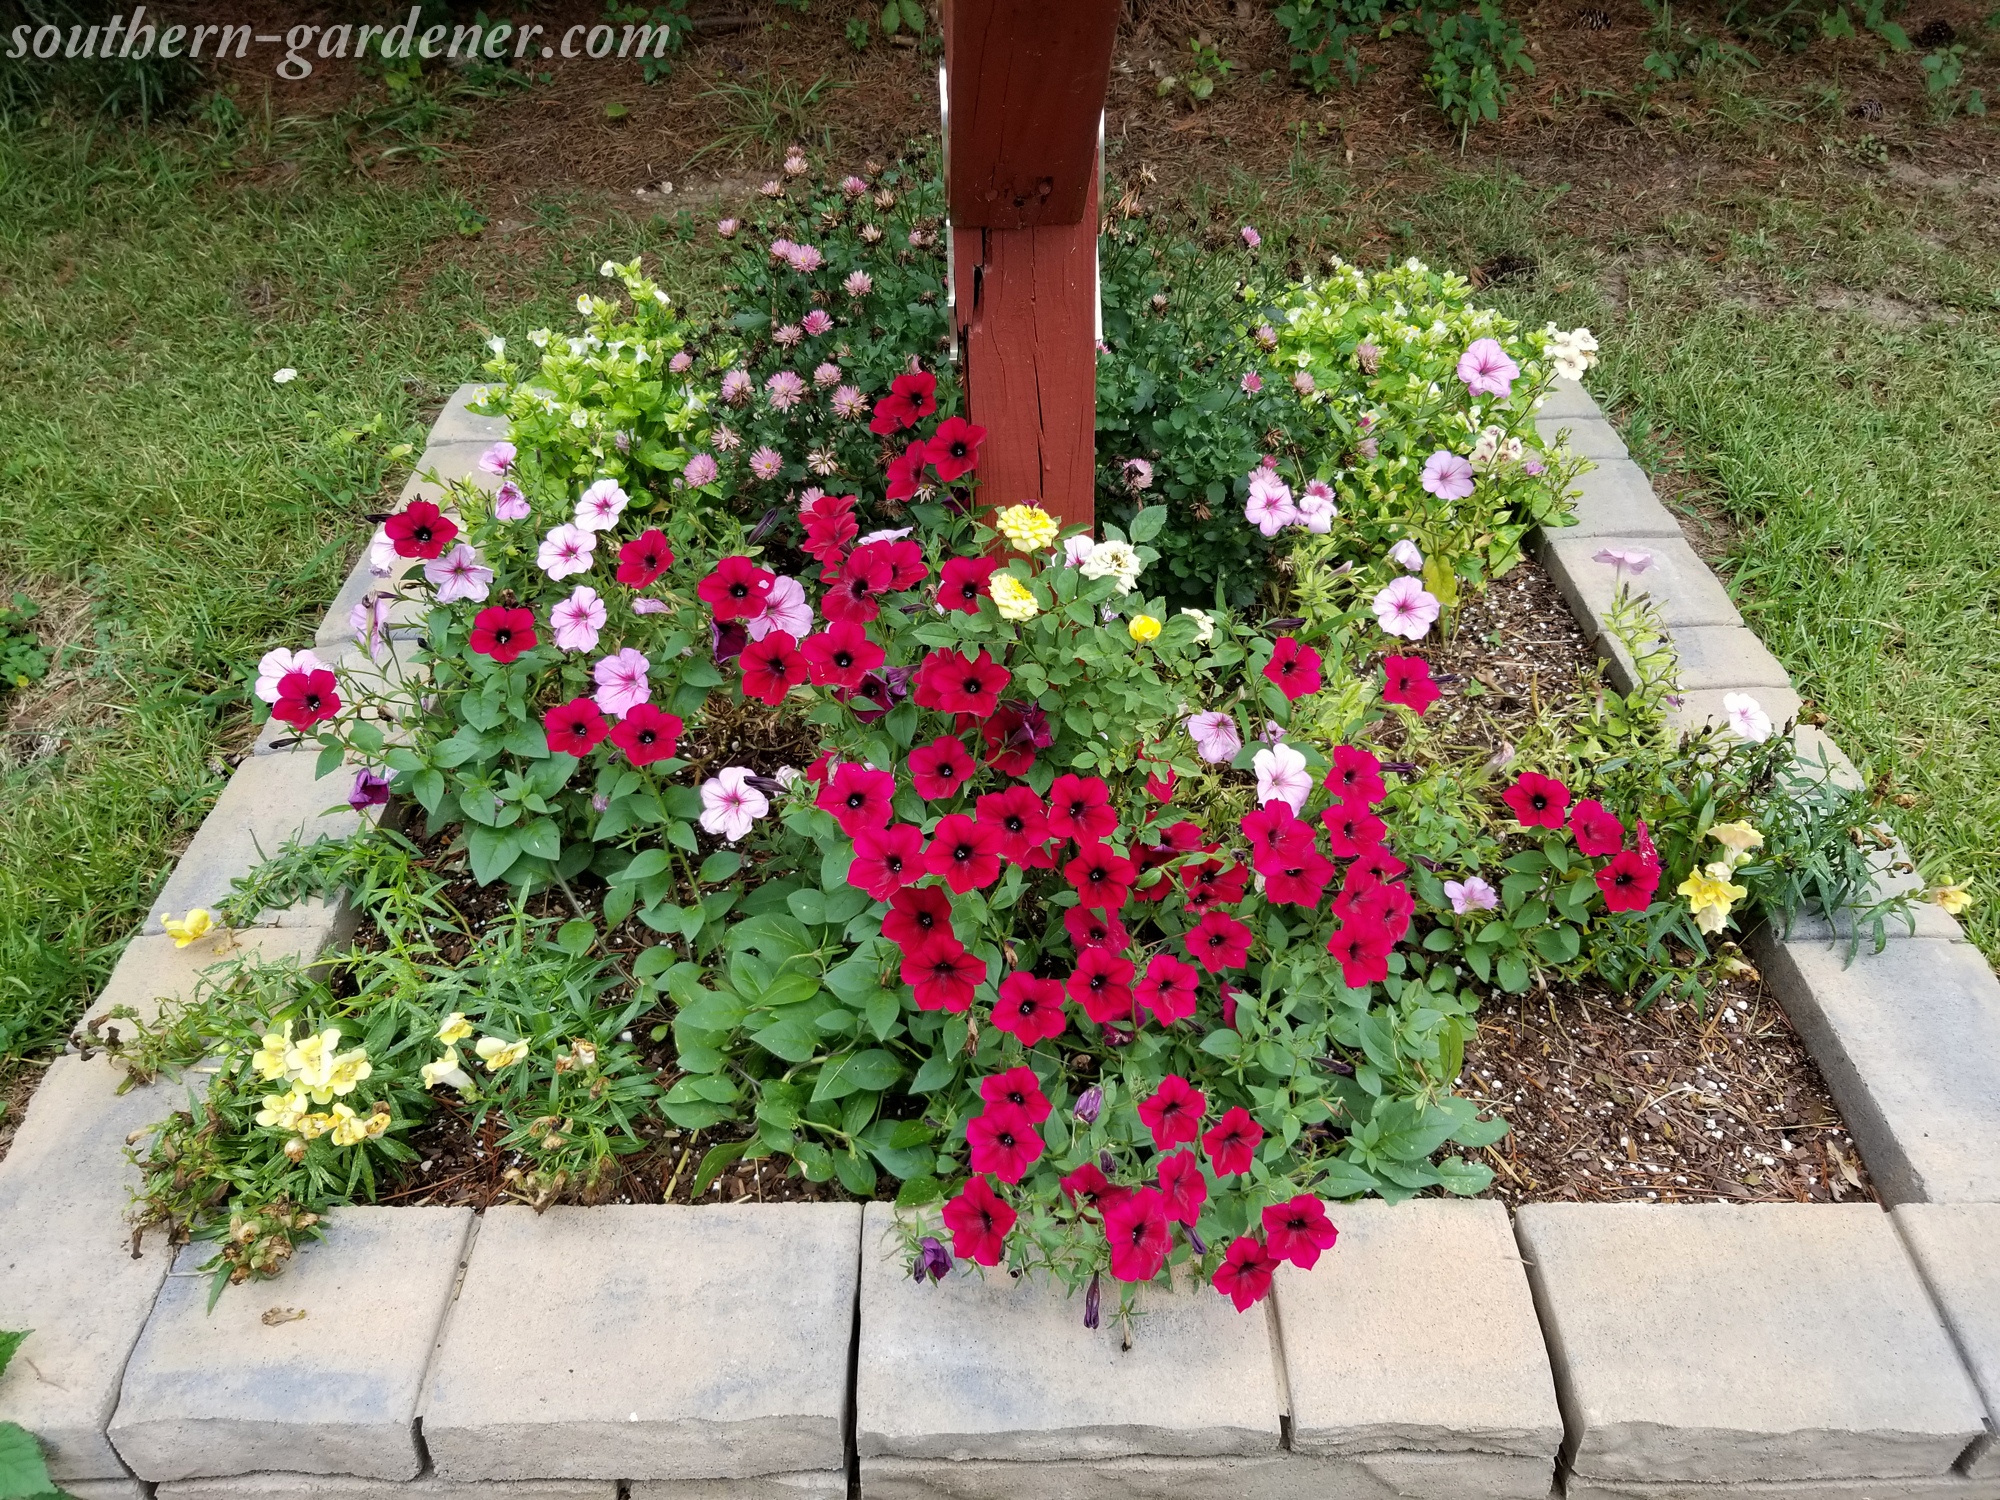
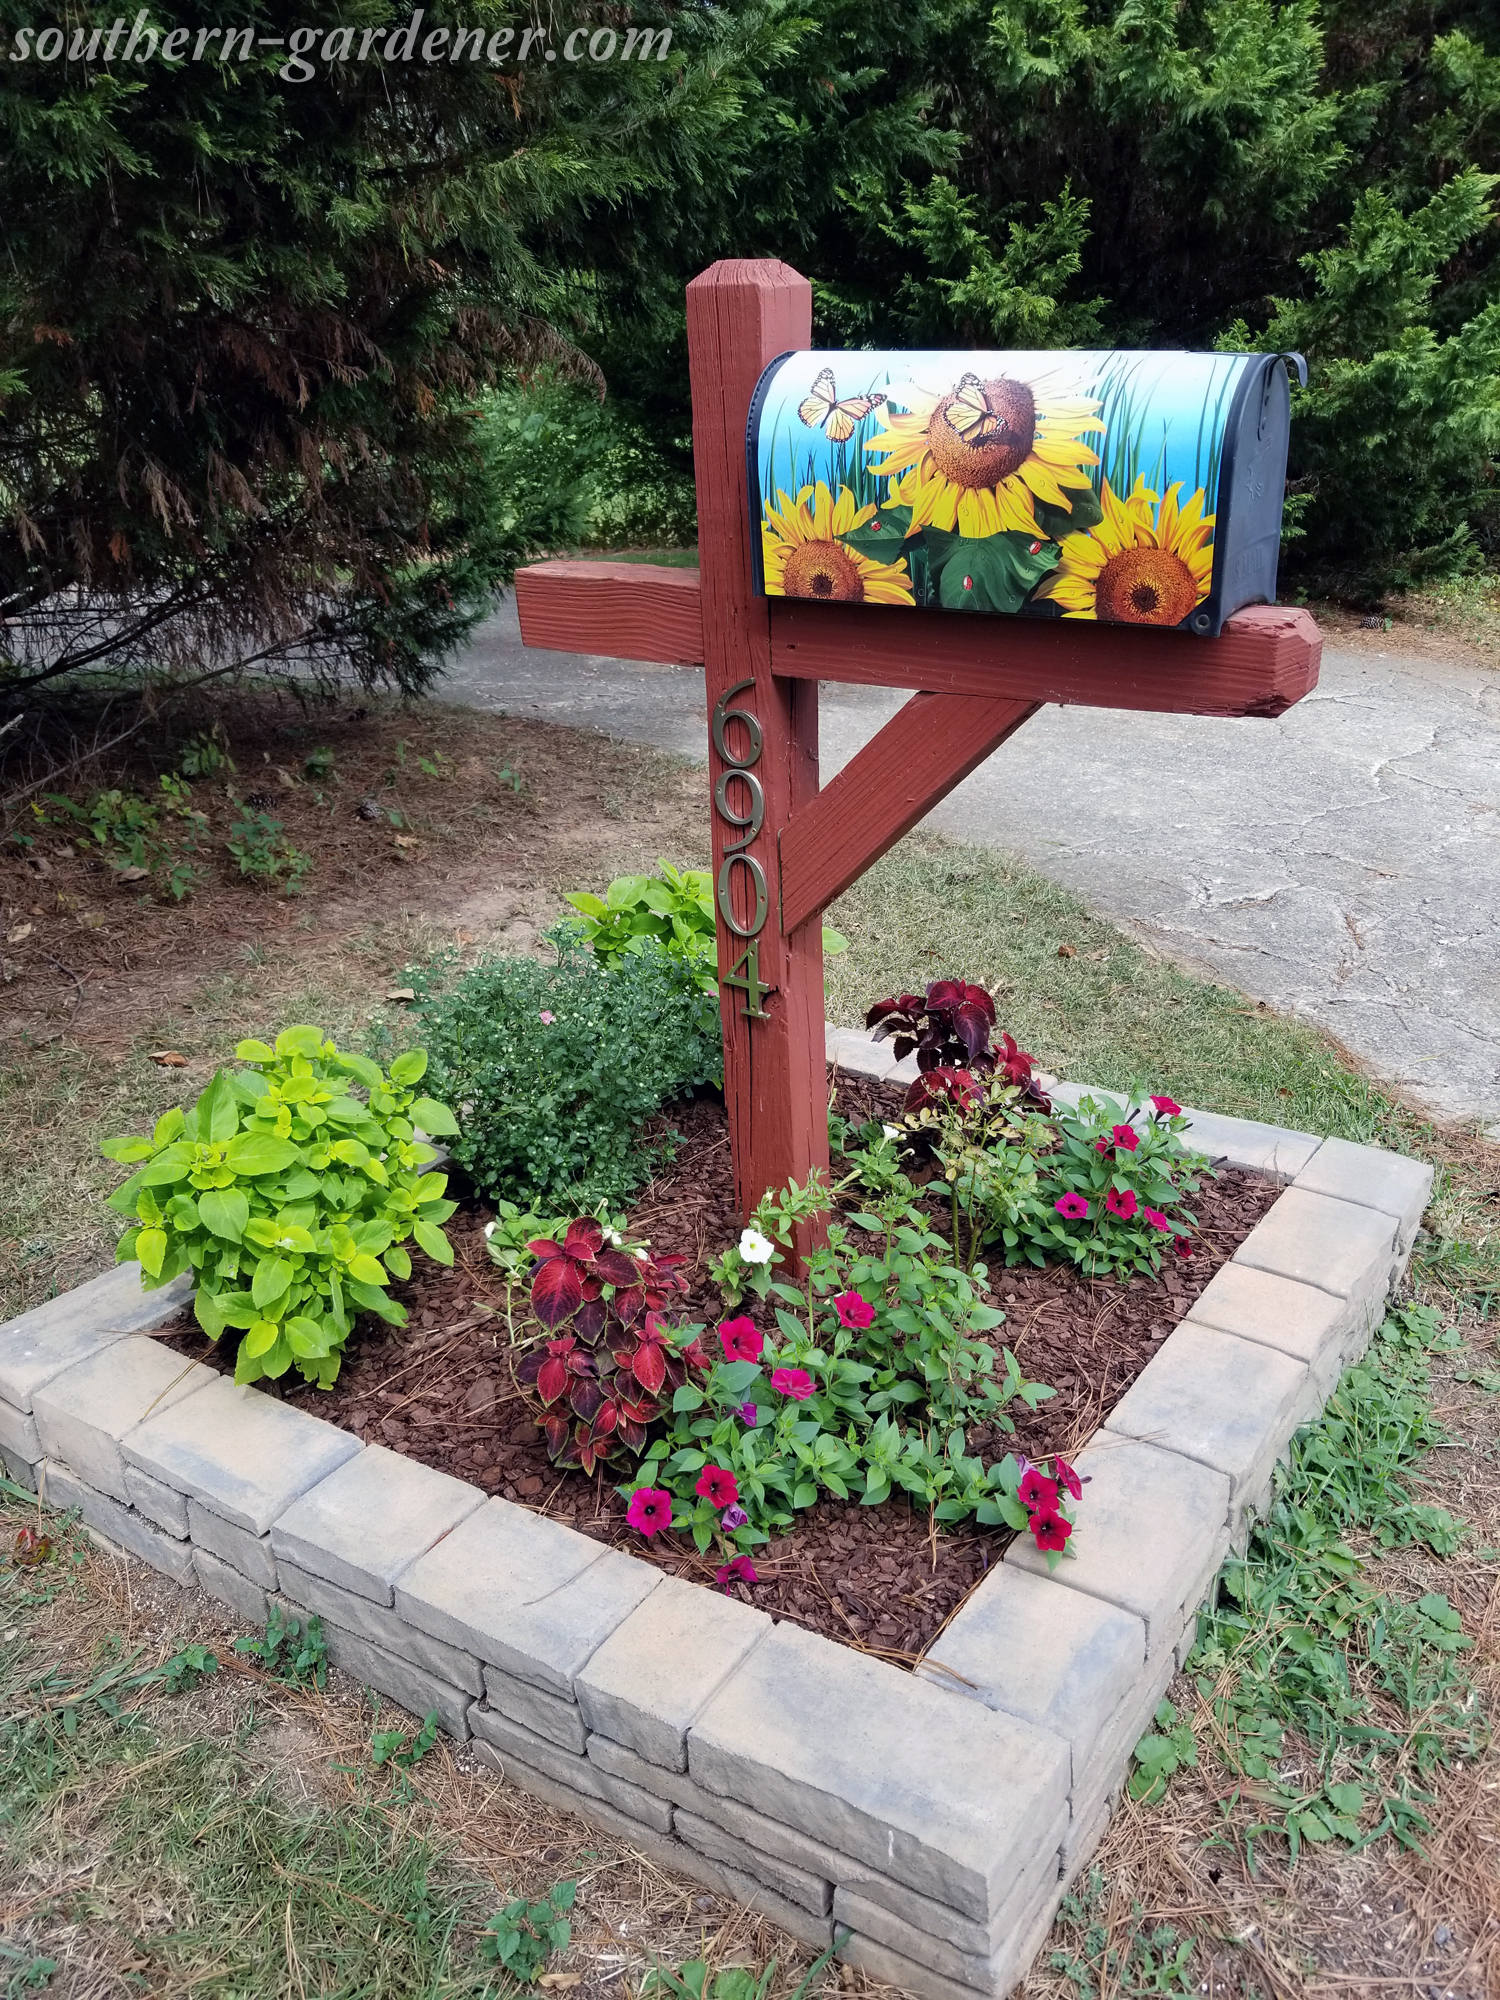
By early September (Sept 4th to be exact), it was time to do some pruning and replacing. The wishbone flowers were pretty much done, so I replaced those with some ‘Sun Lime Delight’ coleus. I deadheaded & trimmed the mum, pruned the red petunias way back, added some white/cream-colored petunias, and some ‘Chocolate Covered Cherries” coleus.
The rose bush is looking a little sad, probably due to pests and the lack of water. It’s been a dry summer, and I don’t always water like I should.
I will definitely grow these ‘Tidal Wave Red Velour’ petunias next year! Perhaps I will just use these to cover the front and sides since they spread so well, and just have the mum in the back.
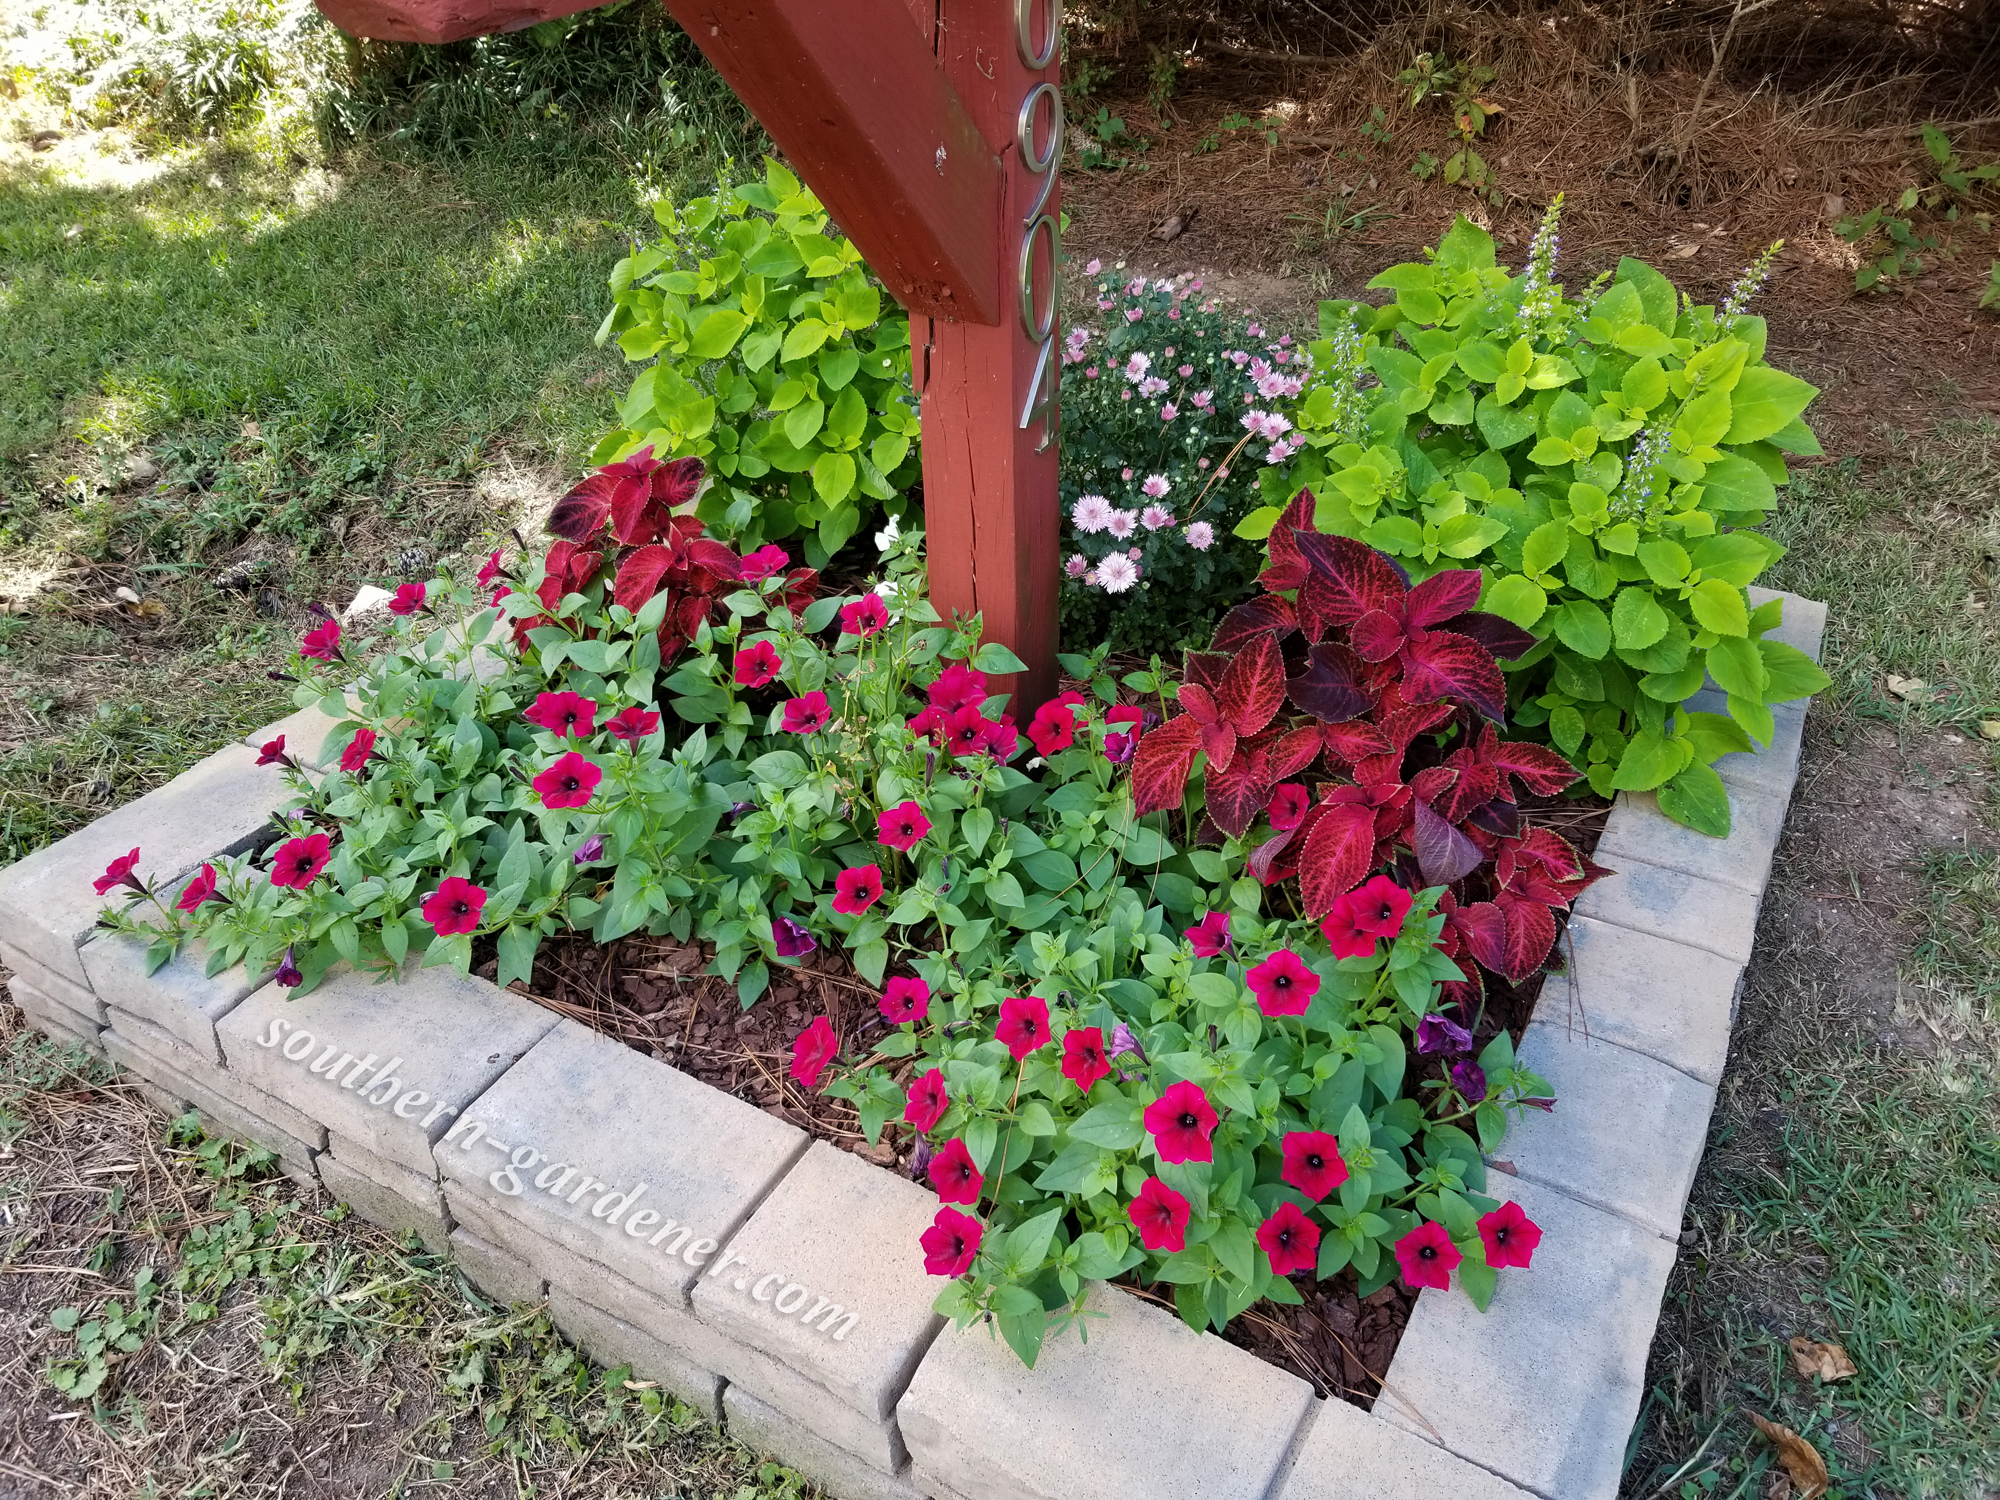
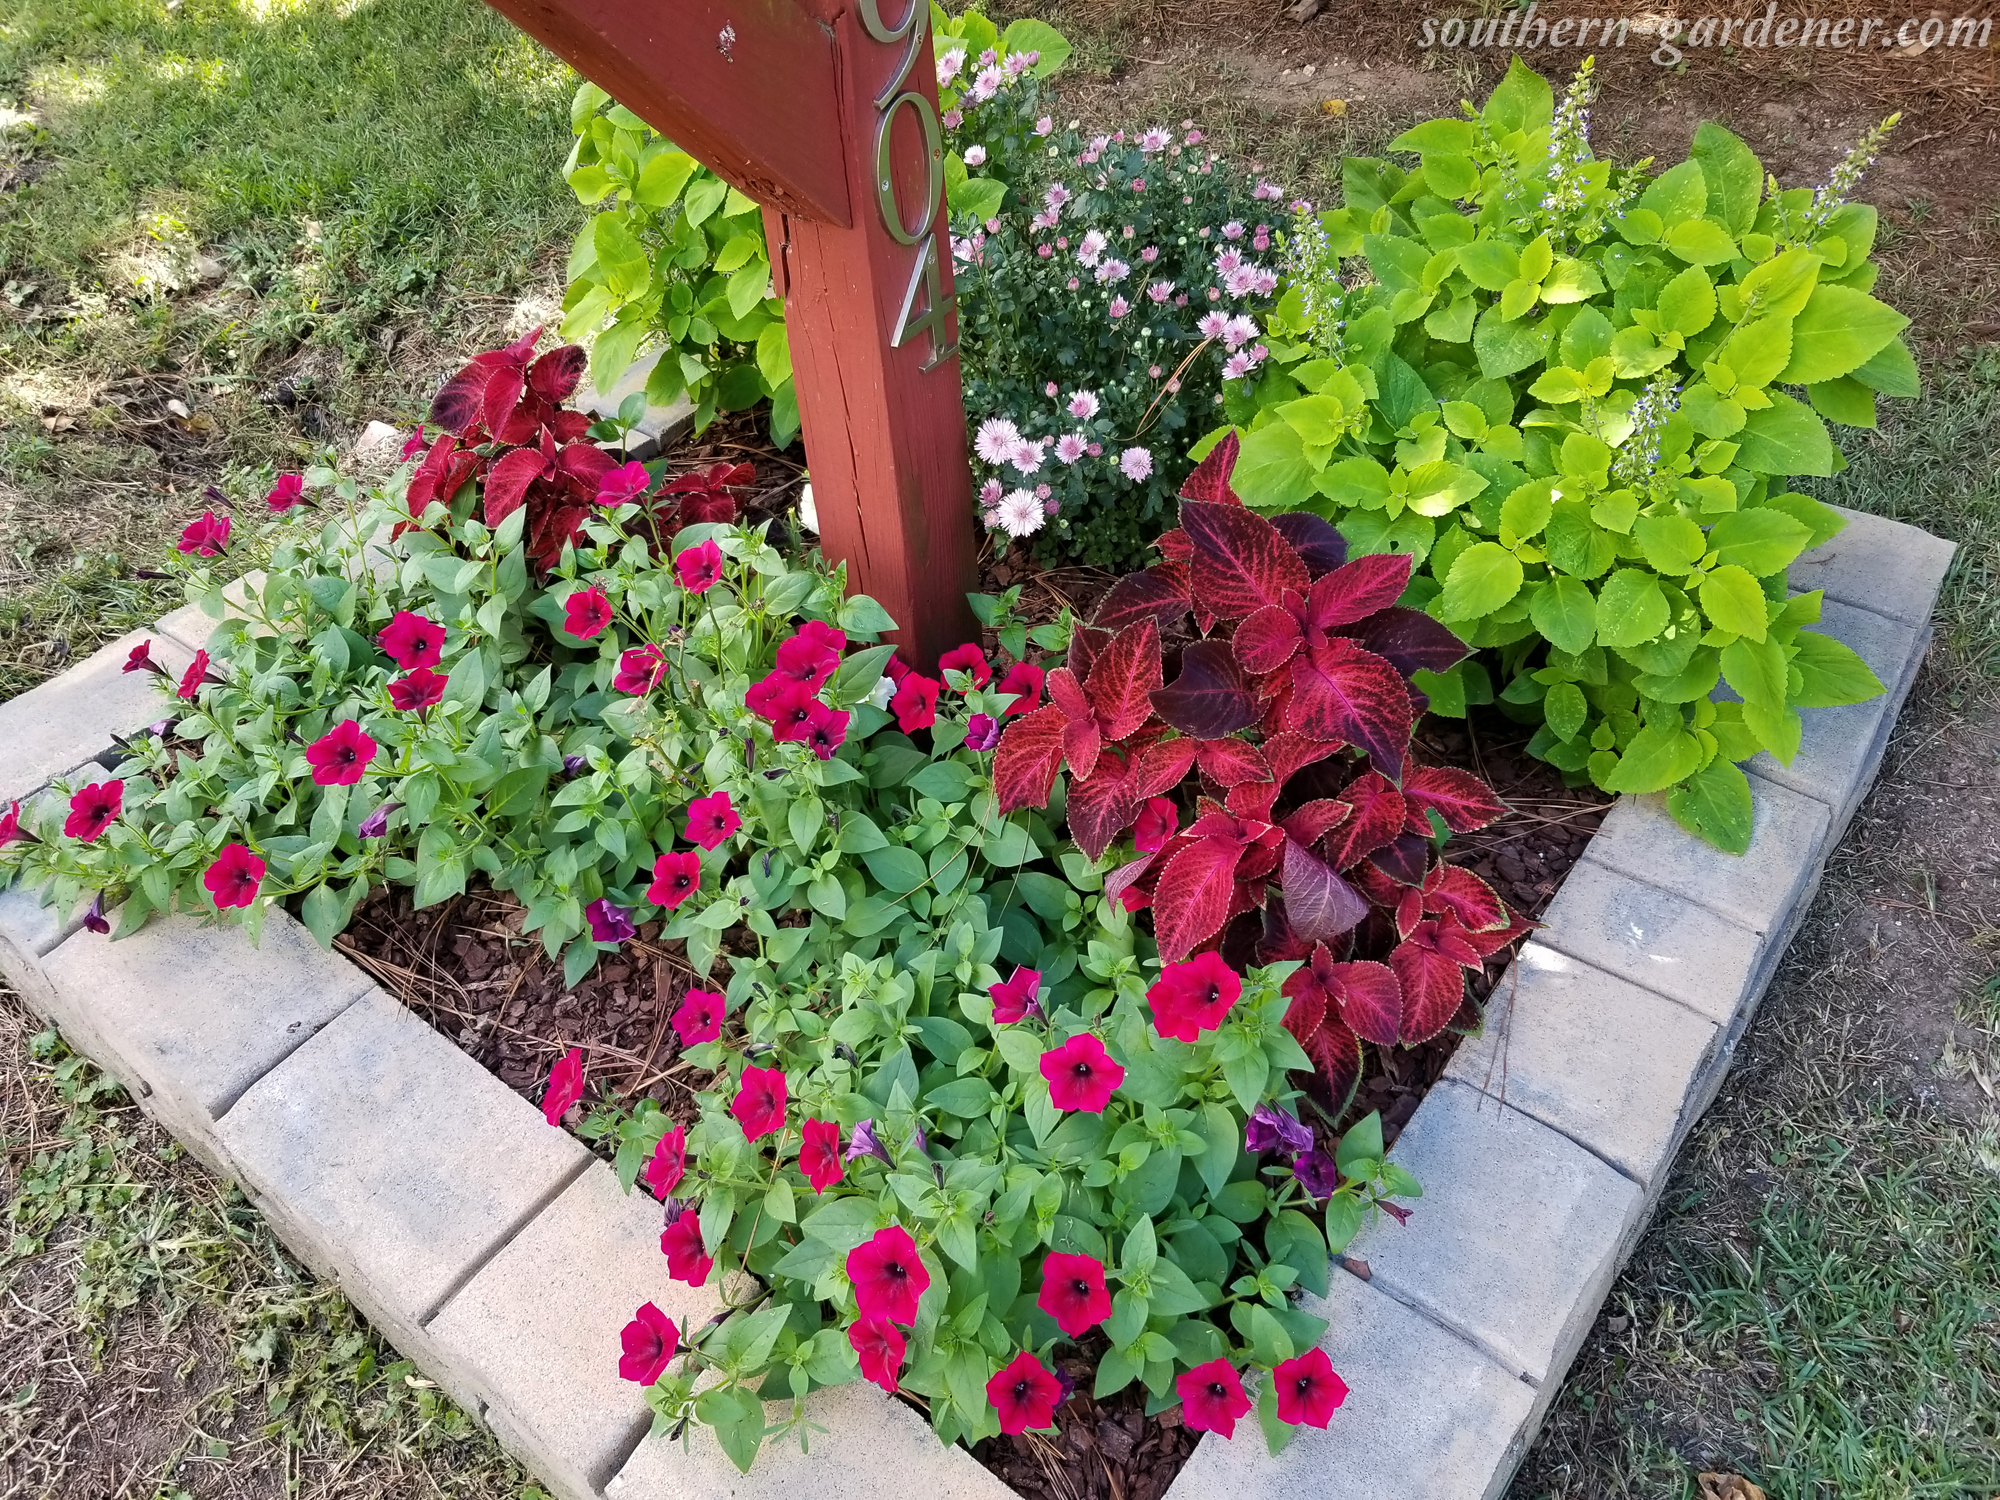
And here’s a picture two weeks later! Things have filled in so nicely! This is mid-September here in Alabama. The official arrival of fall is just 5 days away, so the mailbox covers will get changed out again.

The mum is blooming again, and the ‘Tidal Wave Red Velour’ petunias are on their way to taking over the front section again! The ‘Sun Lime Delight’ coleus are blooming also, which means the end of summer is near.
I’m going to hate seeing these petunias go when we finally have our first frost. What do you grow in your mailbox flowerbed?